I’m struggling with words. Pain so fresh that is not my own. Pain that has been occurring under 400 years of oppression that white people cannot begin to understand. I’m angry with myself for not being more vocal about racial injustices sooner, but I am still learning. And I have so much to learn about how to be an ally. It’s difficult to amplify the voices of people’s struggles when they’re not your own, which is why it’s absolutely critical that we begin listening to POC without ego.
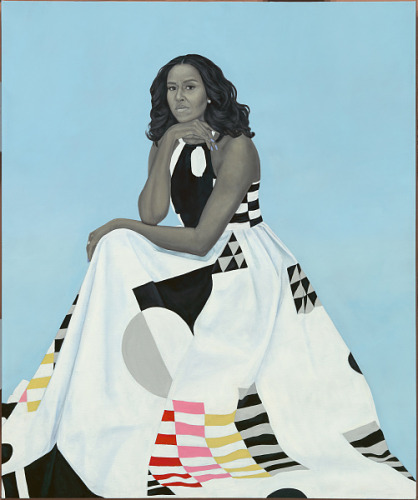
In a small act to try to be a better ally, I am donating 100% of the winning bid for the Gee’s Bend Inspired face mask to Baltimore Action Legal Team . “BALT provides legal support to Baltimore communities as they exercise their civil liberties protesting against injustices rooted in structural racism and economic inequality.”
The inspiration for this mask is the First Lady’s portrait. When it was first revealed, the inspiration of the Gee’s Bend Quiltmakers struck me. Amy Sherald, the portrait artist, perfectly captured the soul of Gee’s Bend in the Milly dress Mrs. Obama was wearing.
“Gee’s Bend is where the Civil War came and went, but the slaves stayed, and their children stayed, and their grandchildren stayed, and their great-grandchildren, and so on, until today, Mary Lee and 700 of her kin cling to this bulb of bottom land that their ancestors were chained to. They bear the surnames of the last slaveholders to live here. They grow corn near the slaveholders’ headstones. They come and go amid the ghosts and dust devils that dance on the site of the old Big House.”
Mary Lee, the subject of the Crossing Over article, is one of the Gee’s Bend Quiltmakers.
The human spirit has always amazed me with the beauty that is created from such painful experiences. You can see the soul in each of the Gee’s Bend quilts
After trying several masks patterns and not finding any one pattern that worked for me – style, functionality, fit, and ease of construction – I came up with my own pattern. I like the Olson mask because there are less layers of fabric while still having a pocket, but there are several lining pieces and several edges to hem. This pattern cuts down on one lining piece and 2 hems. That’s not a lot when you’re making a single mask, but when you’re production sewing, all the little steps add up.
I named it the Broken Wing Mask because the lining is asymmetrical, but also as a reference to our broken system that has led to home stitchers making non-medical grade masks for our frontline workers. But that’s been discussed in great length by others with more articulation and grace than I am going to pretend to have, so let’s get on with the sewing.
Supplies:
Quilting Cotton
(2) 36″ ties (can use twill tape or bias tape style ties) or (2) 8.5″ 1/4 wide elastic (elastic length is dependent upon wearer and style of tying off elastic – 8.5″ is generous)
Safety Pin
Pinking Shears or Pinking Blade (optional but saves time)
EDIT: I forgot to mention that you can sell masks made from this free pattern. You’re actually always allowed to sell products that you make from patterns, regardless of what the pattern says, you’re just not allowed to sell, or reproduce the actual pattern. When you make something from a pattern – it is yours. (Not intended to be legal advice, I just don’t like it when pattern designers are not mutually supportive of the home stitchers that support them.)
Print Pattern and Check Scale
After you have printed the pattern, make sure the 1″ square is accurate, or approximately accurate as I did a crappy job drawing it and the pattern is not digitized. Now would be a good time to mention that this pattern has not been tested and fits my face but please make sure that you use crappy fabric that is not your favorite on your first go in case you hate it.
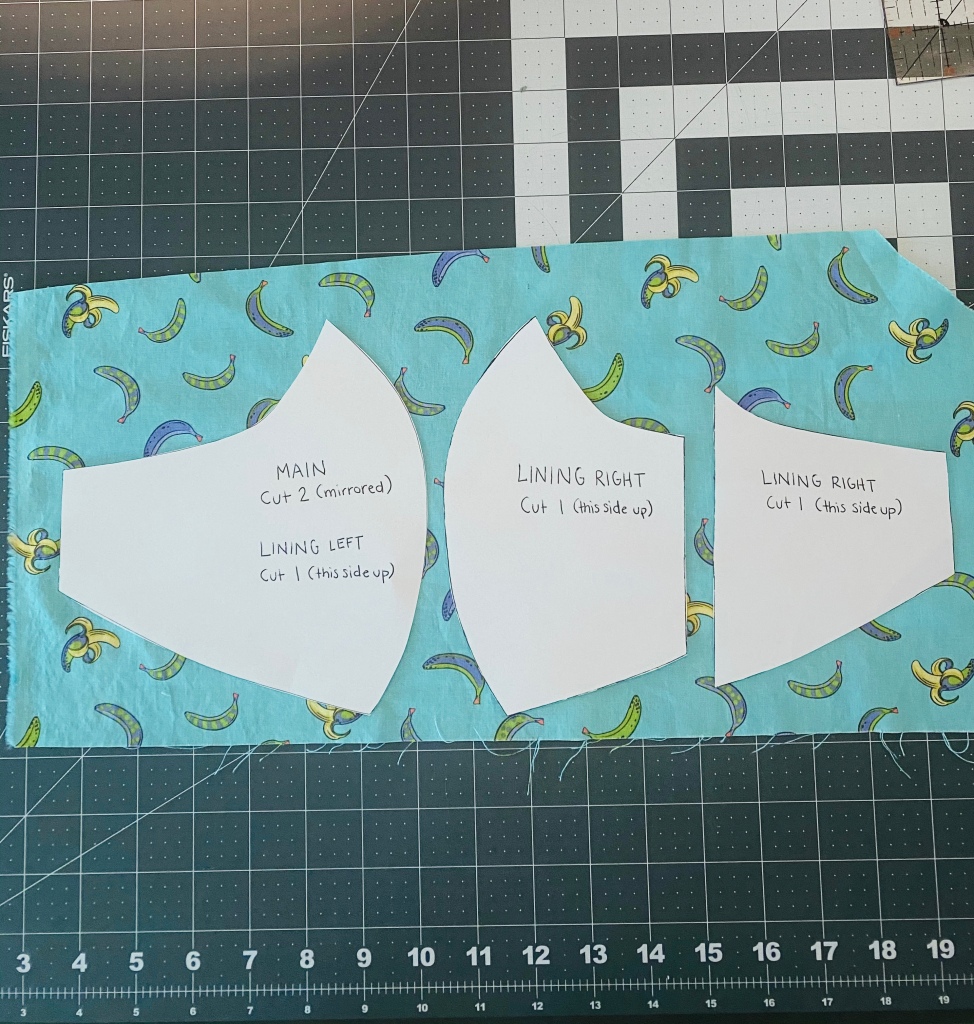
After your pattern is printed and cut, you will layout the main pattern piece on a folded over piece of fabric so that you can cut 2 (mirrored) pieces. I like to fold the fabric right sides together so that pieces are already together for the way that they’re going to be sewn together.
Main Pattern Piece
Since the lining piece is asymmetrical, cutting it feels awkward. However, cutting the lining this way, allows you to have an internal pocket with less fabric layers and less hemming than a symmetrical lining. If you would like a symmetrical lining, you would just cut a pair of mirrored pieces from the 2 lining pieces rather than cutting one of the main pattern pieces
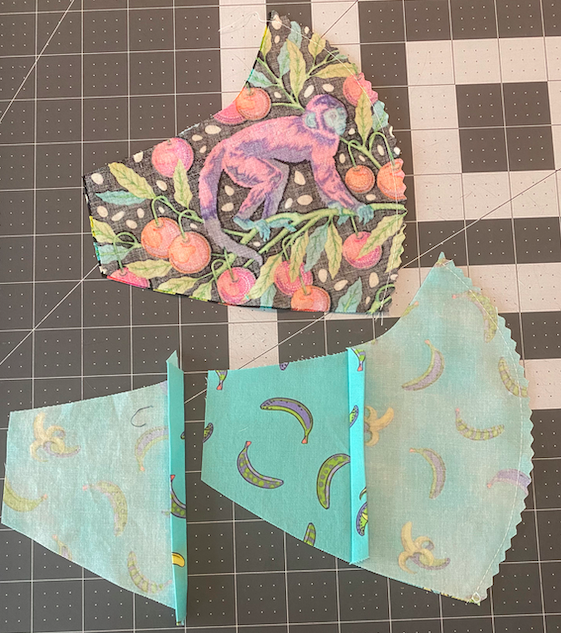
Cut 3 Lining PiecesAll Pattern Pieces (2 Main and 3 Lining)
Sew Along Curved Edge
Once you have all your pattern pieces cut, place the 2 main pieces rights sides together, as well as the 2 lining pieces that have the curved edge. Sew the main pieces together with a 1/4″ seam allowance along the curved edge. Repeat for the 2 lining pieces.
Pieces Right Sides Together
Trim Your Seam Allowance/Notch Your Curves
Once you have sewn the curved edges, notch them with a pinking blade or scissors. Notches will help your curve to lay nicer.
After trimming seam allowances, take all of your pieces to your ironing board, including the lone lining piece that has not had anything happen to it yet. Press both of your seams. On the lone lining piece, fold the wide edge in a scant 1/4″ (little bit) and press. Fold it over itself once more and press again. Now the raw edge of the fabric is contained. Repeat this pressing for the short side of the lining piece that is sewn to the other half (see below).
Notched Curves and Pressed Hems
Topstitch Hems and Main Curve
Once you have pressed your hems, take all of your pieces to your machine. Set your stitch length to your preference for topstitching (I used between 3.5 – 4 mm). Topstitch both hemmed edges and along the main curve.
Topstitching the main curve can be a bit tricky, as curves can be finicky. I start at the bottom edge, finger press the seam to the left and gently pull the fabric to the right to make sure the fabric doesn’t get bunched in the curve. Make sure you go slow and peek underneath your curve every so often to make sure your topstitching is catching the seam allowance in it.
Not a good picture to showcase the topstitching on the main piece
Sandwich Your Pieces Right Sides Together
Now that the hems and front of the mask are topstitched, it’s time to sandwich the pieces together. First, match the main and lining piece with the sewn curved edge together at the center seams. I usually clip these seams. Then lay the lone lining piece on top of the other lining piece (right side facing down). Pin where the edges of the lining overlap. You can also pin around the entire mask if you want but I like to just pin at the critical points.
Sandwiched Mask
Once your mask is sandwiched together, sew along the entire perimeter with a 1/4″ seam allowance. You do not need to leave a turning hole because the mask will be turned through the pocket opening.
After you have stitched around the entire mask, clip your 4 corners and notch the curved edge. Press your seams open. Then turn your mask out through the pocket opening. I use a chopstick to push out all of my corners and make sure my seams are all pushed open. (I forgot to take a picture of this step.)
Once your mask has been turned out, press the edges well before topstitching. Topstitch around the entire perimeter of your mask.
Topstitched MaskLining View of Topstitched Mask
Sewing Casings
The mask is almost complete – we just need to add casings to thread elastic, or twill tape through. I fold my edges in 5/8″ – this goes almost to my ear and I find the elastic pulls on my ear less this way. However, I have kind of a big face, so you may need to fold your mask in further than 5/8″. Before stitching your casing down, take your mask and your face to a mirror and see what you think.
Press the edges of your mask toward the lining by ~5/8″. Once you have pressed the edges in, topstitch over your existing topstitch line, making sure to securely backstitch at the top and bottom of your casing.
Making Casings
Thread Elastic or Twill Tape
Once you’ve made your casings, you will need your safety pin to thread your elastic or your twill tape through your casings.
Threading Through Casing
If you’re using elastic, 8.5″ is a generous length, and you will likely need to shorten it a touch after you tie it off. It depends on how much of the elastic you use to tie off and the size of your ear and your preference on fit. Once you have tied off your elastic. Use the tip of your seam ripper to poke the knot down in the casing of your mask so it’s hidden. Your mask is done!
If you’re using twill tape, thread ~18″ through past the top of the mask.
Threaded Twill Tape
Once you have threaded the twill tape through your casings, you’ll want to place a row of staystitching midway down your casing. Finger press the casing in half and sew a line of stitching to prevent the twill tape from shifting, or pulling through.
Staystitch in Casing
Once you have secured your twill tape, your mask is complete!
When you make this mask, play around with the fit and don’t be afraid to change the pattern! You have a seam ripper and plenty of fabric, make a mask that fits how you want it to.
I wanted to share some of the PPE patterns that I have found, since they don’t always come up in a quick Google search. If you’re interested in the Charmed Liebling mask hack for adding strap holders, skip to the section titled “Ninja Mask Hack.”
If you want a pretty blog with professional videos, Natalie of Sew Hungry Hippie did a blog roundup with several PPE patterns. For my thrown together blog, please keep reading.
Scrub Cap Patterns
Rad Patterns and Sweet Red Poppy Cap
The first scrub cap I sewed is a paid pattern I found on Etsy by adesignbyangie. A big perk to this pattern is that you don’t need as long of a strip of fabric as some of the other patterns because of the way the pattern pieces are broken up. It calls for elastic, so if you do not have this on hand, I would choose a different pattern. She also has several other styles in her Etsy shop, which I have not tried.
Fat Quarter Friendly Scrub Cap Pattern
Rad Patterns Surgical Cap
Rad Patterns offers a free, downloadable pattern with 2 styles. I only sewed the bouffant style, which would be good if you have a lot of hair. My hair is long and up in a high bun in this picture.
Reversible Bouffant Scrub Cap by Rad Patterns
The bouffant style in the pattern tells you to make gathering stitches, but I just made pleats in mine. I did not try the other style included in the pattern but you can see pictures of it on their site. Another nice thing about this pattern company is they have a Facebook Group so that you can share your makes and ask questions. If you do join this Facebook group, please read through their posts before posting. They’re a very inclusive group that usually ends their posts with pronoun preference, so be mindful and respectful of this.
Sweet Red Poppy Scrub Cap
Sweet Red Poppy Scrub Cap
The Sweet Red Poppy Cap is a free pattern with a video. This is my favorite scrub cap I’ve made so far. In the picture, I’m wearing my hair up in a high bun and it gives a nice fit. The pattern comes together easily and is reversible.
Masks with a Pocket
If you’re wanting a mask with a pocket, see my previous blog post where I used the Craft Passion mask pattern. Before you use filtration material that is off-label, please make sure you’re using products that are safe to breathe in. 3M has issued a statement that they do not recommend their home filters cut up to breathe in against the face, and many vacuum bags contain fiberglass. Using a non-woven material as a pocket insert such as a paper towel, or a coffee filter may be a better option.
I used the Craft Passion pattern to make my 8 year old a mask. One thing about elastic is that it does not stay well behind little ears. There are hacks for pulling the elastic behind the head*, pulling it onto buttons on headbands*, or you can use ties.
*I have not used these 2 patterns. I found them on a quick Google search.
Unimpressed with Wearing a Mask
The Olson Mask is also a good mask pattern with a pocket, and comes in children’s sizes**. I have made a few of these masks and liked that there’s a pocket without having to use multiple fabric layers. This pattern can be confusing if you use a solid fabric, as the pieces can be easily turned around when you’re hemming the mirrored images. If you use this pattern, I would recommend using printed fabric.
**Please do not put masks on children under 2, or anyone that would have difficulty removing their own mask. Just because you see someone selling a product does not mean that it is safe or recommended.
No Masks for Babies!
Ninja Mask Hack
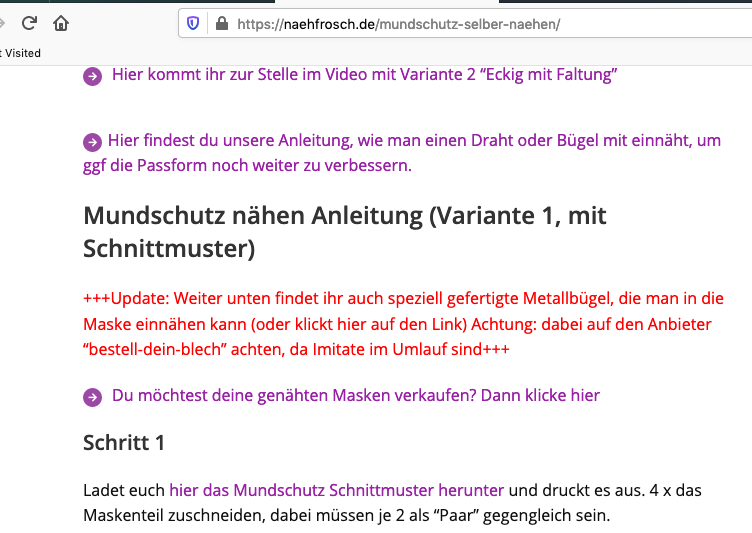
I really like this pattern from Charmed Liebling. This mask has no pocket, is a simple sew, and is reversible. It’s a ninja style mask that is more angled towards the ears than some of the other patterns. This is the mask that I use for myself.
When you are on Anna’s page, the pattern piece is linked when you scroll all the way down and see the purple link, “hier das Mundschutz…”
When you print the pattern piece, there are 2 pattern pieces on the page. The bottom pattern piece prints off the page. This is fine. You do not need that pattern piece as it’s exactly the same as the top pattern piece. Make sure you’re printing “actual size” and that your scale matches after printing.
In addition to the Charmed Liebling pattern piece, you will need a strip of fabric that is at least 4″ x 3.5″ (3.5″ because you will need twice the width of 1.75″ since you’re making 2 strap holders per mask). However, I like to cut my fabric 4″ high by however long of a piece of fabric that I have so I can make several strap holders at once. For instance, if you’re making 3 masks, you will need 6 strap holders (6 x 1.75″ = 10.5″). You would need a piece of canvas (or interfaced woven cotton) that is 4″ x 10.5″. I recommend just cutting 4″ by a long length and figuring it out later.
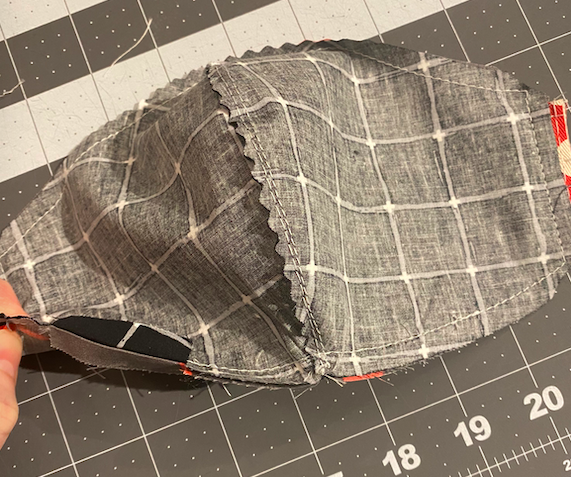
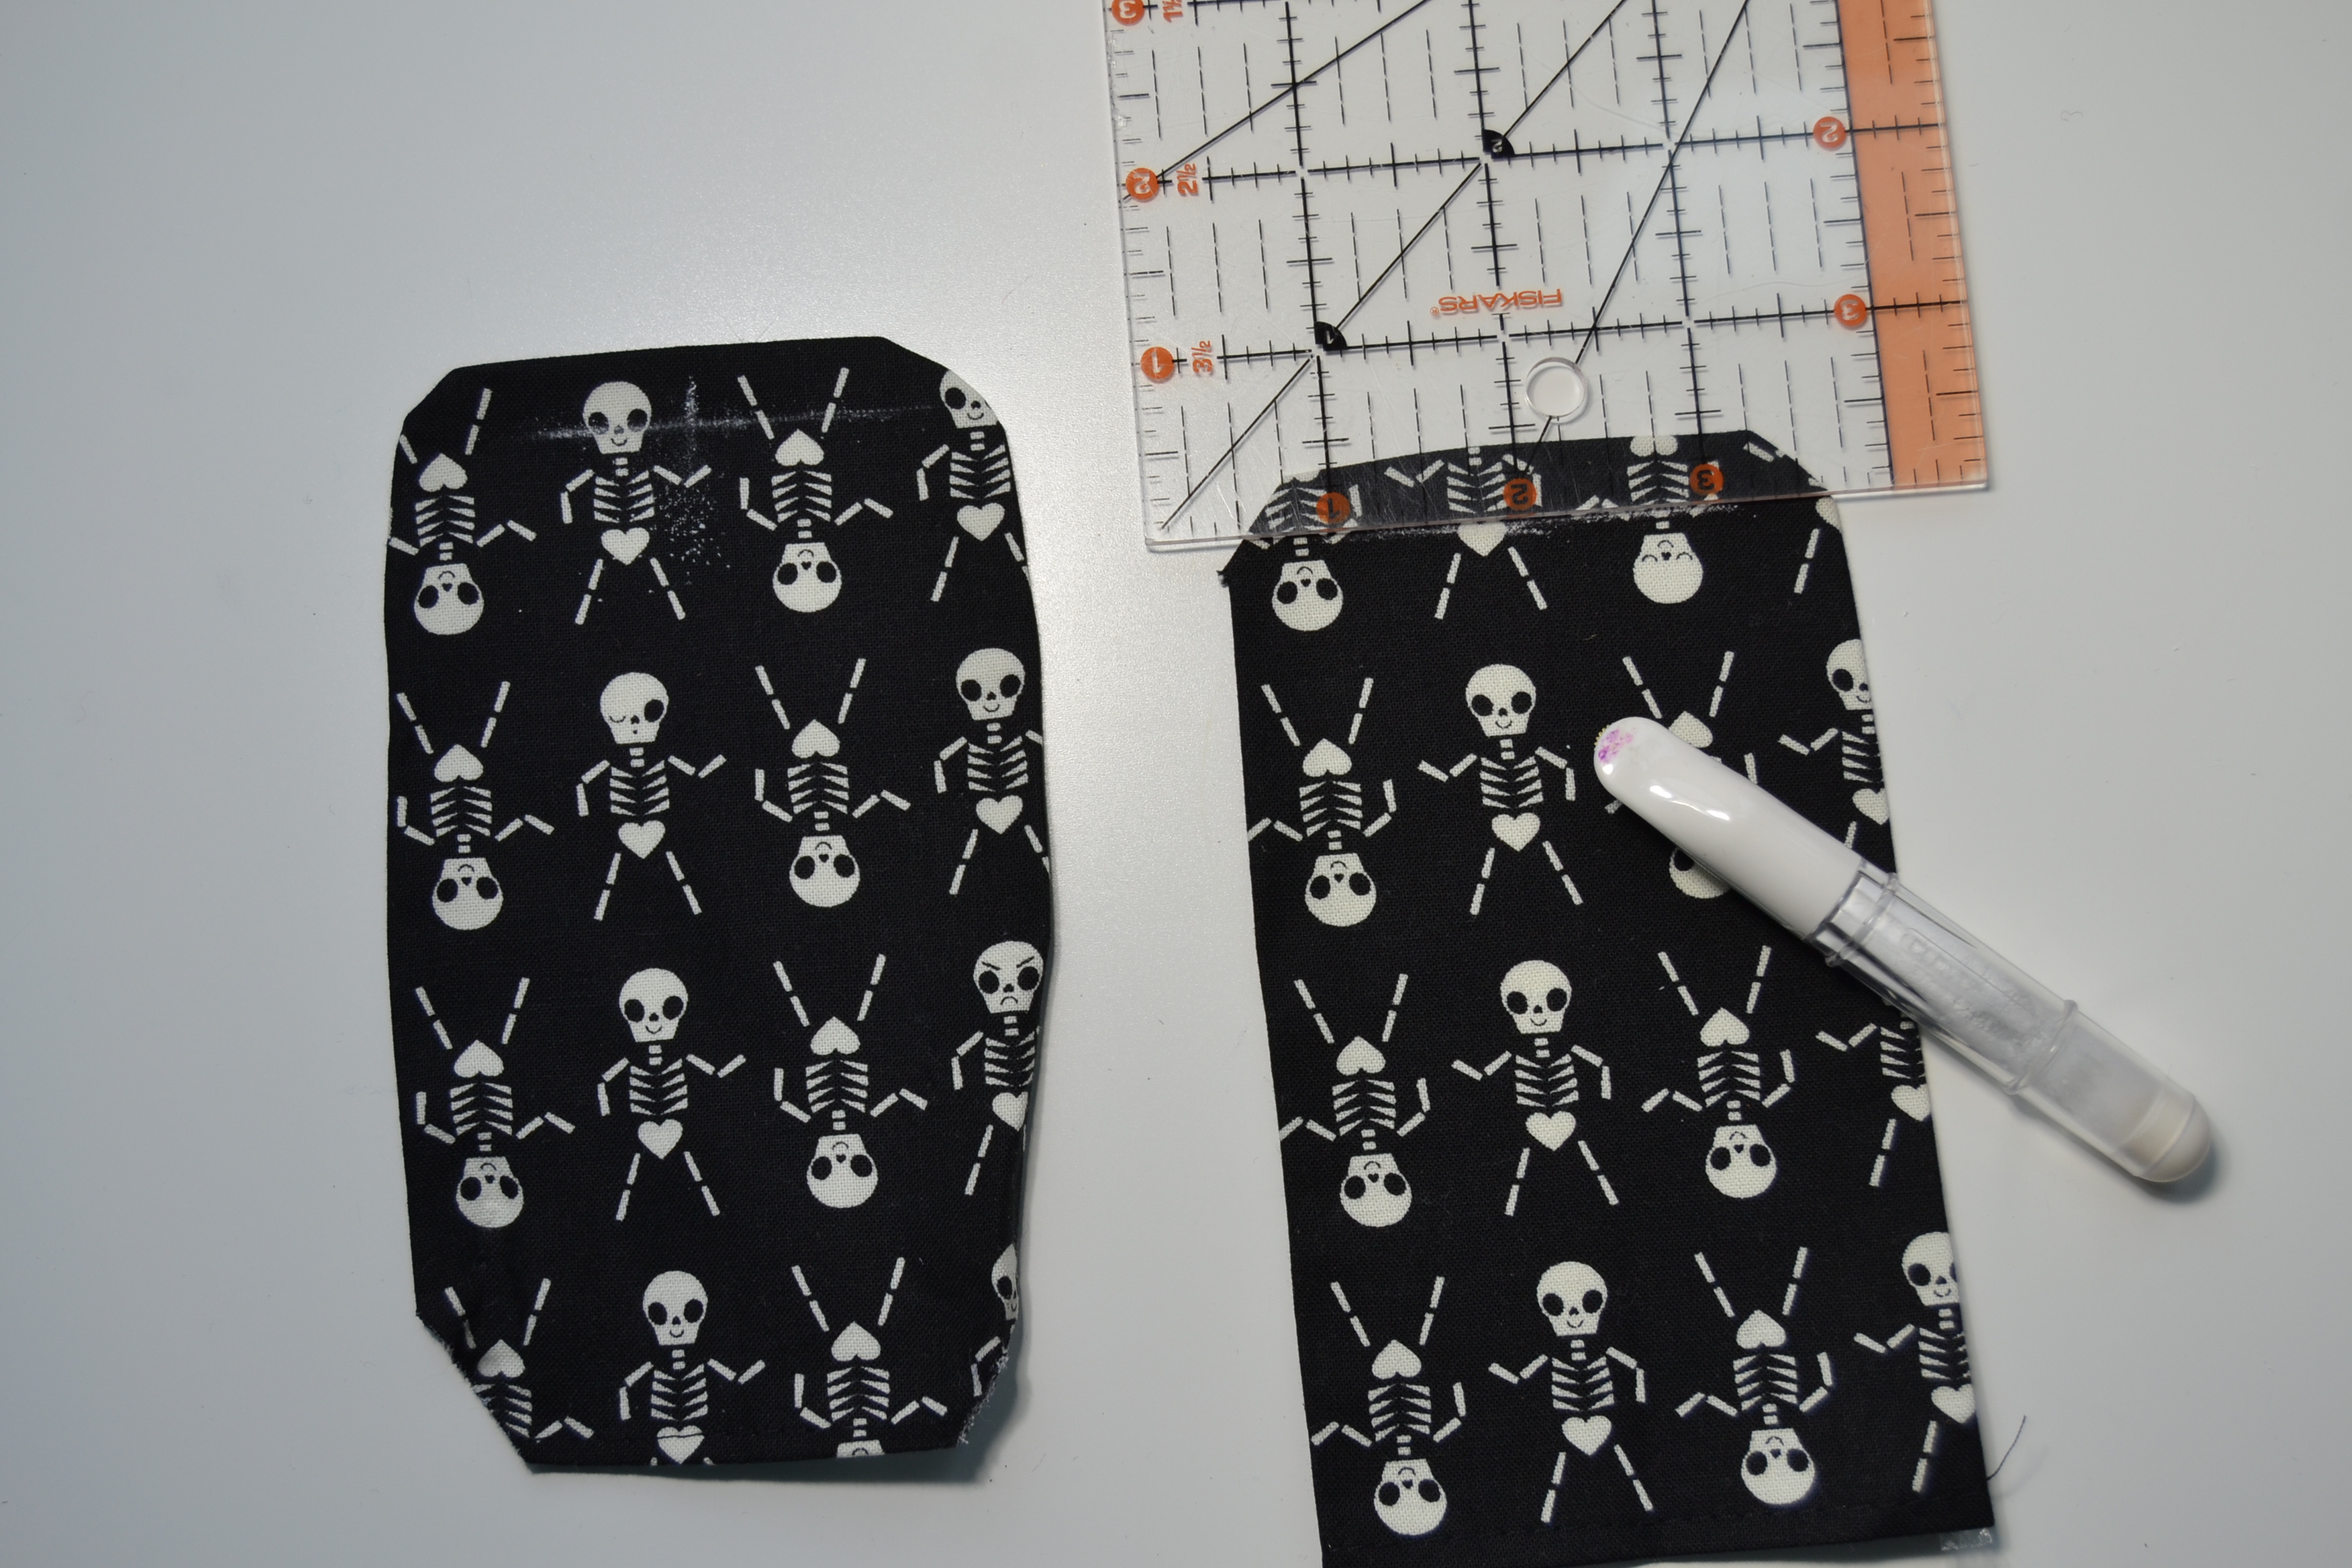
The mask pattern is simplistic, as you only need one pattern piece to cut 2 sets of mirrored images in 2 different fabrics. After you’ve sewn along the curved edge of both sets of fabric, be sure to notch your curves with a pinking blade, or scissors.
Notched Sewn Curves
The one thing that I did not like about construction was sewing the elastic, or ties into the seams. This can be easily changed by adding strap holders to the sides. I used canvas for mine so that I did not have to interface quilting cotton. I only wanted to use a double layer rather than the 4 layers that many straps have so that the side seam of the mask did not get too bulky. If you do not have canvas, you can interface quilting cotton/woven fabric with Pellon SF 101 (fusible woven interfacing).
When making strap holders, it would be timely to make them all separately, so I like to cut one long strip of fabric at 4″ tall. (The finished height of your strap holders will be 2″ because we’re folding the width of the fabric in towards the center to hide the raw edges, so we end up with half the height we cut our fabric.)
Topstitched Strap Holder
After you cut your canvas, you will need to mark the center of the strip lengthwise, so that you can iron the raw edges in to meet the center on the wrong side of the fabric. You will need to do 4 rows of topstitching. 2 rows on each finished edge 1/8″ in, and the additional rows will each be 1/8″ from the center seam (or 2 rows 1/4″ apart). The stitches on either side of the center seam keep the raw edges from pulling up when you’re threading in your ties, or elastic through the strap holders.
Backside of Topstitched Strap Holder
After you have topstitched your strapholder, you’re going to hack it up into 1.75″ wide pieces.
Front Side of Strap Holder Cut into 1.75″ wide pieces
Bring the raw edges of the strap holders together and baste. I bring these all to the sewing machine at once and chainstitch (stitching without stopping between each one) them together. I don’t usually bother clipping the raw edges together but wanted to show the raw edges brought together in the picture.
Chainstitch Mask Channels
Once your channels are basted, we’re going to baste them to the edge of one of our mask pieces. You will baste to the edge with a scant 1/4″ (little bit) hanging over the edge. The reason we’re leaving a bit hanging over the edge is that it will keep the edge from fraying or pulling through. Since the channel will have pressure on it from the elastic, or straps pulling, we want this seam to be secure.
Channel Basted to Mask Edge with Overhang
After both strap holders are basted to one of your mask pieces, sandwich the other mask piece on top with right sides together with other mask piece. Make sure your center seams are aligned. I clip these together with Wonder Clips, as I find them much easier to deal with than pins at thicker seams.
Mask Pieces Sandwiched Right Sides Together
When I am sewing something that I need to leave a turning hole in, I place a pin on each side of where I want the opening to be so that I do not forget where to start and stop. Make your turning hole about 1.5″ wide on the bottom of your mask, about an inch in from the edge so that it doesn’t interfere with your corner.
Mask Sandwich
When you begin sewing your mask pieces together. Begin at the left pin, so that you can sew one continuous length of stitching to the other pin. Make sure to pivot at your corners and maintain a 1/4″ seam allowance on the mask fabric even where your strap holders overhang (your stitching will be ~1/2″ in from the edge of the strap holder).
After you sew your mask pieces together, leaving your turning hole open, notch your curve, clip your corners and press your seams open. In the image below, I have not finished pressing my seams open but wanted to highlight the turning hole. When I have a turning hole, I like to make small snips on each side of the opening within the seam allowance so that it easier to press the opening in, which gives a clean press when you’re topstitching from the right side of the mask.
Pressed Turning Hole
After you have notched, clipped, and pressed. Turn your mask right side out through the turning hole. Once it has been turned out, use a chopstick or other dull pointed object to push the seams outward, especially at the corners.
Freshly Turned Mask – Almost Done!
Once the mask has been turned, make sure to press your seams well before topstitching, taking care that none of the fabric is bunched at the seams. Pressing well before topstitching makes a huge difference in how clean your topstitching looks on your finished product.
Topstitch ~1/8″ in all around the edge of your mask. When you’re topstitching over your turning hole, make sure your edges are evenly pushed in and ensure that you’re catching them in your topstitching. This way your mask doesn’t look wavy in that spot and there’s no rogue opening.
Once you have topstitched your mask, it’s finished! You’re ready to thread your elastic, or straps through with a safety pin. For my masks, I use (2) 8.5″ long pieces of 1/4″ elastic, or (2) 36″ pieces of twill tape. If using twill tape, or bias tape straps, make sure to secure your straps in your strap holders with a stay stitch in the center.
Finished Mask Ready to Thread
For my masks, I prefer elastic because they’re easier to slip on and I’m not wearing them for a long period of time. If you have trouble wearing elastic, need an adjustable length, or wear masks for long periods, straps are the better option.
After your mask is threaded, it’s finished! I made this mask in Katarina Rocella fabric. She designs for Art Gallery Fabric, which is some of the highest thread count fabric in the industry, so it’s ideal for making woven cotton masks. Her daughter also did an adorable mask making tutorial on her Instagram.
Finished Mask in Katarina Rocella Fabric
Buying Masks
If you don’t sew, or do not have the time to sew. There are many talented sellers making masks to sell. Some of them are donating masks for each mask sold.
Keyana of Clutch Lota has been making masks for the homeless for donations received through her site’s mask order form. I know that she has been inundated with orders, so she may be too overwhelmed to take additional mask orders. However, she does have some clutches in her shop if you would like to show her support.
My long-time friend has been making masks for essential workers in the Sacramento area, and has begun to sell her masks. You can also purchase a mask for an essential worker through her website madebybetsy.
MadeByBetsy Masks
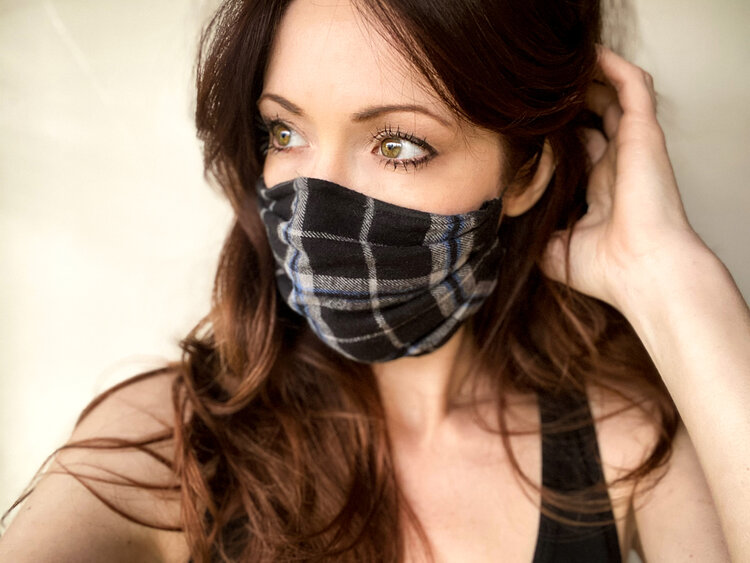
My friend Irena had to put her career on hold during the stay-at-home order, and I’m so impressed at how quickly she has built her mask-making business. She went to design school so she is skilled in tailoring, making her masks fit well, while also looking stylish. She restocks her website stitchbitchmasks regularly.
Irena Modeling Her StitchBitch Mask
Ashley Star has a fabulous style and fun video to go along with her masks.
If you’re looking for children’s masks, there are many sellers on Etsy. (If you sell children’s masks, and would like me to link your shop, let me know!)
Please stay safe, and remember that everyone is processing a lot of emotions right now in different ways – a little bit of kindness goes a long way.
As of this writing, the CDC is considering revising their guidelines to state that healthy people should wear masks when leaving the house. LA has already stated that their residents should begin following this protocol. This poses an obvious problem, since there’s already a lack of supply. The good news is that anyone with a sewing machine can make their own mask. It’s a small act that will empower you in this otherwise uncontrollable situation.
(2) 1.5″ x 36″ fabric strips OR Twill Tape (2 yards per mask)
Safety Pin
Pinking Shears/Blade (optional)
You will need to print the pattern pieces from craft passion. To find the pattern pieces, scroll down to the bottom of the page to “2. Ordinary Face Mask Pattern WITH seam allowance included.” I use the “teenager” size. Make sure you print “actual size.” If you do not want a pocket on your mask, you do not need to print the lining fabric piece (you will only print page 1).
CHECK YOUR SCALE FOR ACCURACY
After printing and cutting out the pattern pieces, relabel them. From the “Main Fabric” pattern piece, you will be cutting 2 sets of mirror images (4 pieces total). With the “Main Fabric” pattern piece, you will cut 2 mirror images from your focal, or exterior fabric. The other set of mirror images will be cut from a lining fabric that will not be visible (it will be behind the pocket fabric. Relabel the “Lining Fabric” pattern piece – “Pocket Fabric.” You will cut 1 set of mirror images (2 pieces) from the pocket pattern piece.
When choosing your fabrics, make sure you choose a contrasting fabric for the pocket. This helps medical professionals quickly differentiate the side that will be against their face. If you’re not including a pocket on your mask, only cut the 2 sets of mirror images from the Main pattern piece.
When cutting out mirror images of fabric, I like to fold the fabric so it’s right sides together so I am cutting both at once, and the fabric is already together as it needs to be when you sew it.
Fabric Right Sides Together When Cutting
Complete Sewing Tutorial
Sewing Curved Edges
After all your pieces are cut, sew along each of the curved edges with a 1/4″ seam allowance. Once your pieces are sewn, use your pinking shears or a rotary cutter with a pinking blade to trim the seam allowance. If you don’t have a pinking blade, notch the curve with scissors. You can also omit notching but it helps the curve to lay better if notched.
Trim Seam Allowance
After your seam allowances have been trimmed. Press to one side and topstitch an 1/8″ away from the seam.
Front and Back View of Topstitched Curve
Making Your Pocket
After you have sewn and topsitched the curved edge of the exterior, lining, and pocket, you will hem one edge of your pocket piece. It doesn’t matter which edge of your pocket piece you hem. If you’re right handed, it probably makes more sense to hem the right edge, as this will be the side you’ll slide your filtration material into.
Take your pocket piece and fold one edge under 1/4″ and press. Fold under again and press so that the raw edge is now concealed.
Sew down the hemmed edge of your pocket.
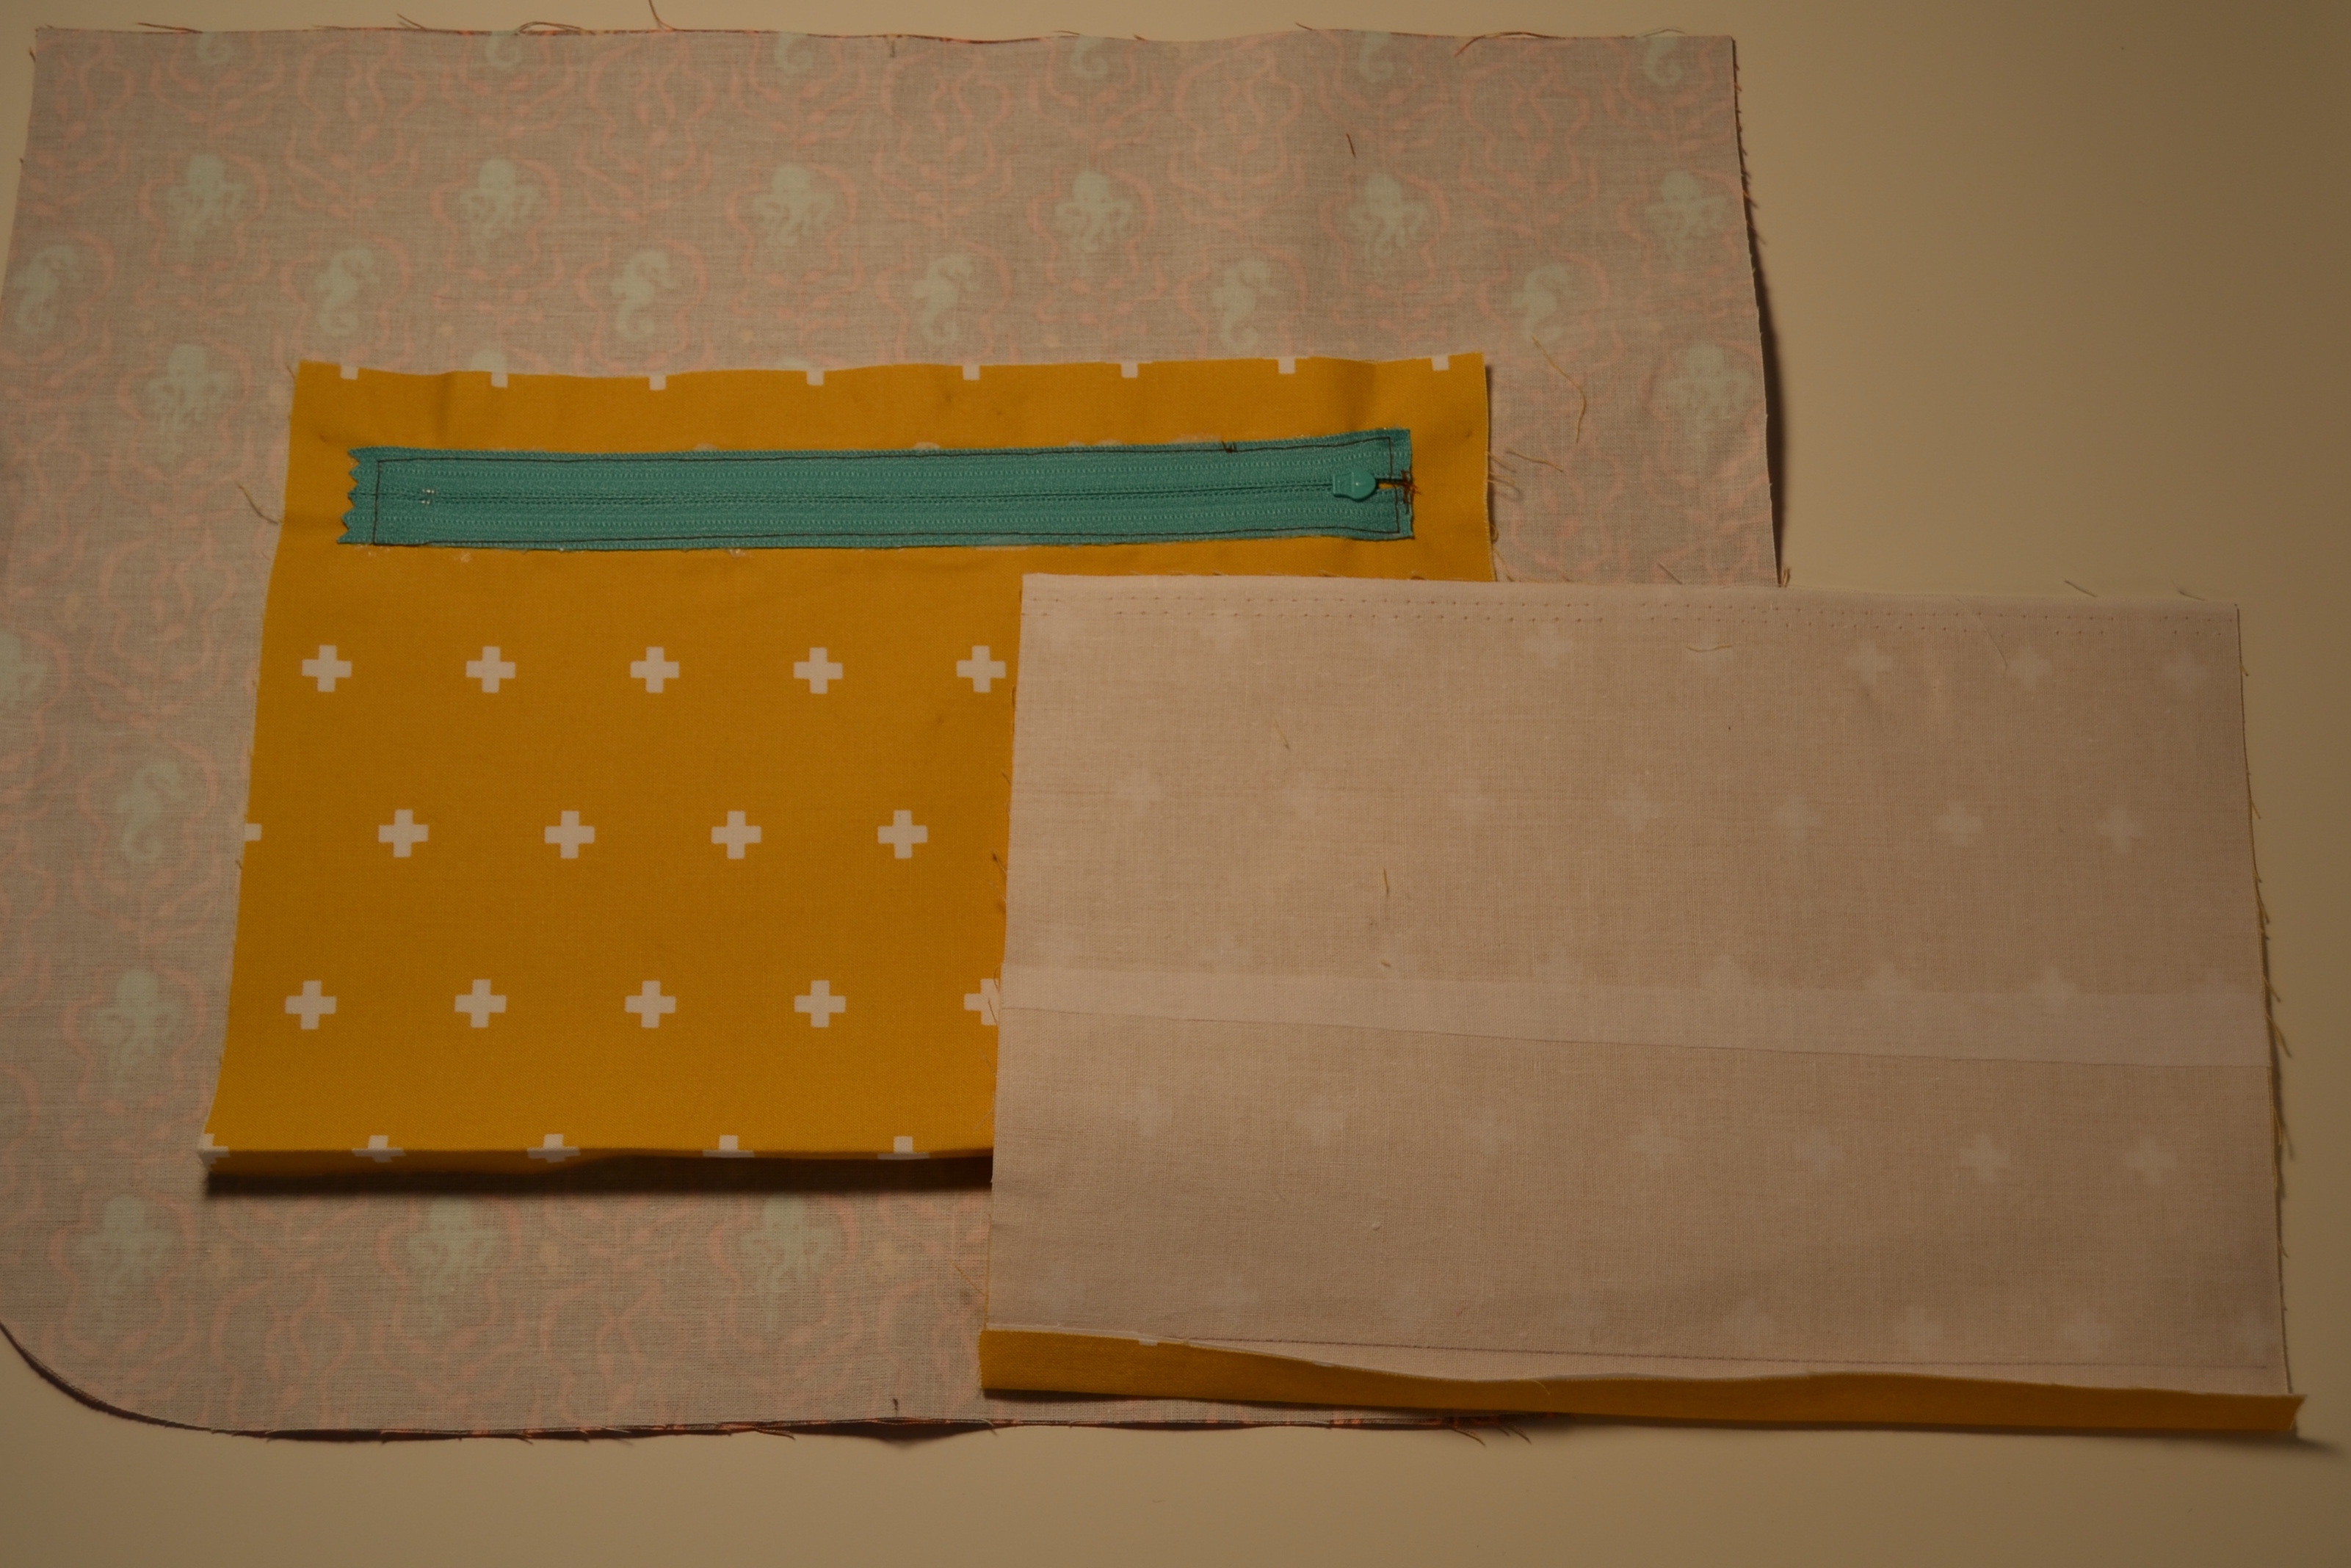
Get your lining piece, and place the pocket wrong side down against the lining (both right sides will be visible to you). Match up the center seam of the pocket with the center seam of your lining piece. There will be room on each edge where the pocket does not meet the edge of the lining piece, and one edge of your pocket will be raw. This is correct. Baste the top and bottom edge of the pocket to the lining with an 1/8″ seam allowance.
Sewing Mask Together
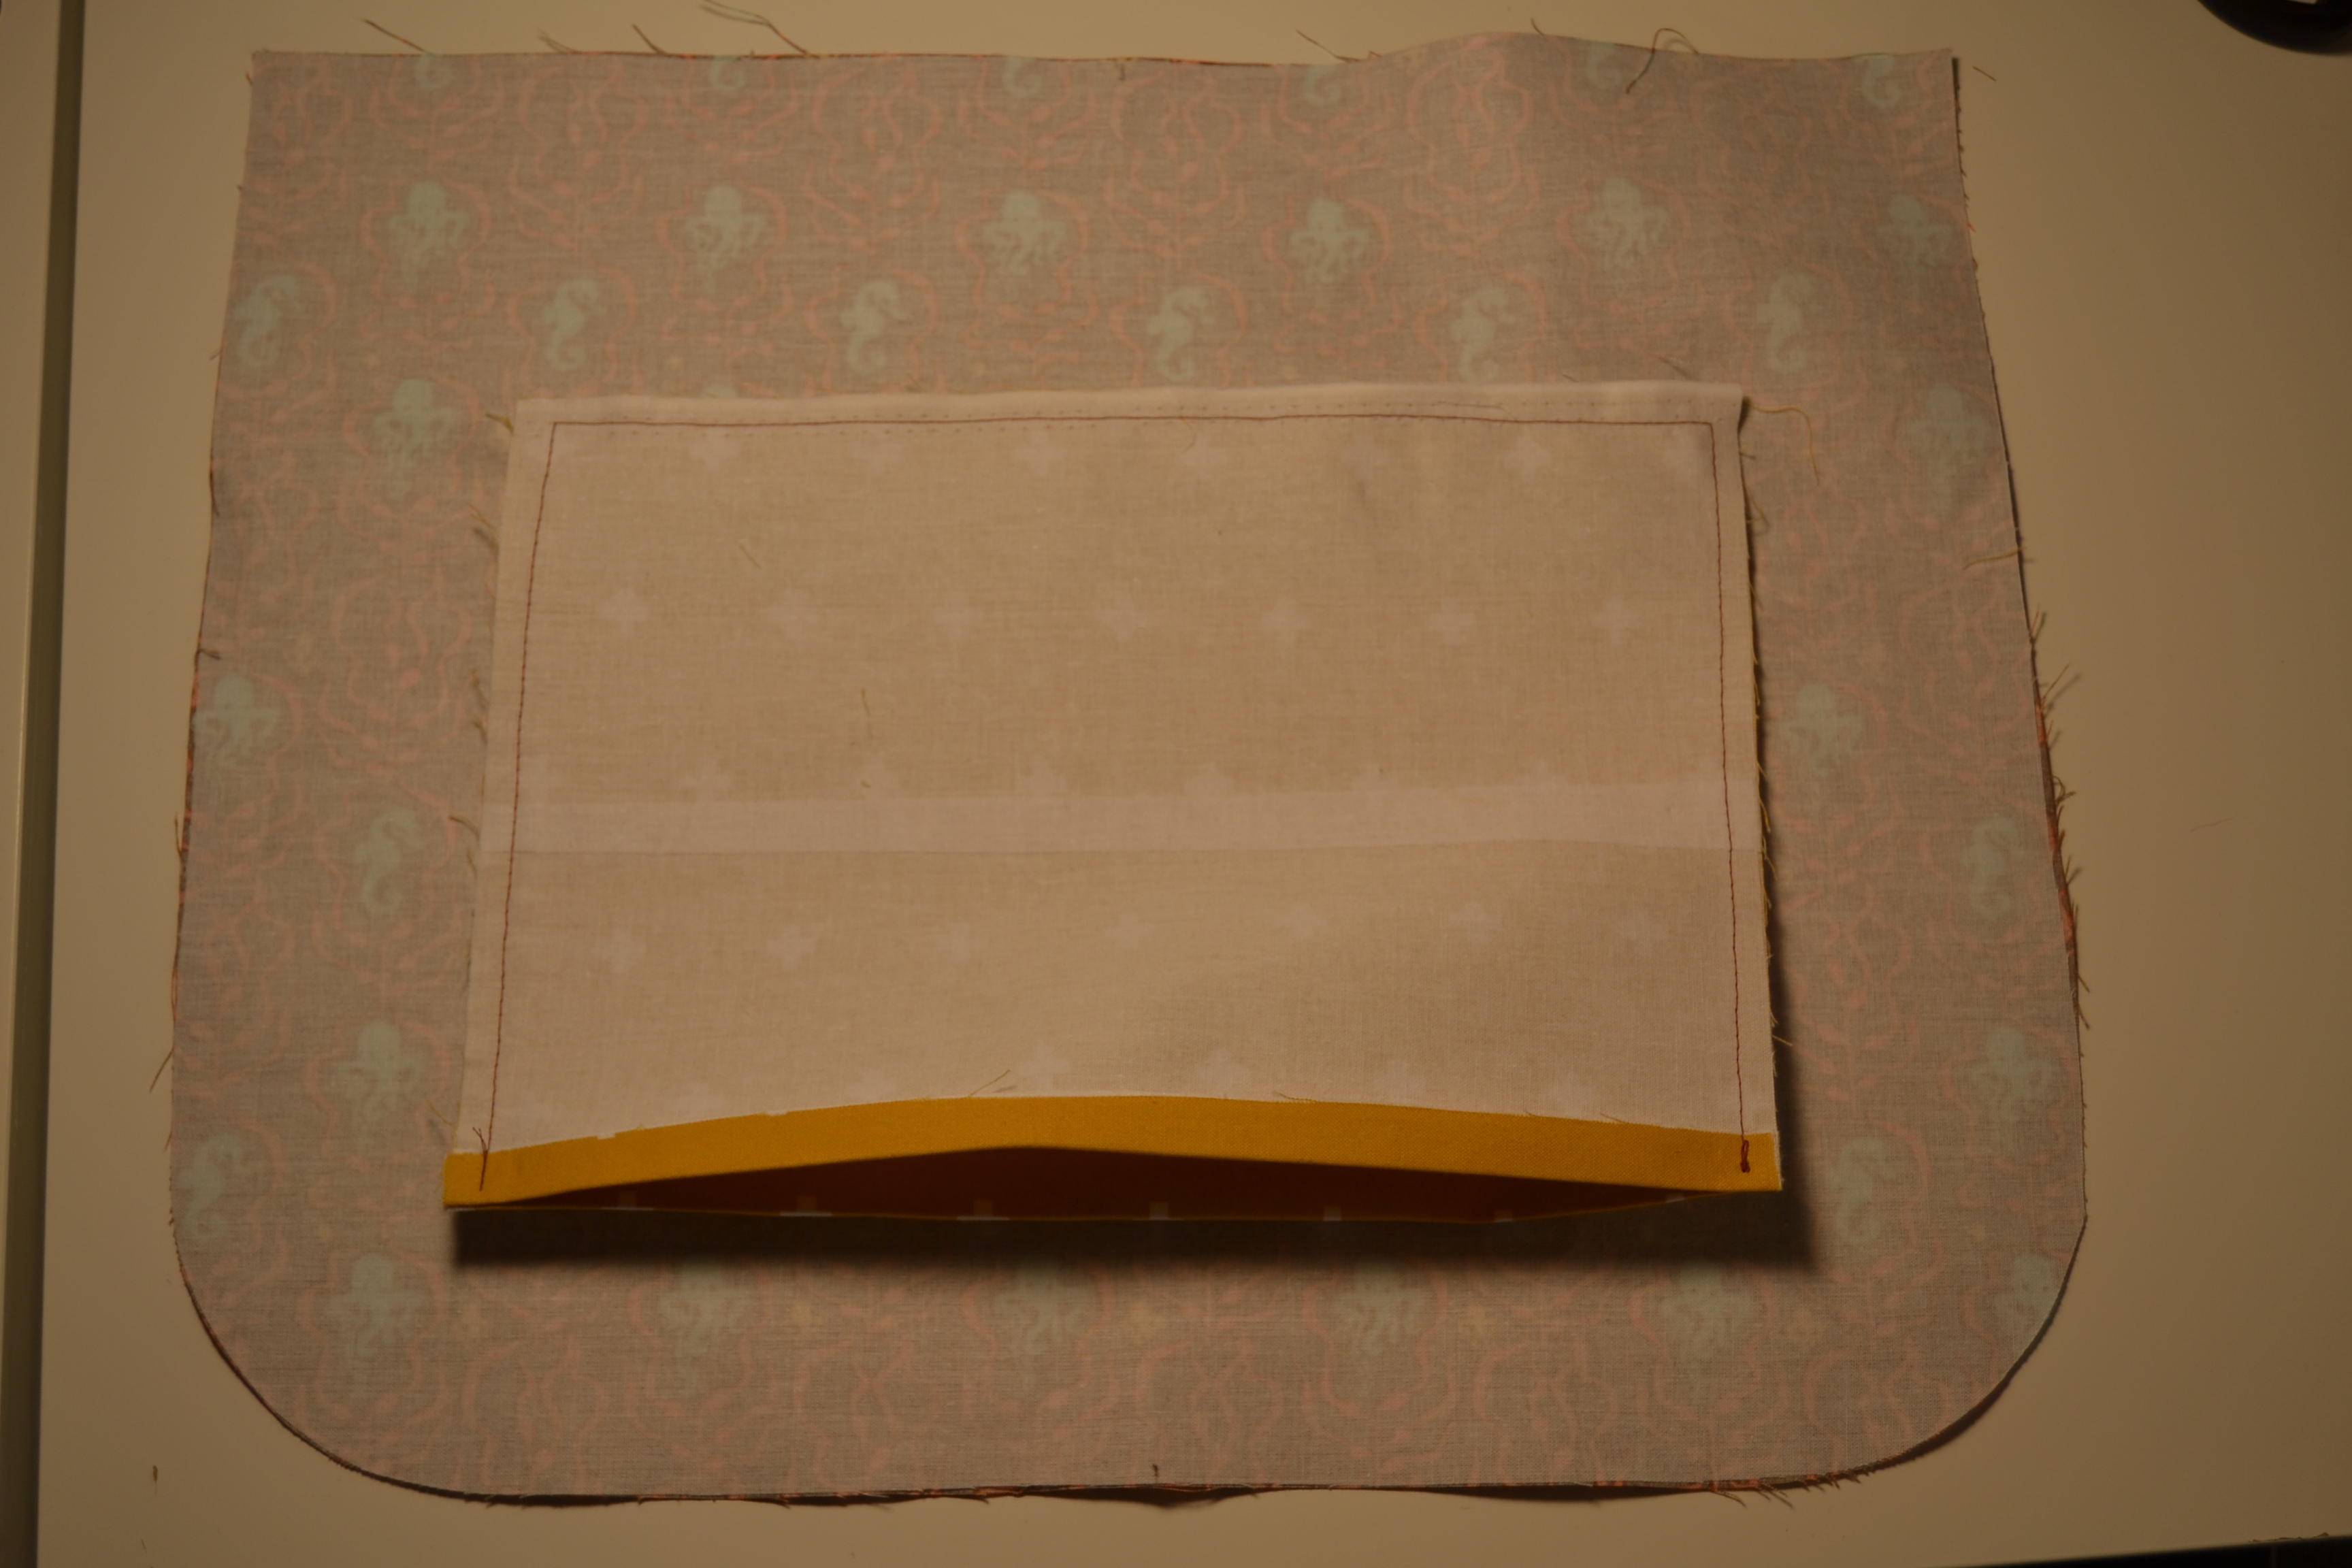
Now we need our exterior piece. We will place our exterior piece right side down on the lining so that the pocket is sandwiched between and the lining and exterior are right sides together. Sew the bottom and top edge with a 1/4″ seam allowance.
Press your seam allowance open and turn.
Topstitch with an 1/8″ seam allowance along the top and bottom edge.
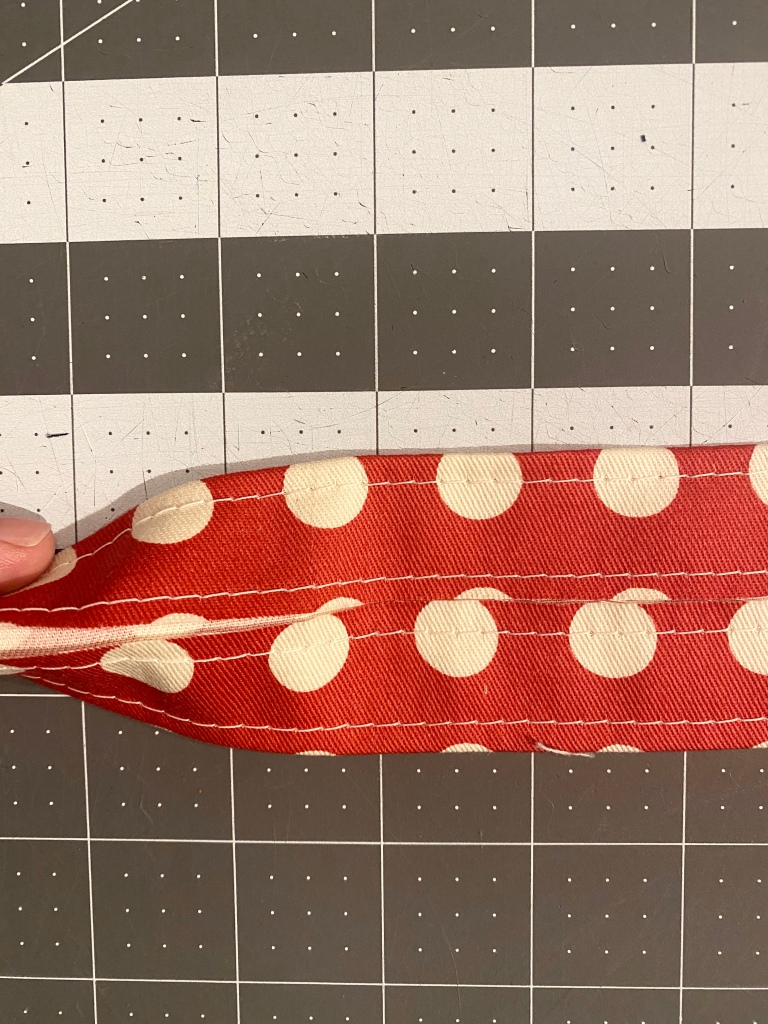
Making Tunnels for Your Ties
(Skip to minute 17 in the video to see this step.)
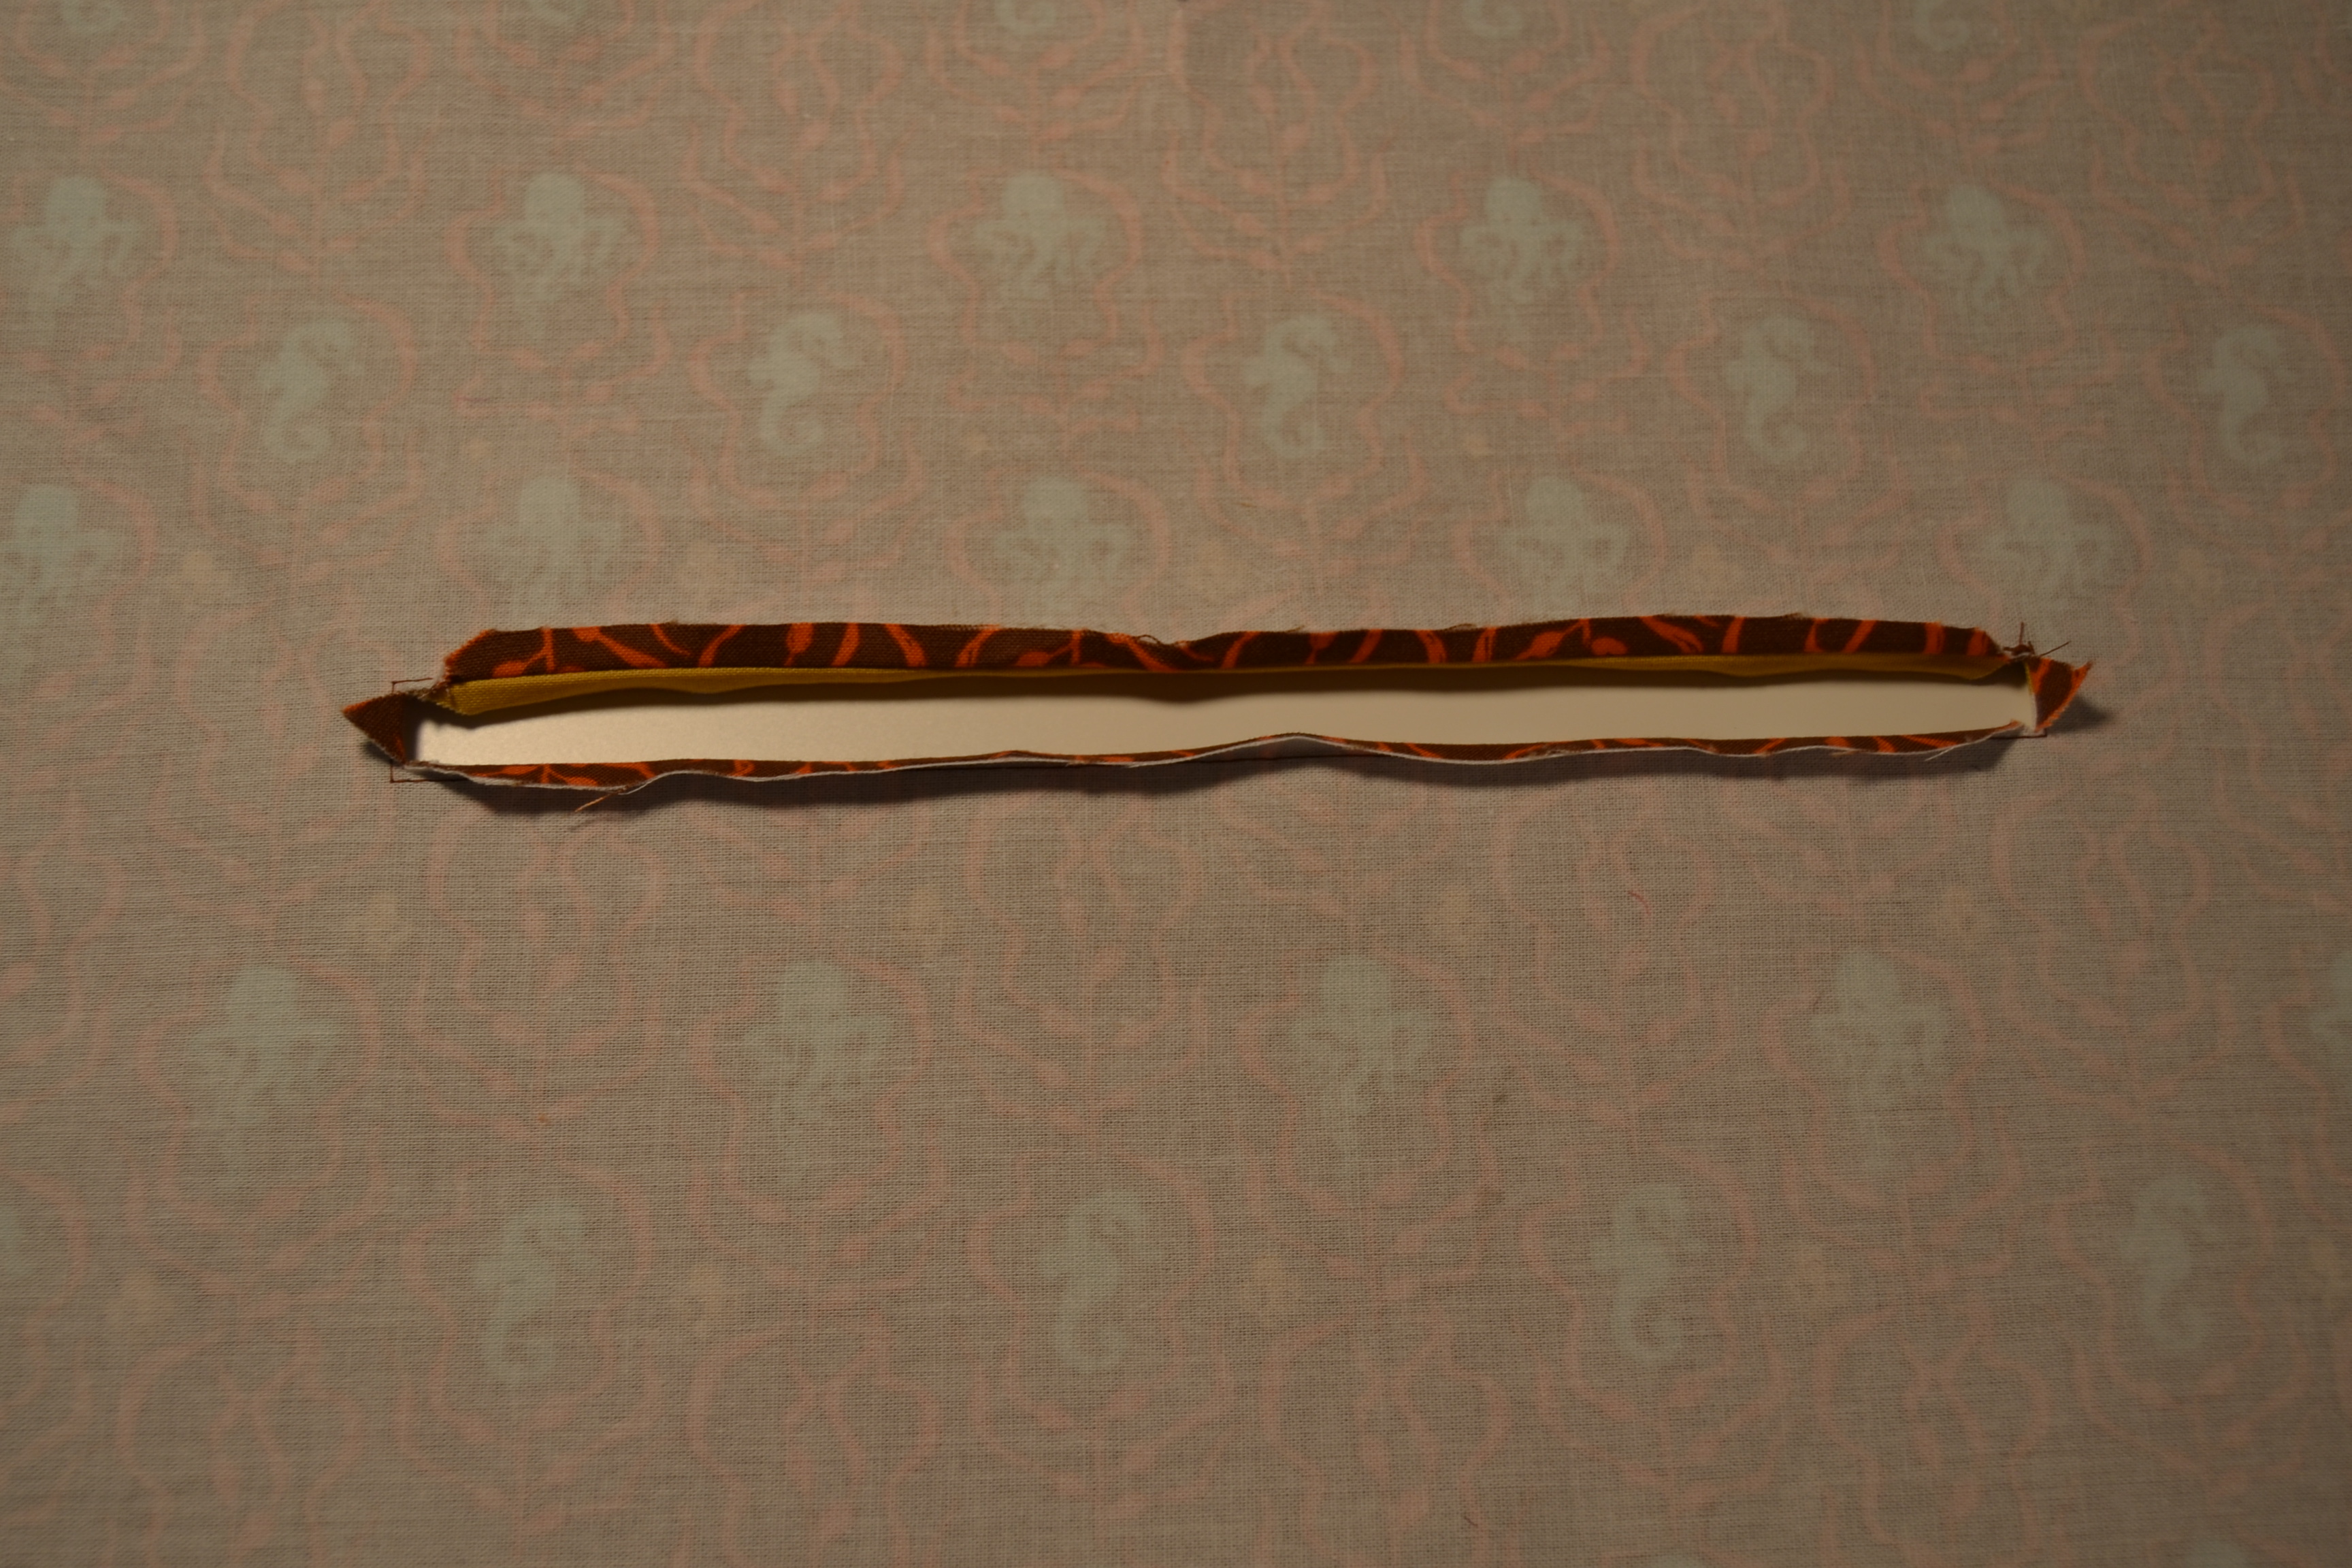
Turn the raw edges of your exterior and lining in a 1/4″ and press. Then start with the edge on the side with your hemmed pocket edge. You will turn the exterior side in again and press so that it meets the edge of your hemmed pocket. This will create a tunnel in the fabric that we will be stringing our fabric tie through. Topstitch the edge of your fabric tunnel an 1/8″ from the hemmed pocket edge. When you’re topstitching this edge, make sure your stitching at the top and bottom are secure, as there will be pressure on this seam from pulling the ties.
We will be doing the same on the other edge, except we will be covering our raw pocket edge with our hemmed tunnel edge. Turn in the fabric ~5/8″ or to match the width of your tunnel on your hemmed pocket edge. It does not need to be exact.
After your tunnels are made, you’re done with the mask portion!! If you have twill tape, skip past the fabric tie making section.
Making Fabric Ties
Get your 2 strips of fabric and press all 4 raw ends in 1/4″. With the wrong side facing up, find the center of your strip and press the raw edges in to meet in the center. This is much faster with a bias tape maker but it’s certainly not a necessary tool for this step. Once the length of both strips has been pressed to the center, you will press the strip in half so that the raw edges are concealed. Sew down the open edge of your strips.
Adding Your Ties
Get your safety pin and pin it on the very end of on of your fabric ties. Push the safety pin through one of your fabric tunnels. Pull the tie through so that the top of the mask has ~3″ more length protruding than the bottom edge (the top of your head is greater in diameter – this seems obvious now that I’ve written it but your first instinct is to make the ties equal lengths – unless it wasn’t and now you have wasted time reading this extraneous information).
Securing Your Ties
Once your ties have been threaded through your tunnels (I just remembered that the proper sewing term for this is casing. But I would need to go back and change all of the words to casing so just pretend that tunnels is also correct), you will want to put a tack stitch in the center of each so that the ties do not shift. Fold the edge of your mask in half and finger press so that you can see the halfway point. Place under your sewing machine and make a triple stitch to tack down your ties. Repeat for the other edge.
Your mask is done! Take it over to the ironing board for one last good press (the heat will set your seams). Then try it on and take an apocalypse selfie and show off your skills!
If you’d like to add a bit of your favorite fabric to your Converse, it’s pretty easy! It took me less than an hour. I’ve only finished one shoe but I was also taking pics while I was doing it so you might be able to do it in around 30 minutes. Please look through the entire tutorial before deciding if you want to proceed! I don’t want you to hold me responsible for ruining your shoes.
The shoes I did this on are really old and disgusting so I’m sorry you have to look at gross shoes. I tried to crop out the holey heel but it might have snuck in on a pic or 2. Anyway, let’s get started.
In addition to your shoes, you will need the following supplies:
1/4 yd SF101 (woven interfacing)
1/4 yd fabric
1/8 yd Heat n Bond Lite (or a glue stick)
FabriTac (or other fabric glue)
Fray-Check (optional)
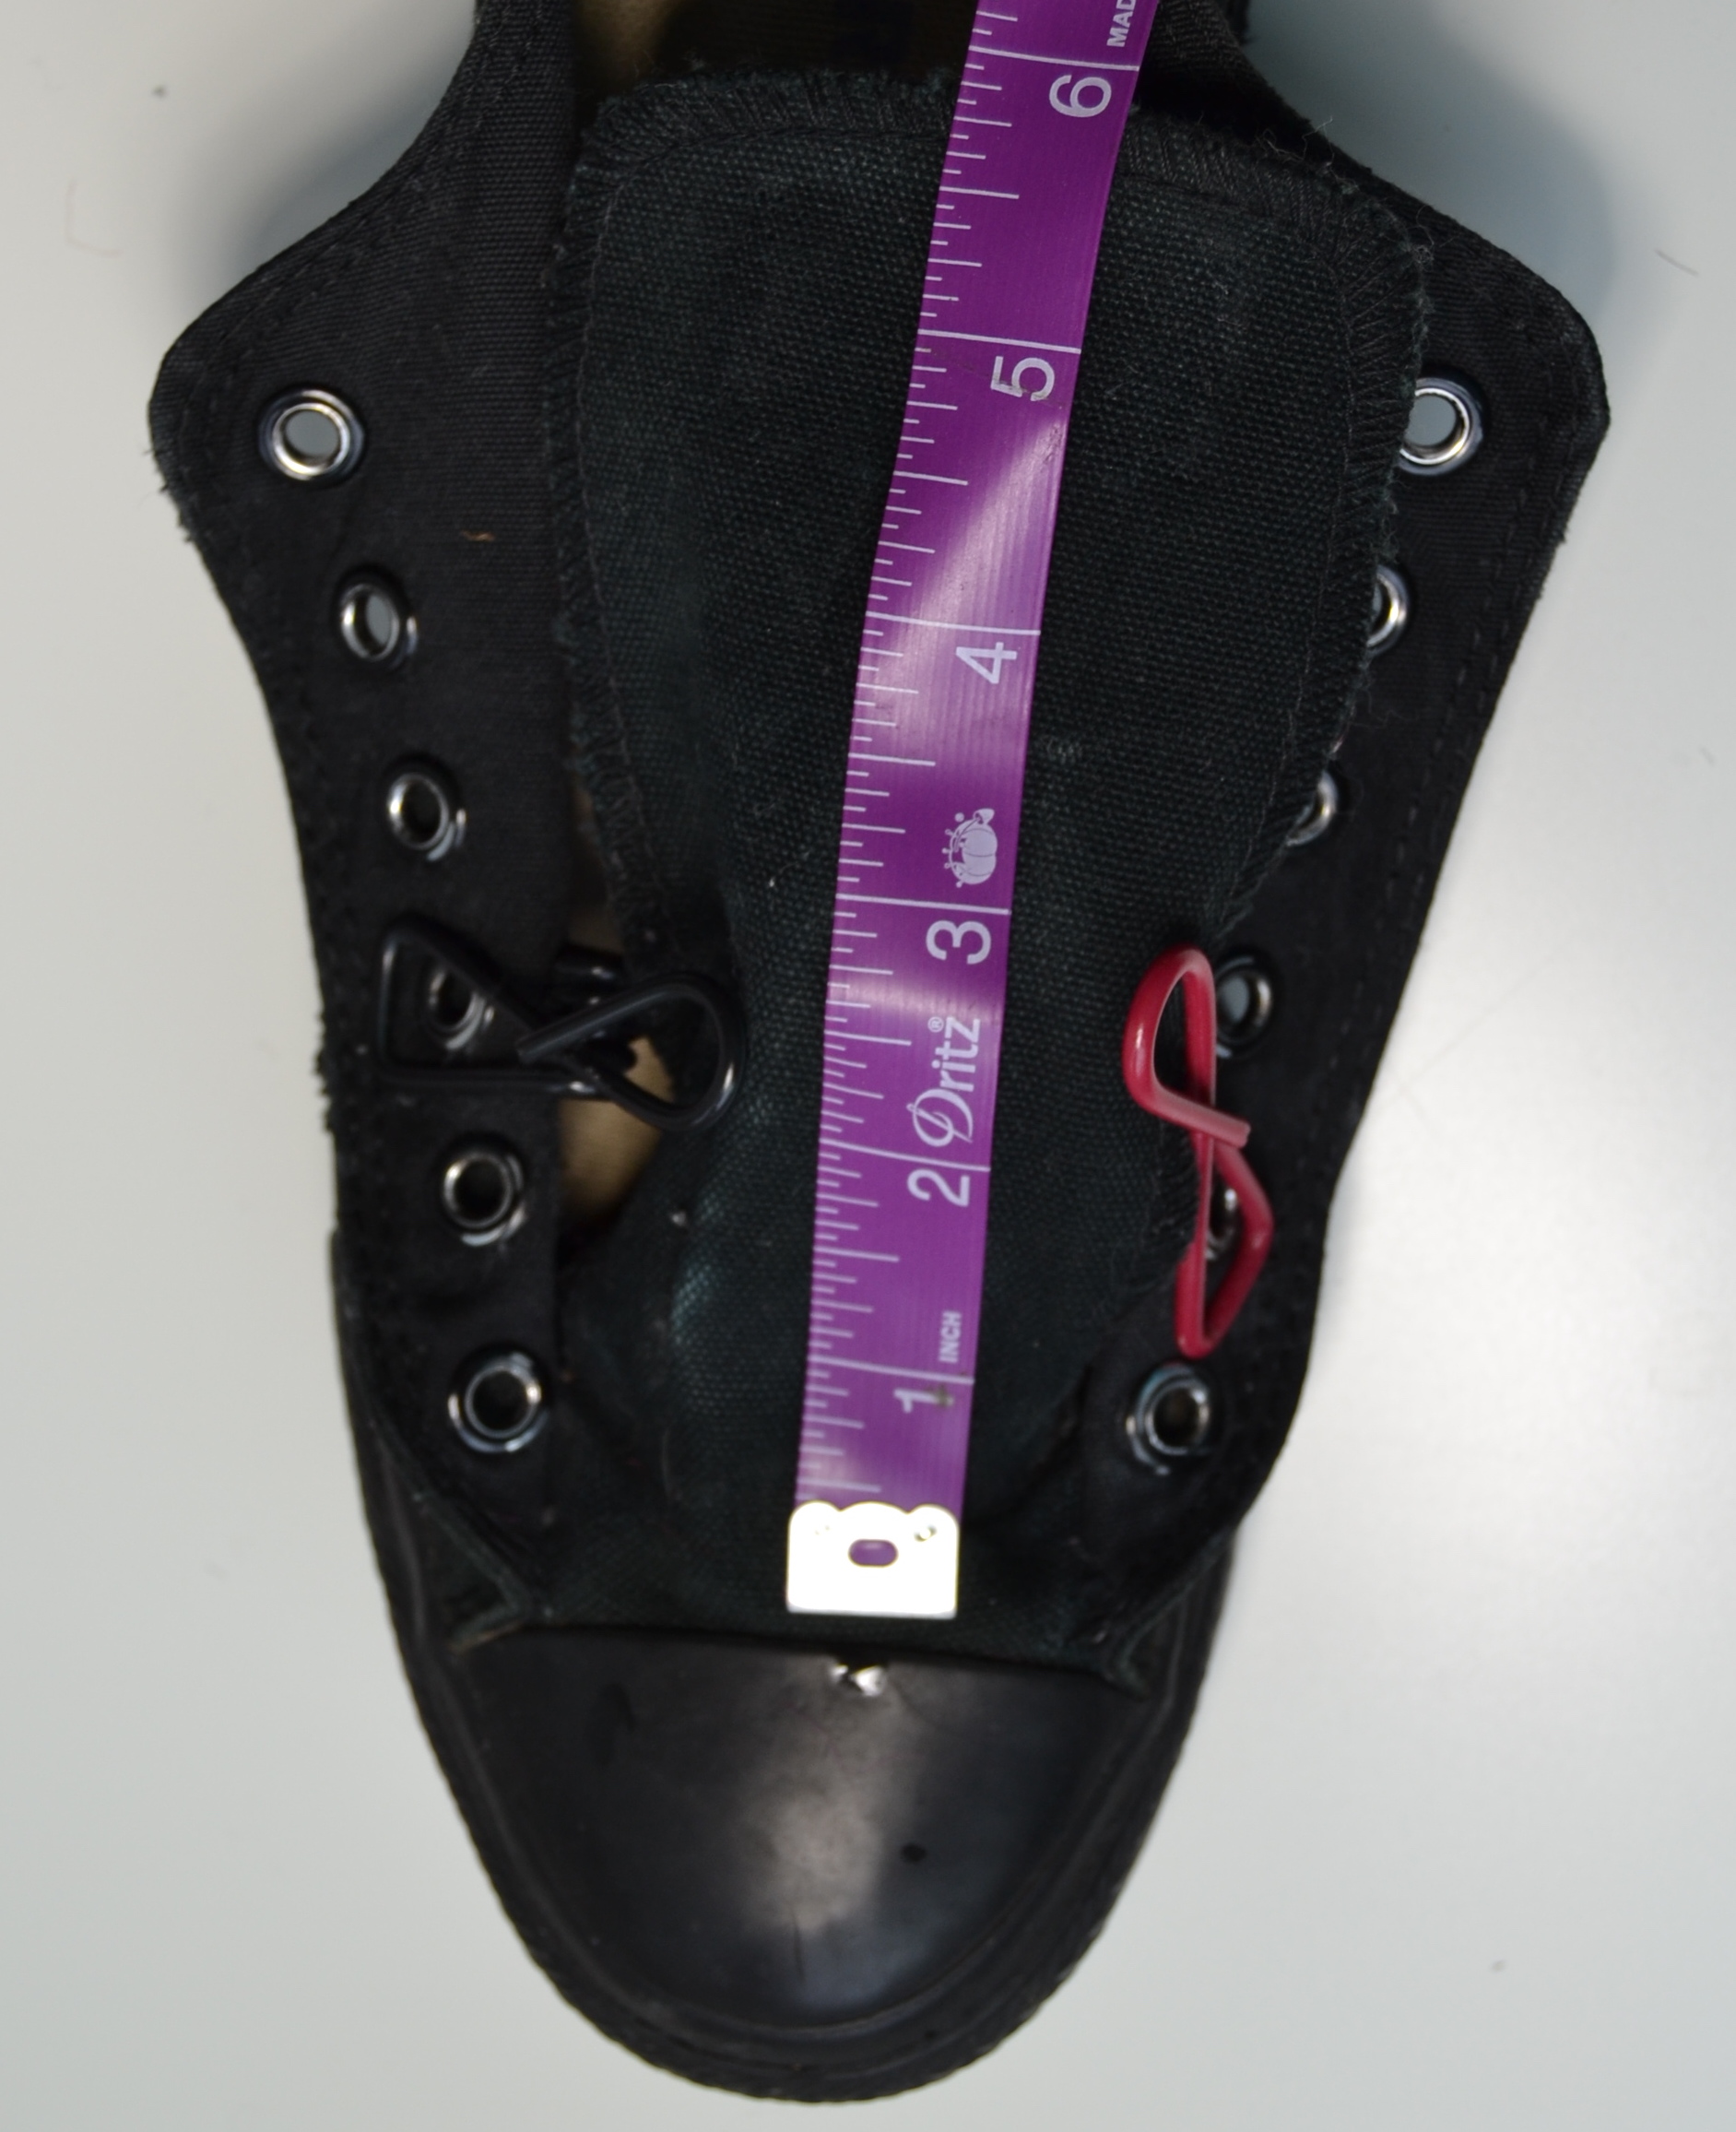
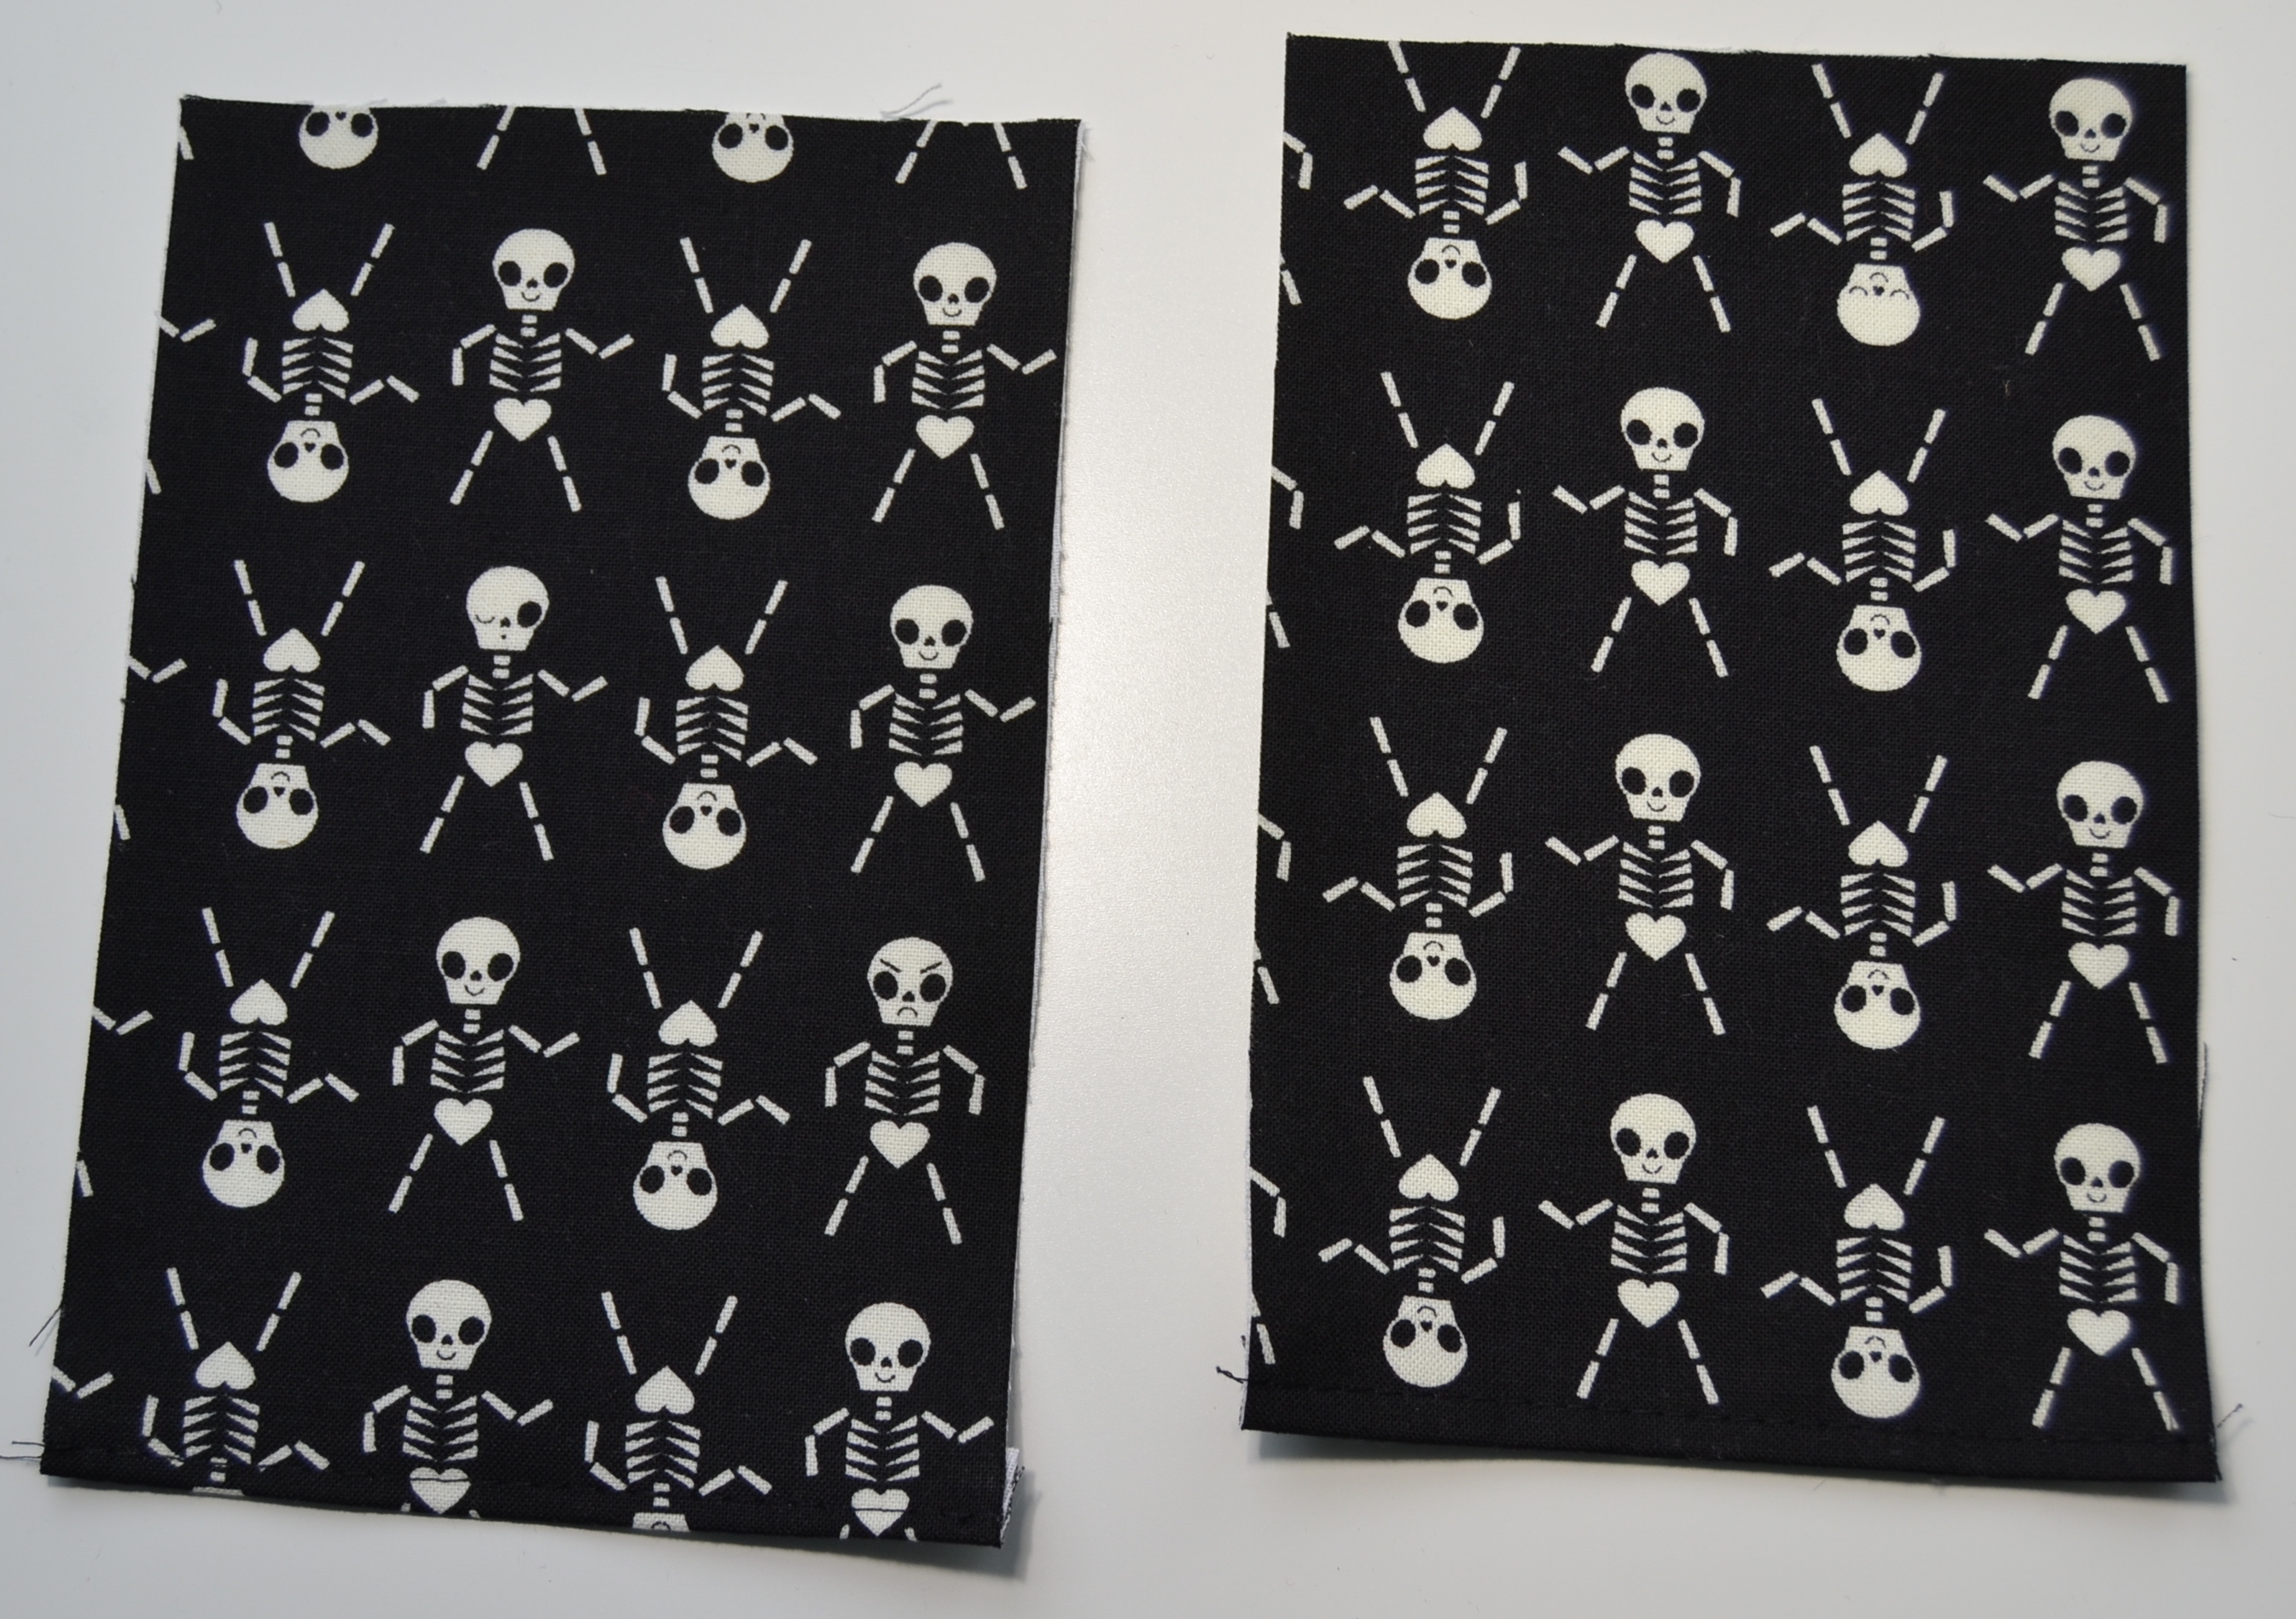
Begin by measuring the tongue of your shoe. Take your laces out, clip sides away from the tongue and measure the length between the end of the rubber toe to the tip of the tongue.
Then measure the width at the top of the tongue. My shoes (US Women’s 9) measures 6″L x 3 3/8″ W. Now we need to add seam allowance (SA) to our measurements. Based on a 3/8″ SA, I added 3/4″ to each side, so my measurements to cut are 6 3/4″ L x 4 1/8″ W.
Based on your measurements, cut (2) pieces of fabric and (2) pieces of SF101. I cut mine at 6 3/4″ L x 4 1/8″ W. Fuse the SF101 to your fabric.
After your interfacing is fused, on the backside of your fabric pieces, mark a line 3/4″ up from the bottom.
Press your fabric towards the line that you just drew. The bottoms of your fabric pieces should now be turned under by 3/8″.
Topstitch 1/8″ in from the bottom edge. (Sorry I used black thread on black and it’s not really visible in the pics.)
Now we need to prep the tongue of our shoes. Take your seam ripper and carefully remove the All-Star tag. I wanted to be able to reattach mine so that the shoes looked like they came with this fabric, but if you don’t want to reattach, you don’t have to be super careful or you could probably just leave it attached.
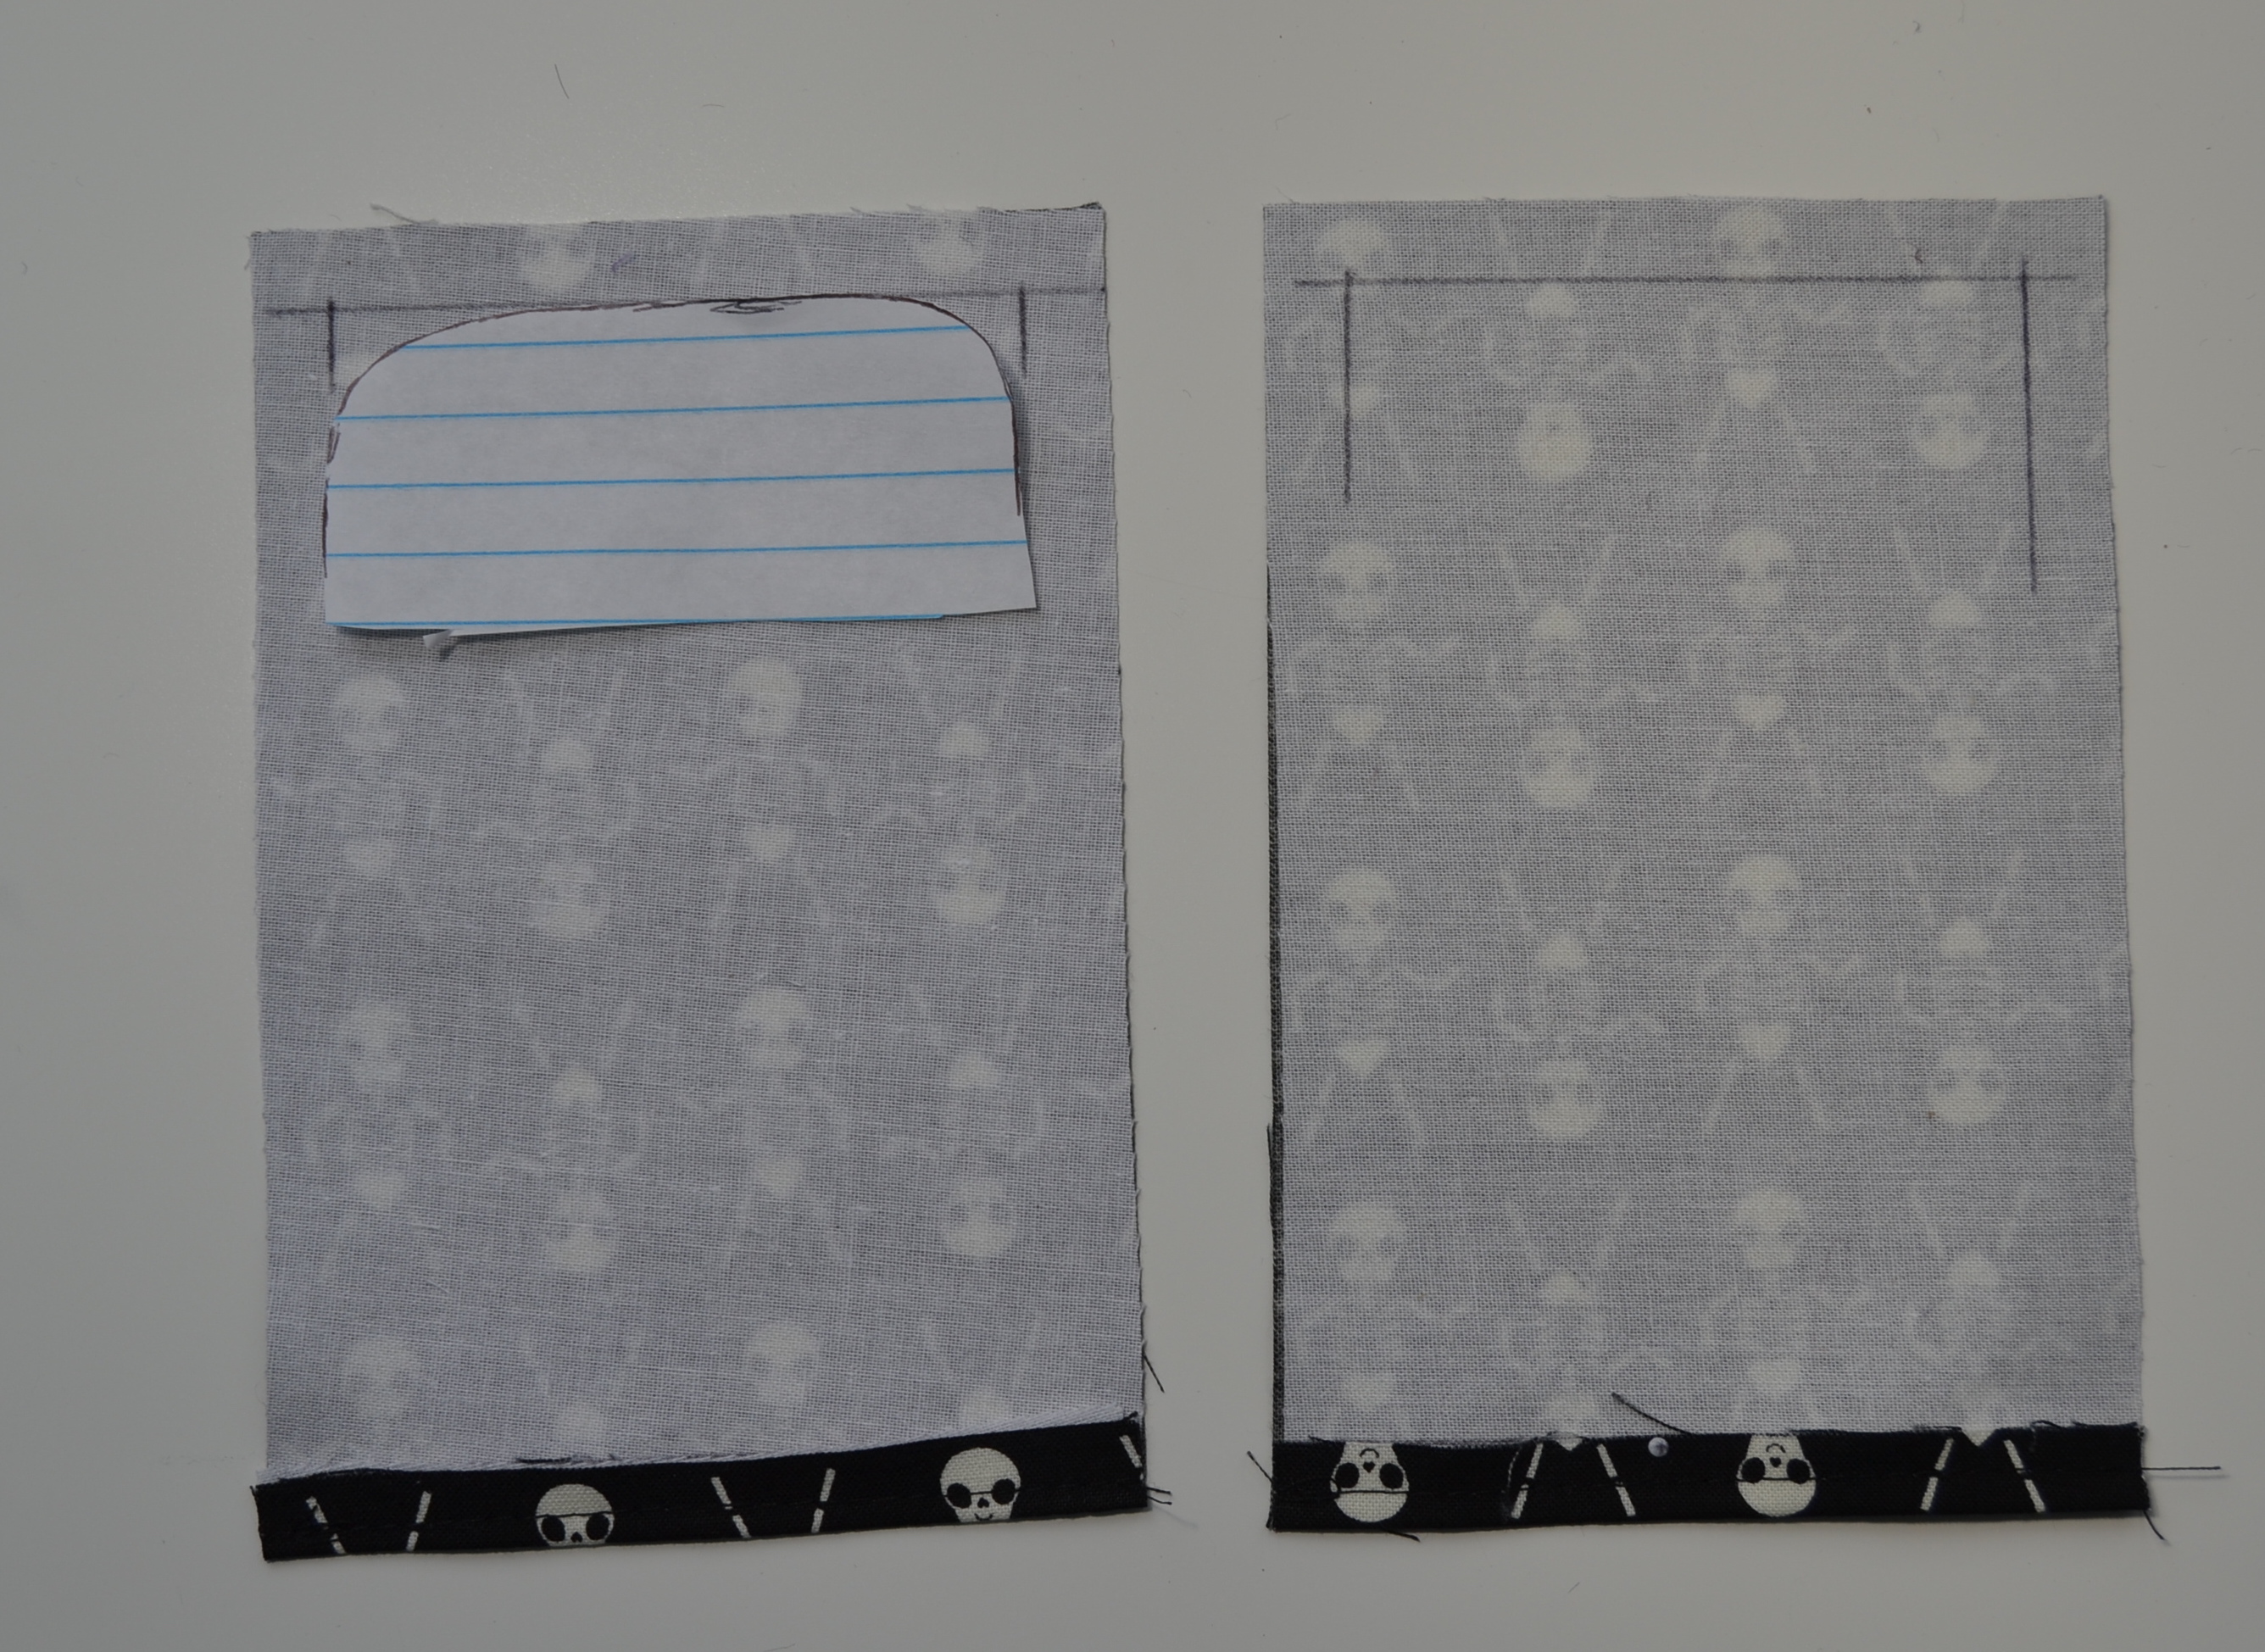
Now we’re going to trace the top of our tongue so that we have a pattern piece for cutting a curve at the top of our rectangular fabric pieces. Nothing fancy, just plop your shoe down on a notebook page and trace. You don’t need to trace the entire thing, we just need the top curve.
Cut your pattern piece out.
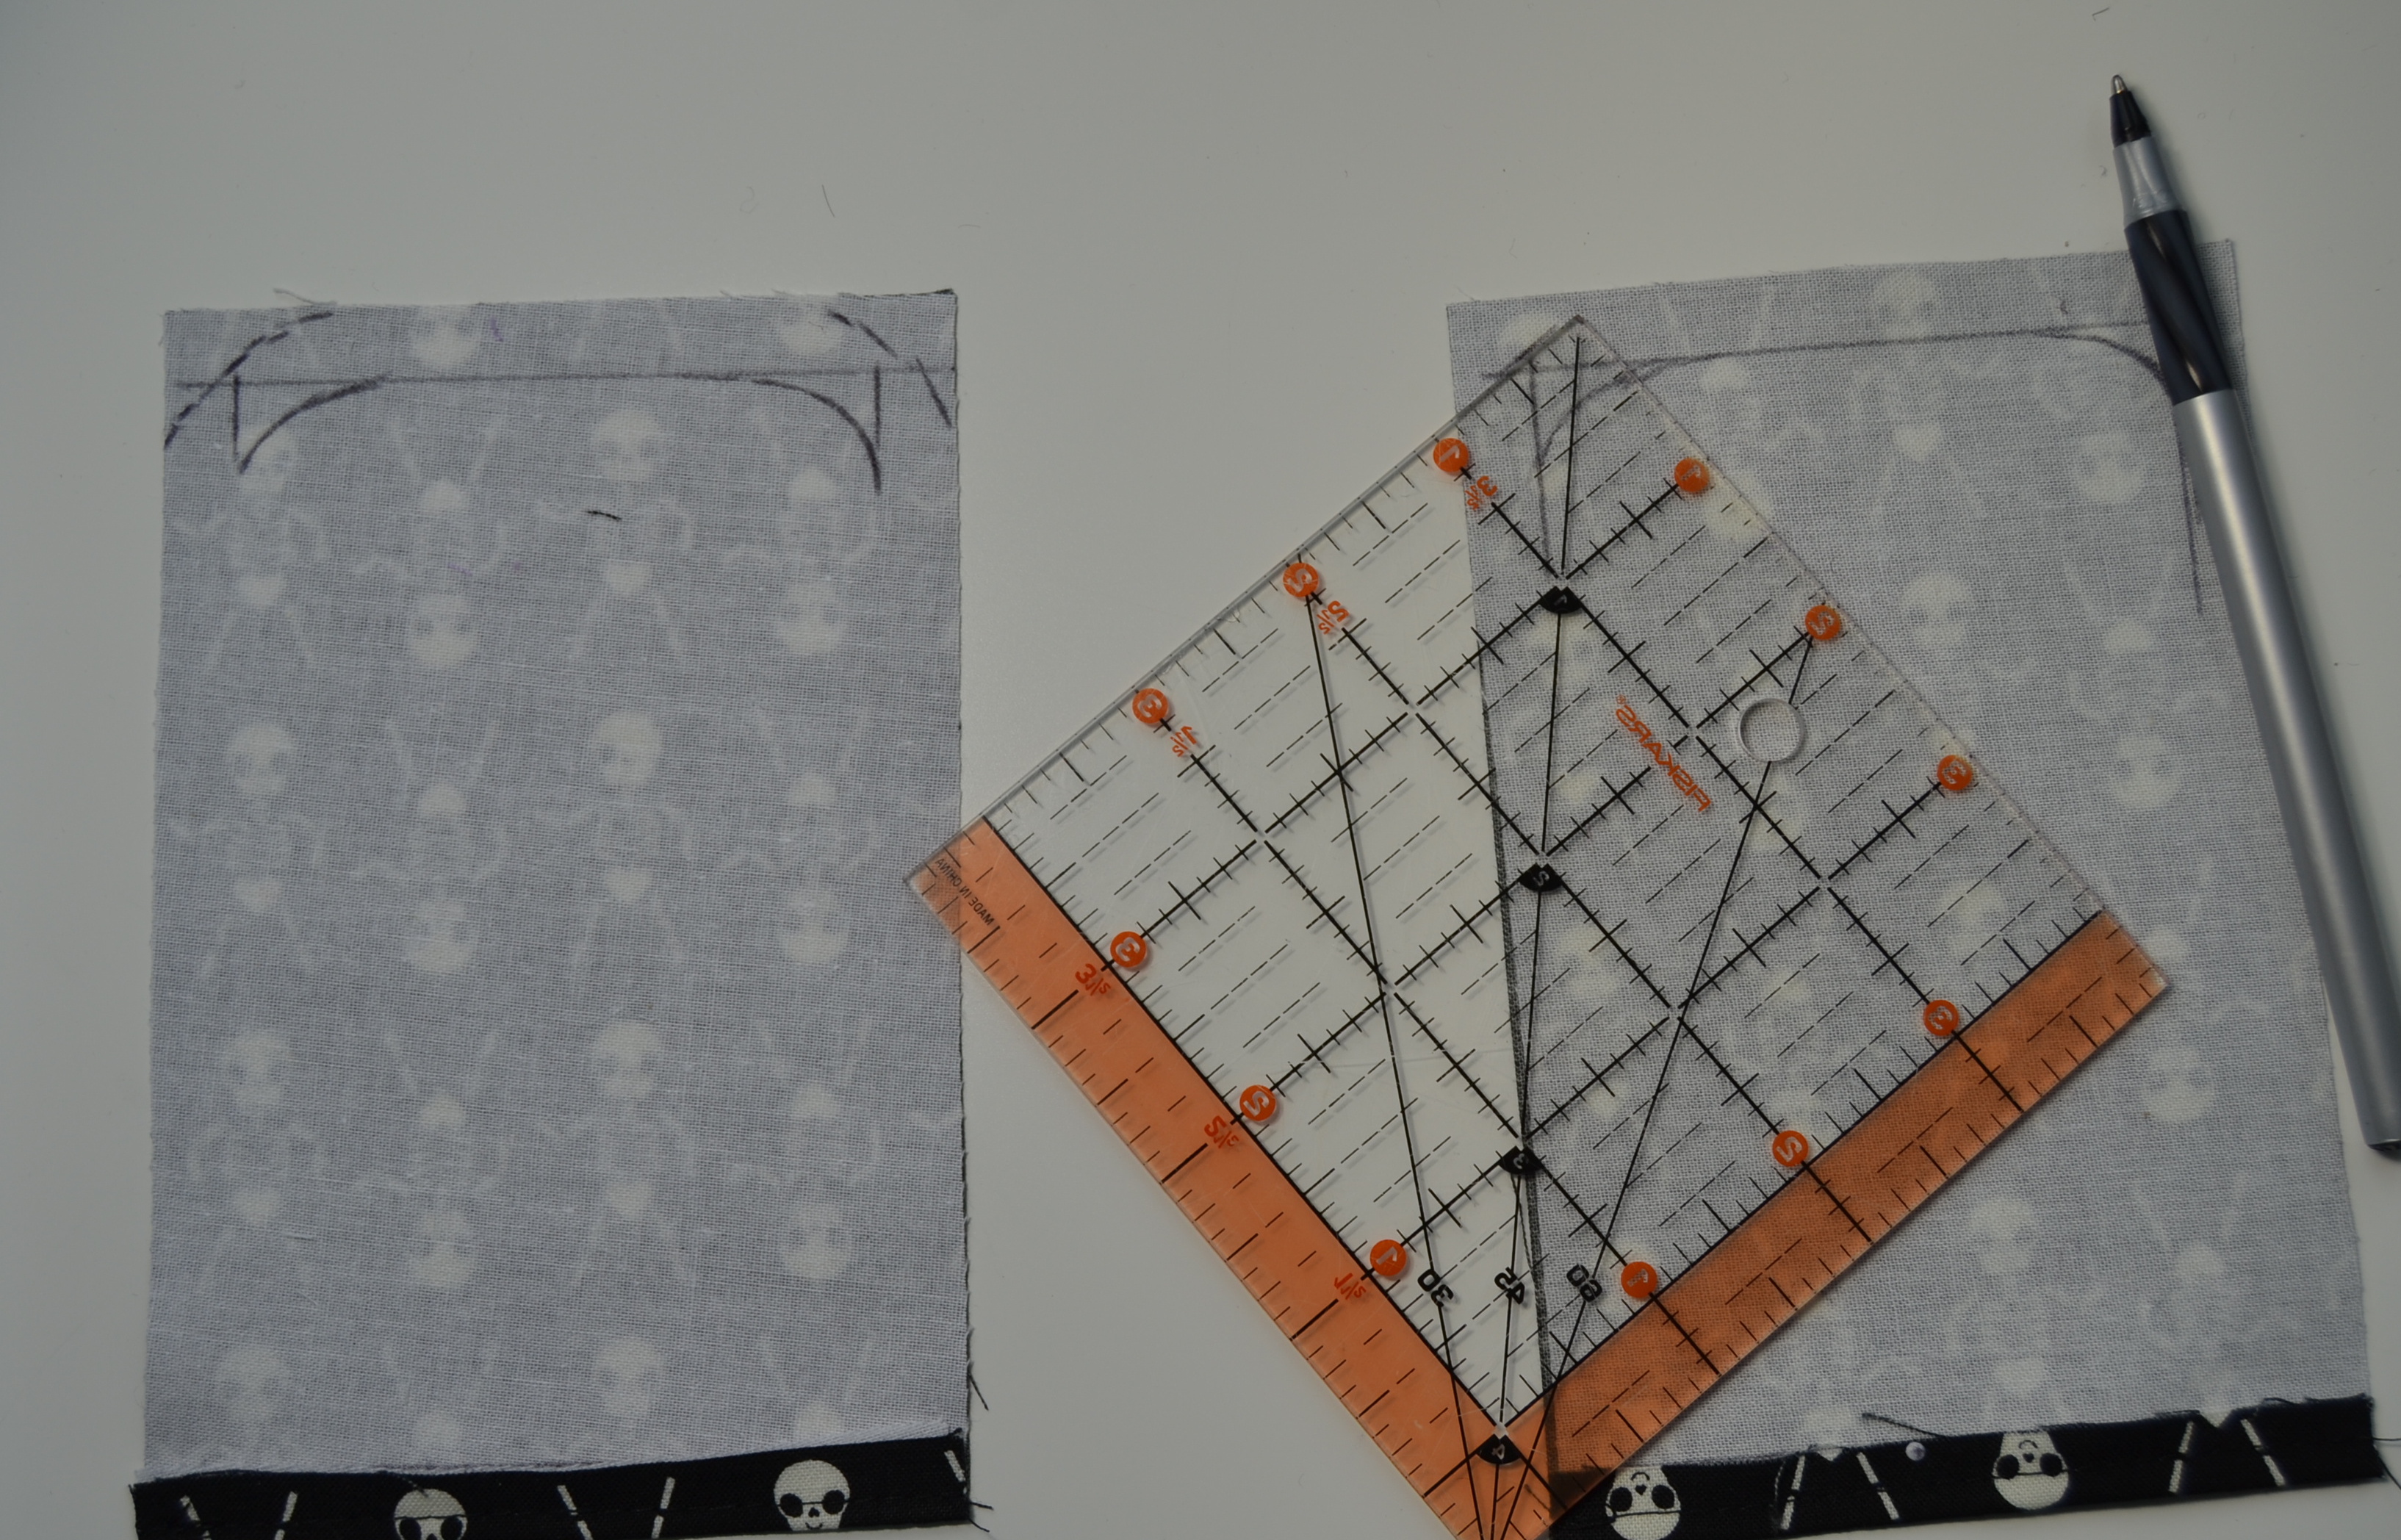
Measure 3/8″ in from the top and side edges of your rectangles and trace the curve from your pattern piece.
We are NOT going to be cutting on that line. We just want to use it as a guide to clip the corners. Measure 3/8″ above the curve on each side of each pattern piece.*
*You might find it easier just to make the pattern piece 3/8″ larger and just trace that directly onto your rectangles.
Cut the edges from the top of your fabric.
Now we’re going to use our fabric pieces and your pattern piece as a guide for cutting our Heat n Bond Lite. Trace your fabric onto your Heat n Bond. (If you’re using a glue stick instead of Heat n Bond, skip this step.) Set your pattern piece 3/8″ down from the top edge of the line you just drew and trace around it. This sounds more complicated than it is. Basically, you’re just drawing a line 3/8″ in all around the inside of the line that you just drew so that you end up with a horseshoe shape. It will be a 3/8″ wide strip that will go all around the outside edge (except for the bottom topstitched edge) of your fabric piece.
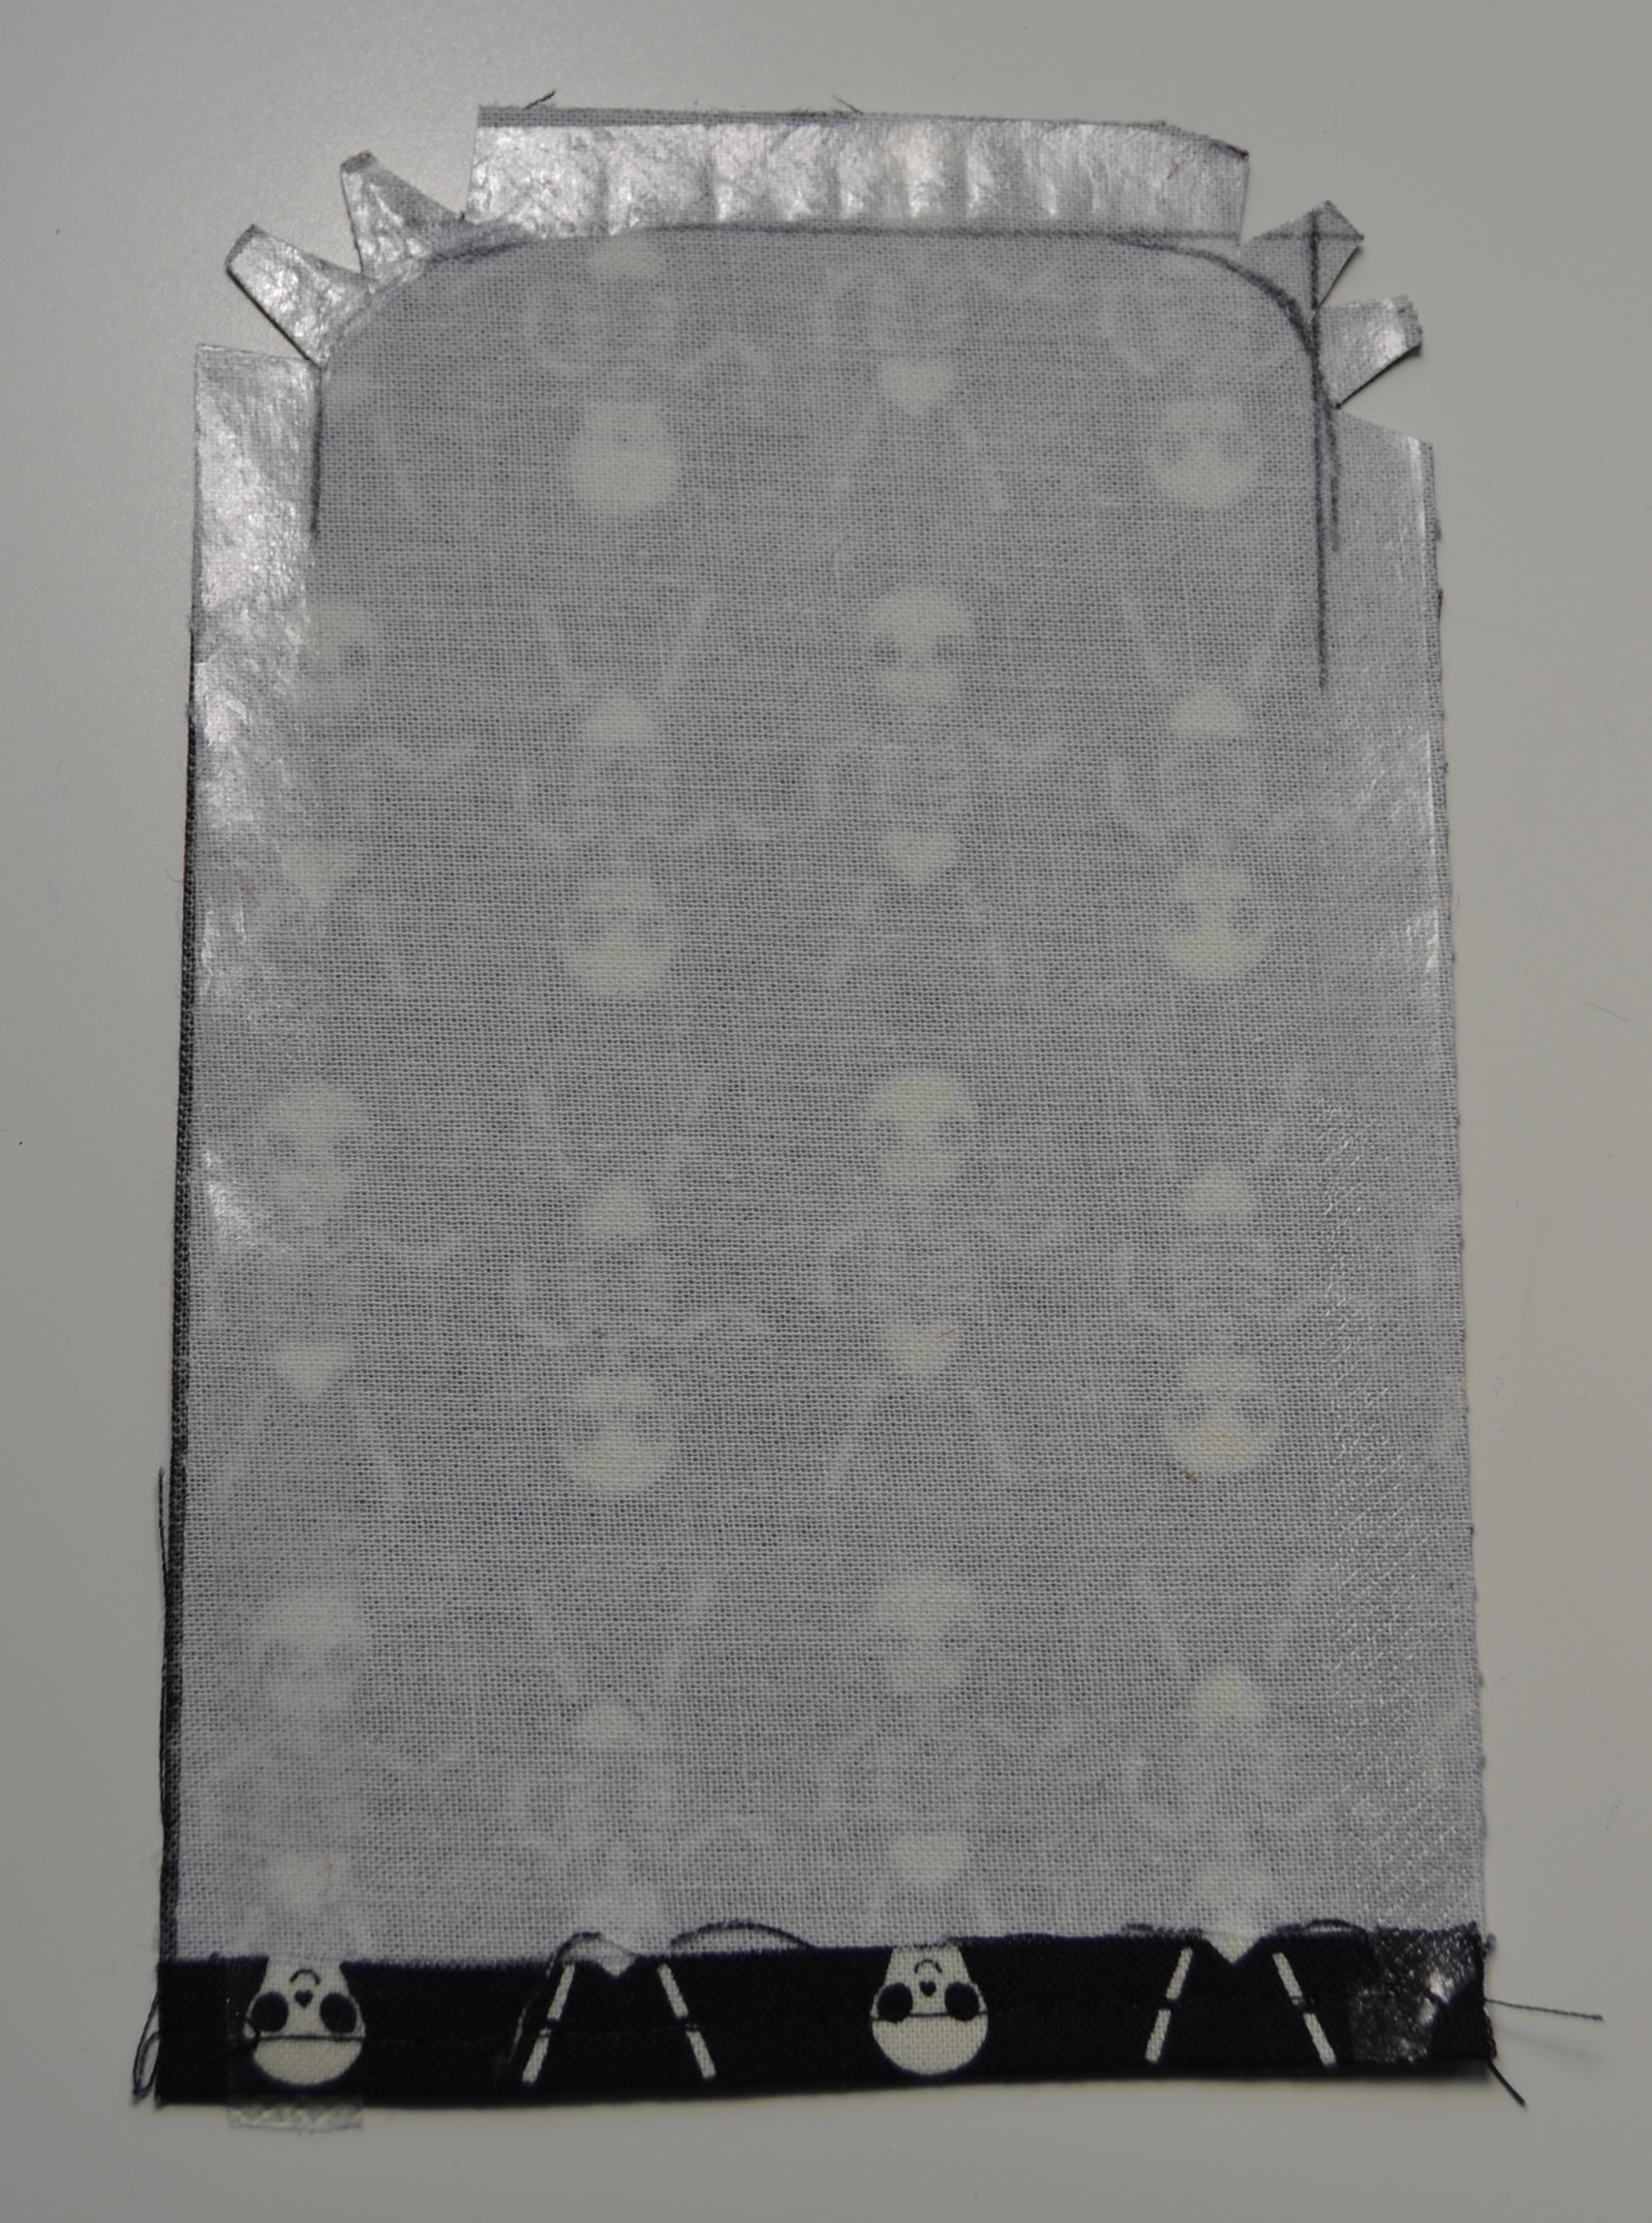
Fuse the Heat n Bond to the edge of your fabric.
Clip notches out of the curves just in from the SA.
If you’re using a glue stick, notch your curves and then apply a line of glue along the edges of your fabric.
Press your fabric in 3/8″.
Now we need to get rid of the bulk from the bottom corners of our fabric. Clip or pin your fabric to your tongue and determine the amount of fabric that you need to trim from the bottom corners. The space between the sides of my shoes measured 2 1/4″.
I measured 2 1/4″ centered on the bottom of my fabric, clipped the corners and then trimmed them.
I used the marks from my clips to cut the bottom corners off of the bottom. Then I liberally applied some Fray-Check to the raw edges. You could probably come up with something more graceful at this step but I knew those edges would be hidden behind the sides of my shoes so I just chopped them.
If you would like to reattach your One-Star label, measure 3/8″ down from the top edge of your fabric and mark a horizontal line.
Zigzag stitch the edges of your labels.
Clip your prepared fabric to the tongue of your shoe.
Shove your shoe underneath your presser foot.
Zigzag stitch all around the edge of the tongue.
Now we have that bottom bit in front of the rubber toe that we were unable to stitch. I decided to glue mine down but you could handstitch if you’re feeling saucy.
Mmm…glue.
Press that glue with a hot iron. Lace your shoes up.
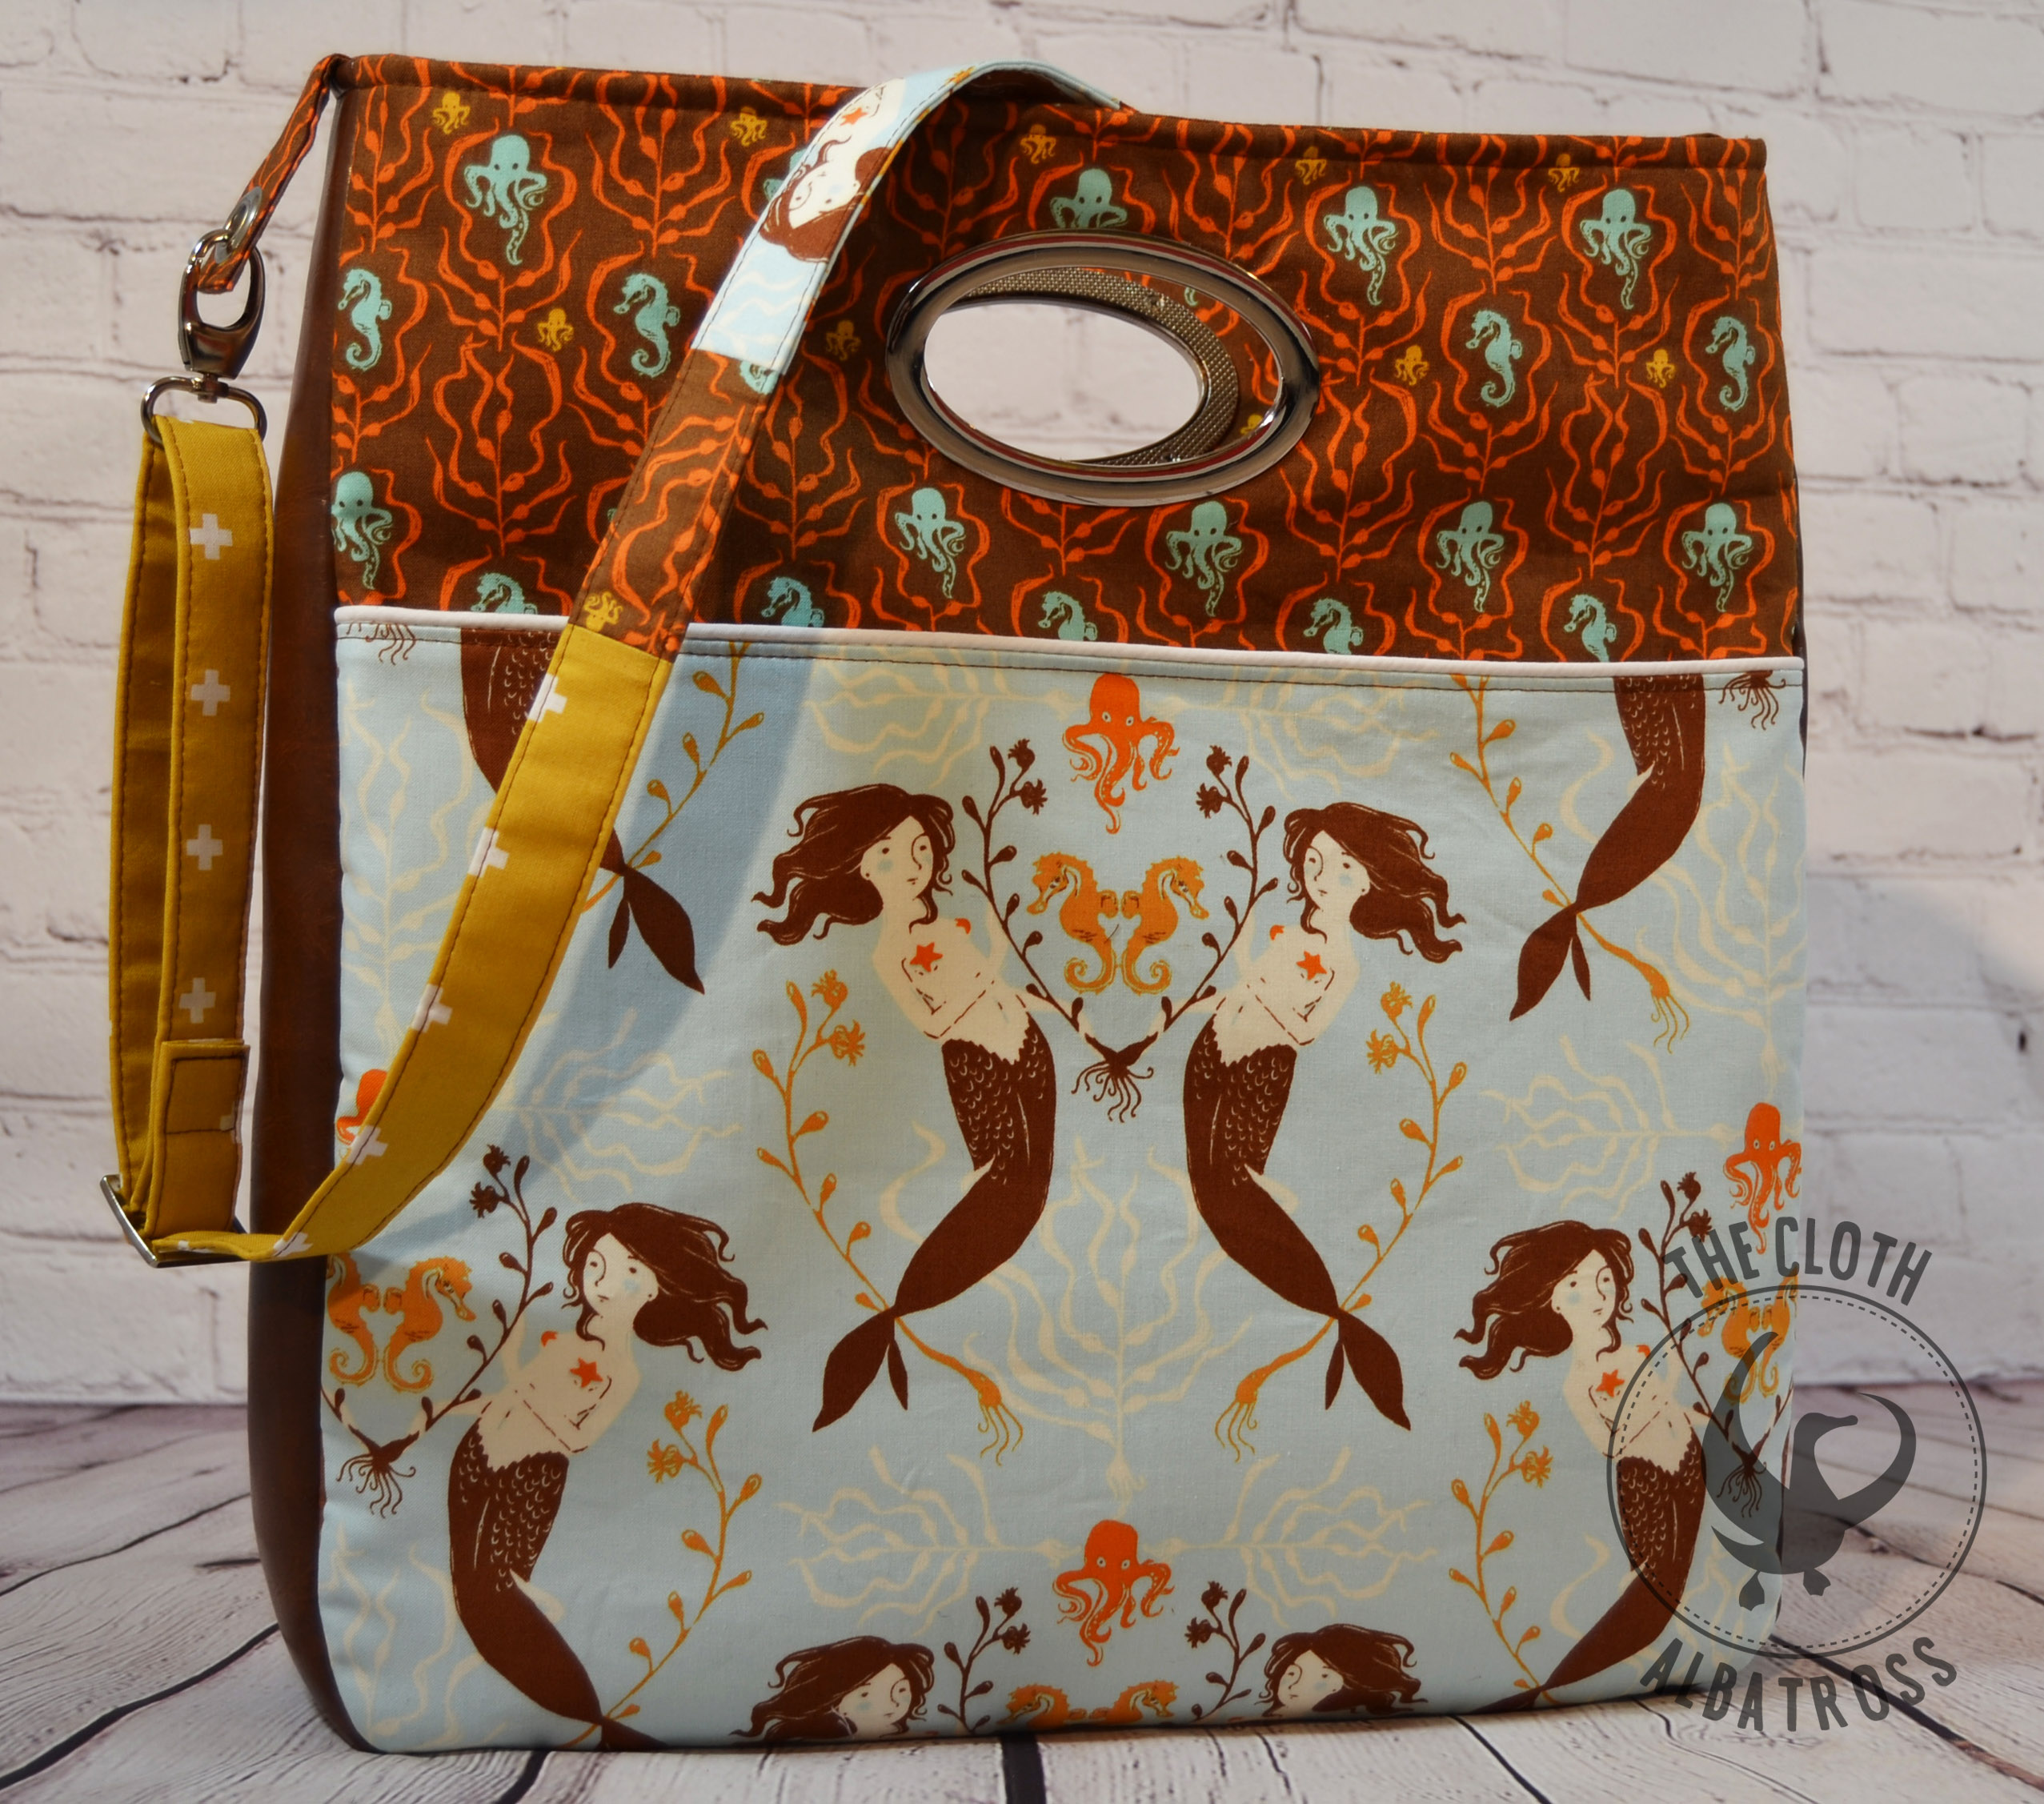
This bag pattern was designed by Mrs H for the February Bag of the Month Club 2016. It’s a large tote with plenty of pockets and unique grommet handles. Janelle of Emmaline Bags asked me to write a tutorial for insertion of her screw-in grommet handles, so I thought that I would detail some of the steps of making the Window Shopper Tote while I was making it.
I took some pictures of grommet installation, and turning the bag through the zipper pocket. I also took a few pictures of making the zipper bridge, since zippers can be intimidating.
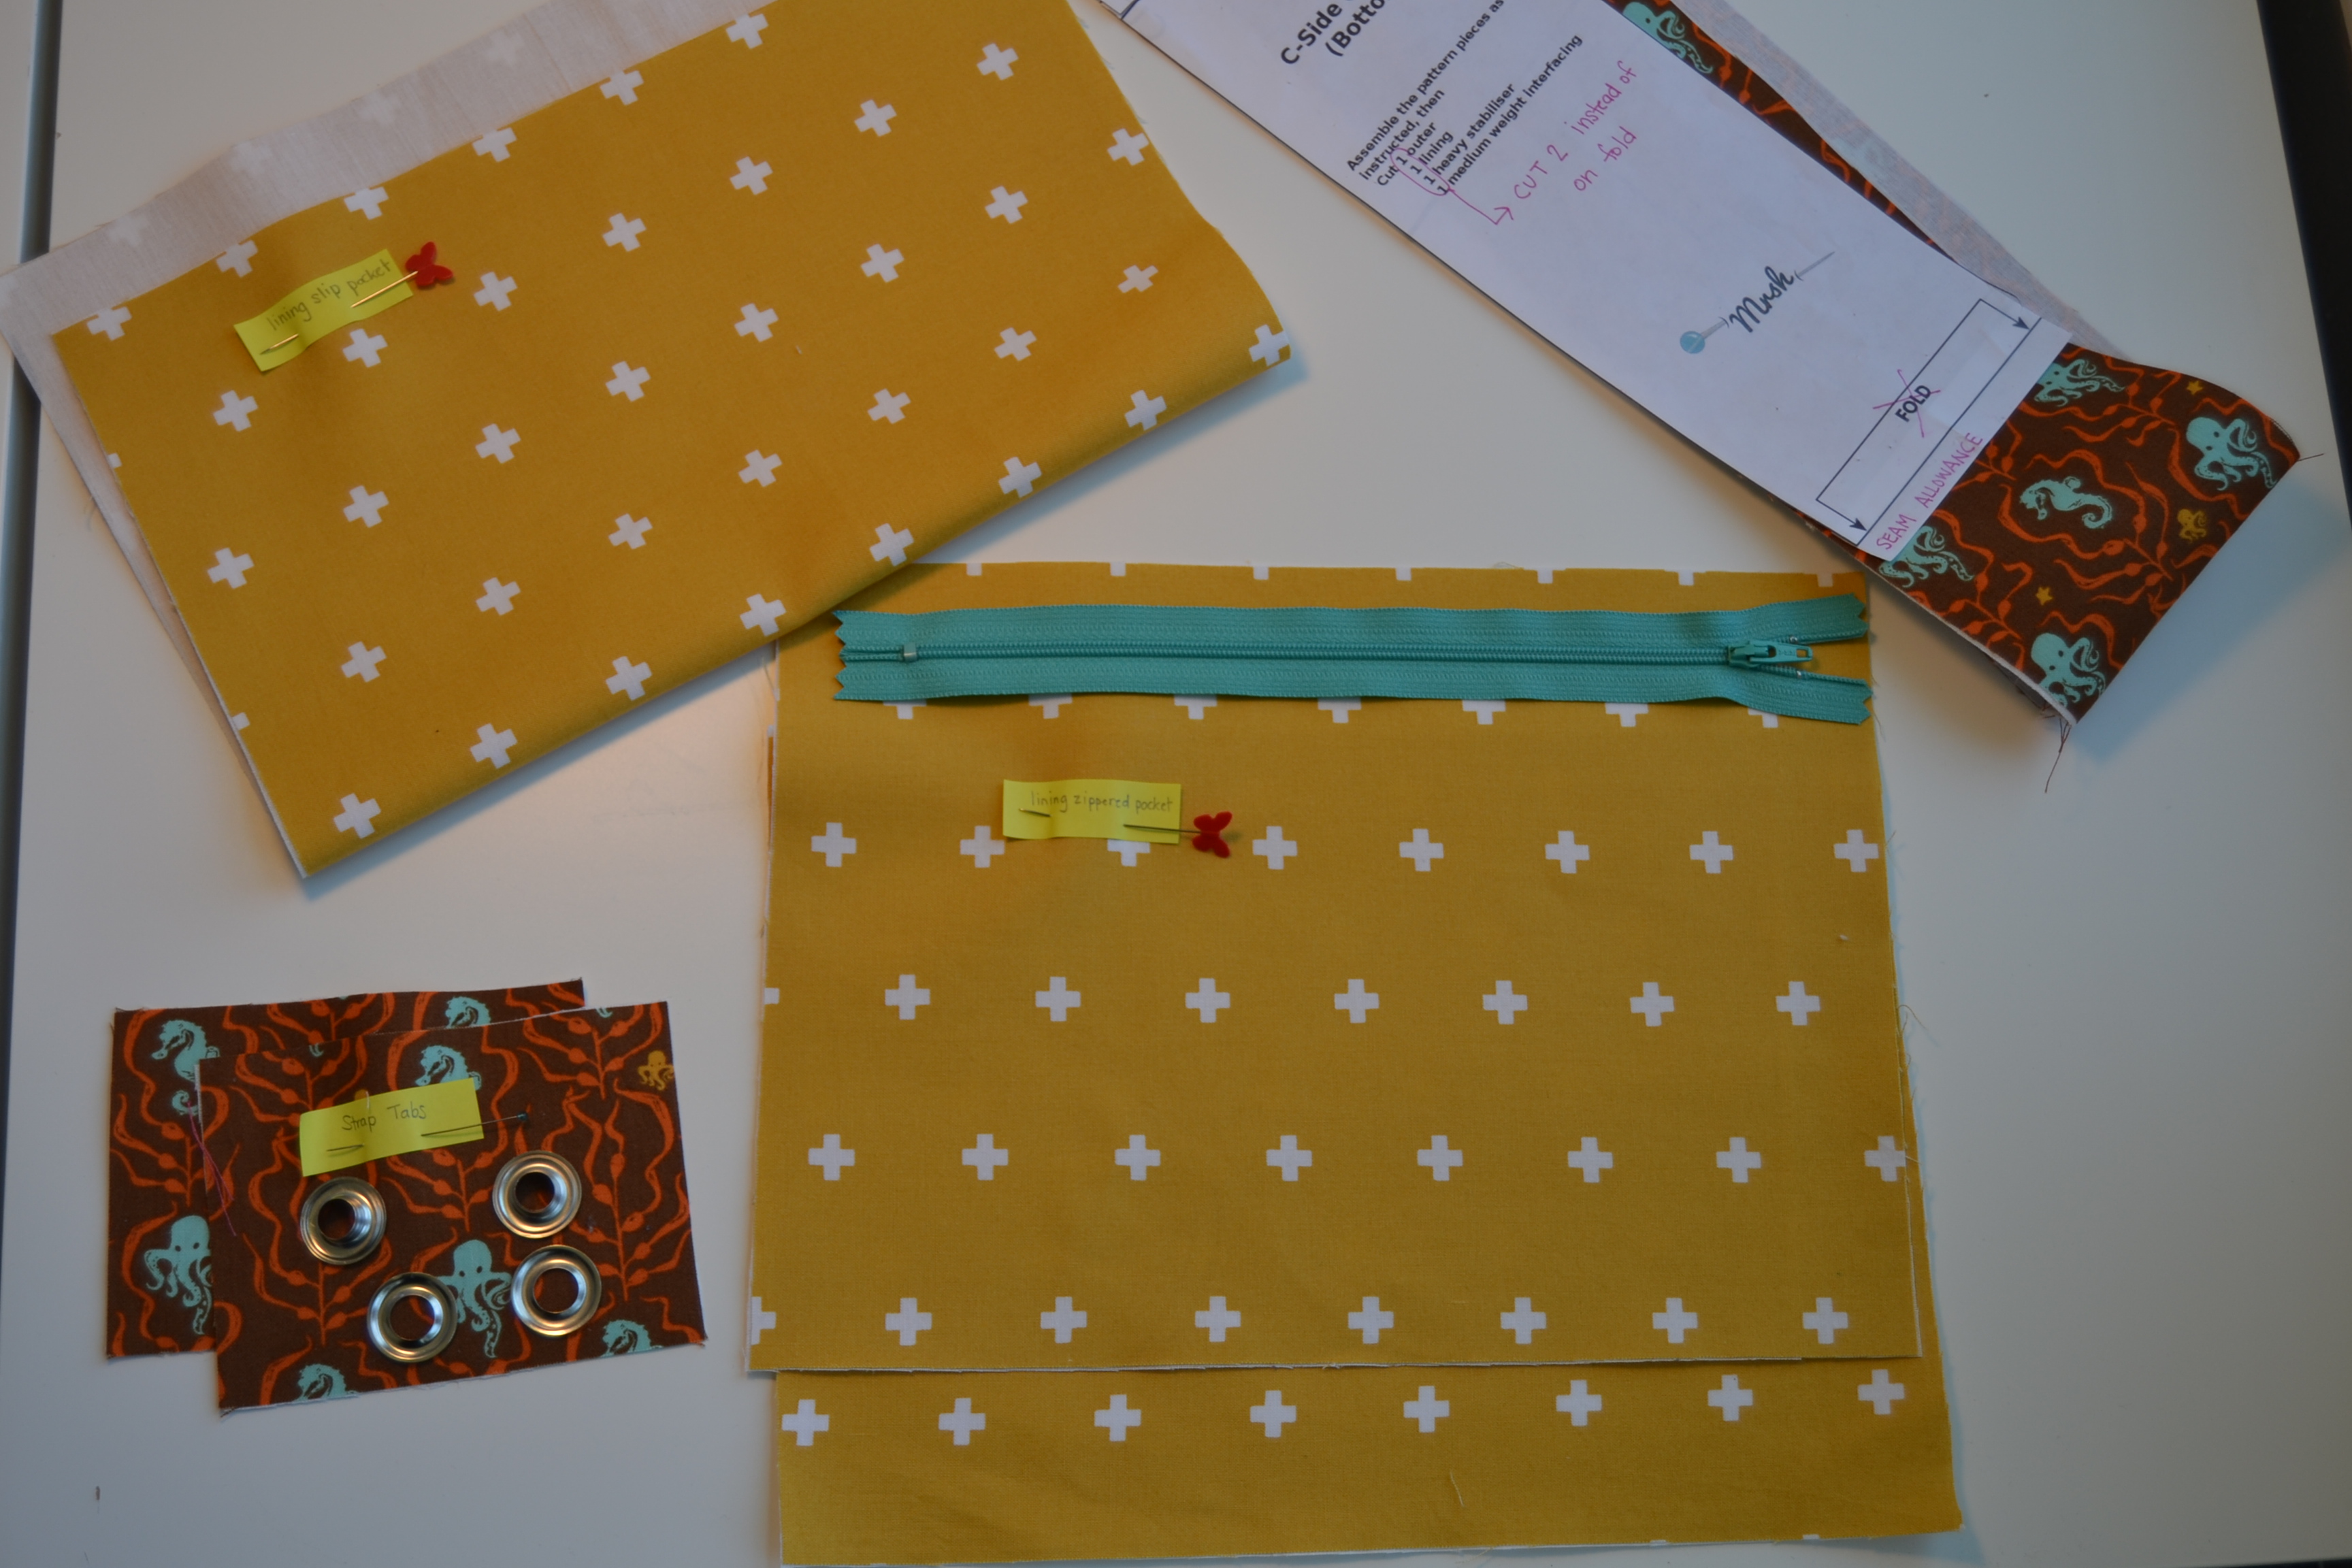
Some of the cutting that I did differently was the gusset, zipper pocket, and strap tabs. I had directional fabric for my lining gusset, so I wanted it to be right side up on both sides. I added a seam allowance to the bottom of the gusset pattern piece and cut 2 rather than cutting on the fold. Since I’m turning though the zippered pocket, I cut 2 zippered pocket pieces and used a larger zipper. I used a 9″ zipper and cut (2) fabric at 11″ W x 7″ H. The strap tabs I cut at 4 1/2″ W x 3 1/4″ H.
The lining slip pocket (H) will be cut at the same size as the pattern states (10″W x 14″H).
Zipper Bridge
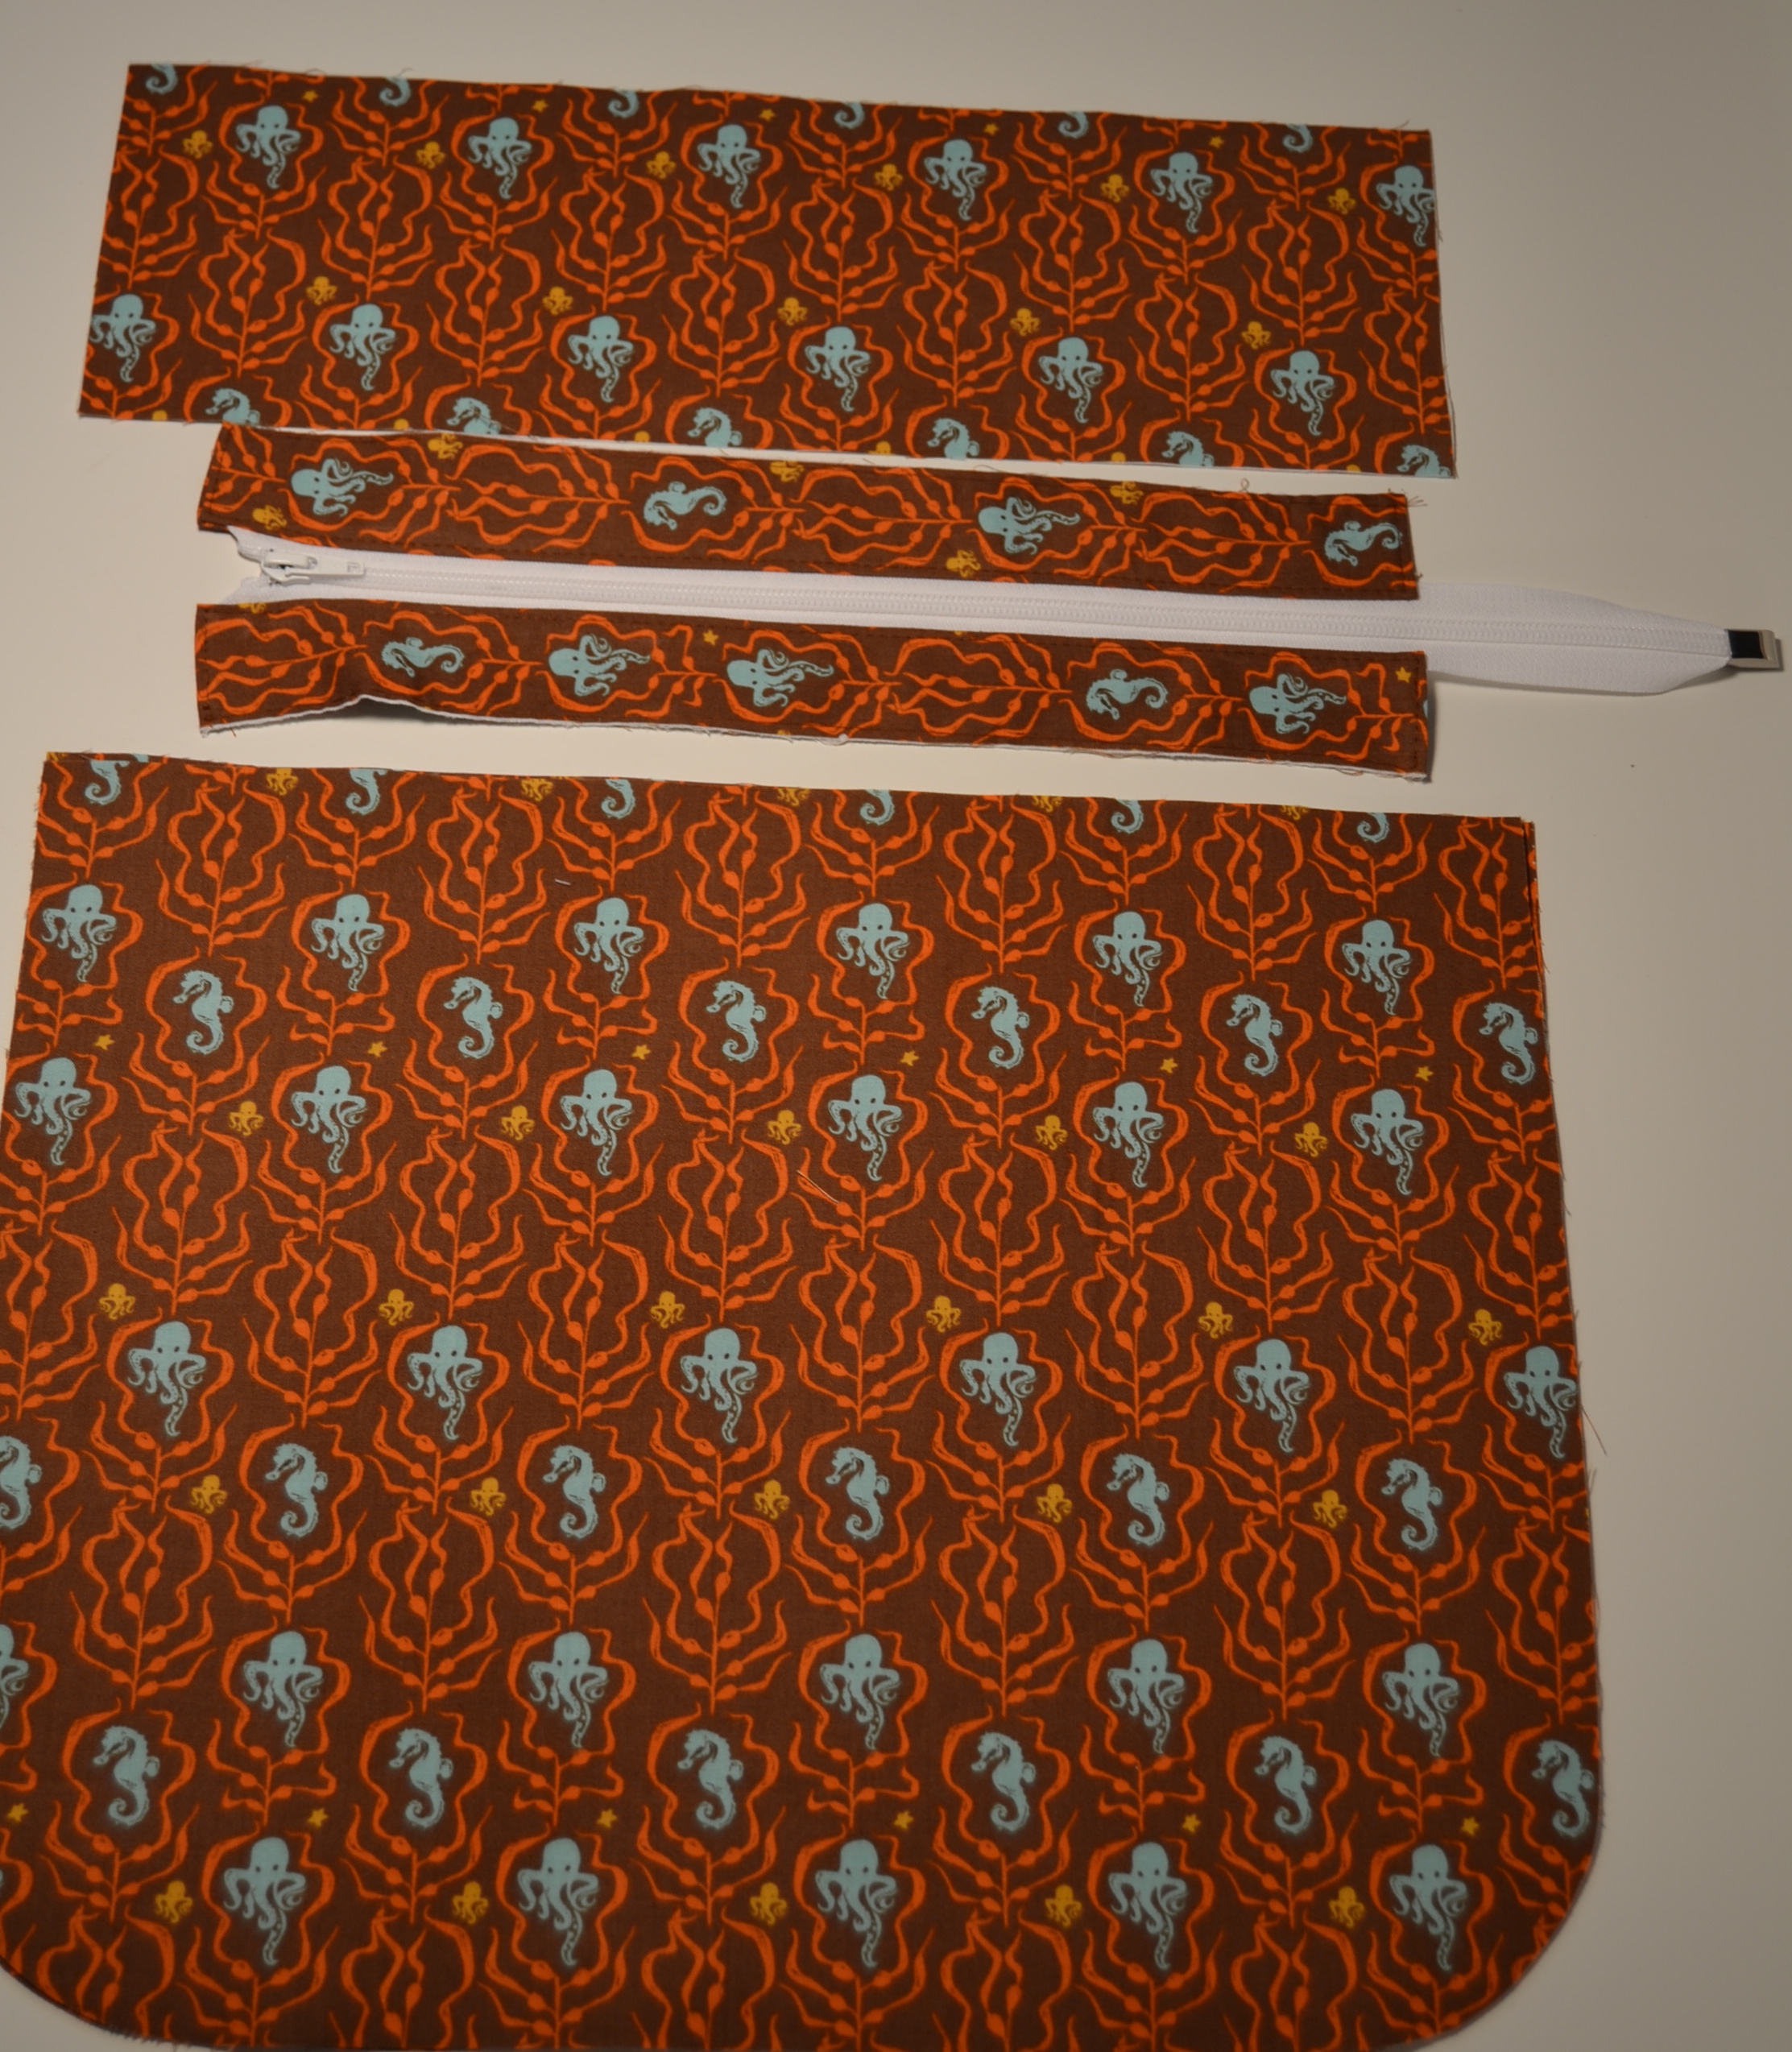
The lining consists of the Lining Main (E), the Zip Bridge (J), and the Lining Top (I).
The zipper bridge gets sandwiched between the lining top and the lining bottom. The lining top is deep enough to accommodate the grommet handles. If you were to leave off the grommet handles, you would want to make the lining top shallower so that you didn’t lose depth in your bag. (You’d have to make sure to add the same amount that you subtracted from the lining top to the lining bottom so that the lining’s entire height matched the exterior’s.) But I digress, let’s make the zipper bridge.
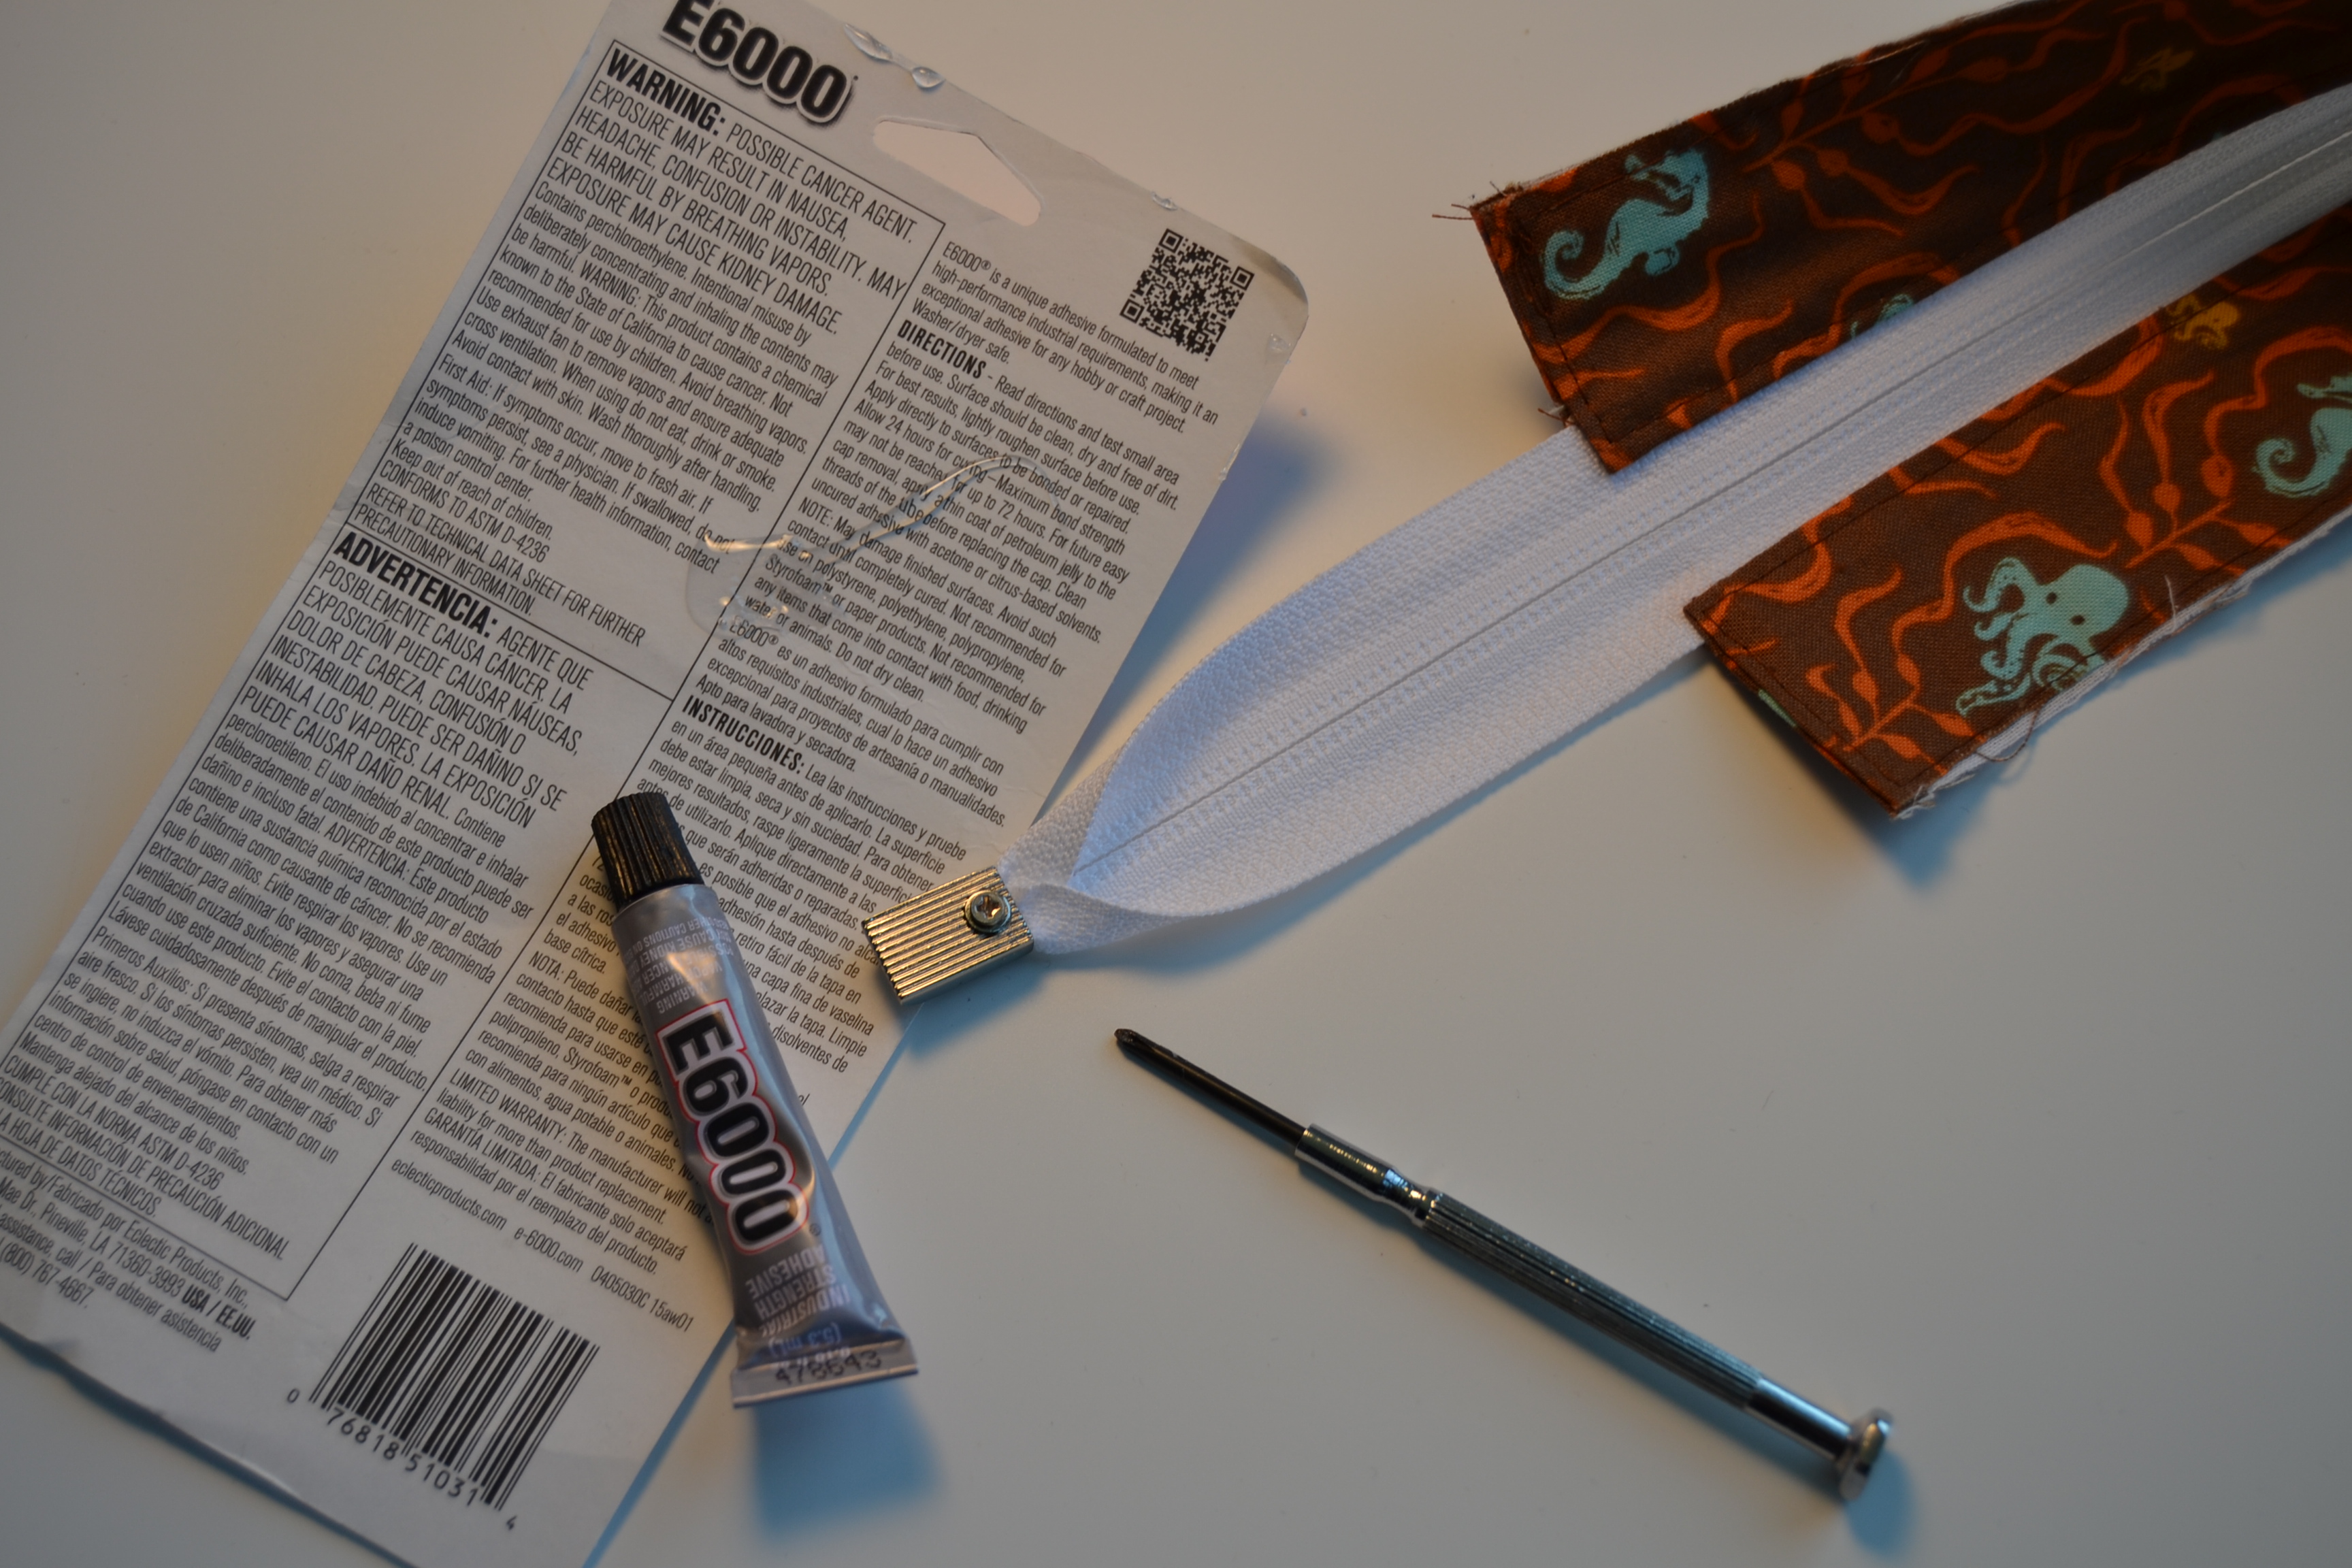
You should have a zipper, 4 rectangular pieces of interfaced fabric, and a zipper end. If you don’t have a metal zipper end, you’ll need to make a zipper tab. I have the glue and the screw driver for my metal zipper tab, so you won’t need those things if you’re making a fabric zipper tabs. You’ll notice that my zipper is too long and that it’s a separating zipper. That’s okay – I am going to cut it down so it doesn’t matter that it’s too long and is separating. I never have the right length zipper, so I usually just cut longer ones shorter.
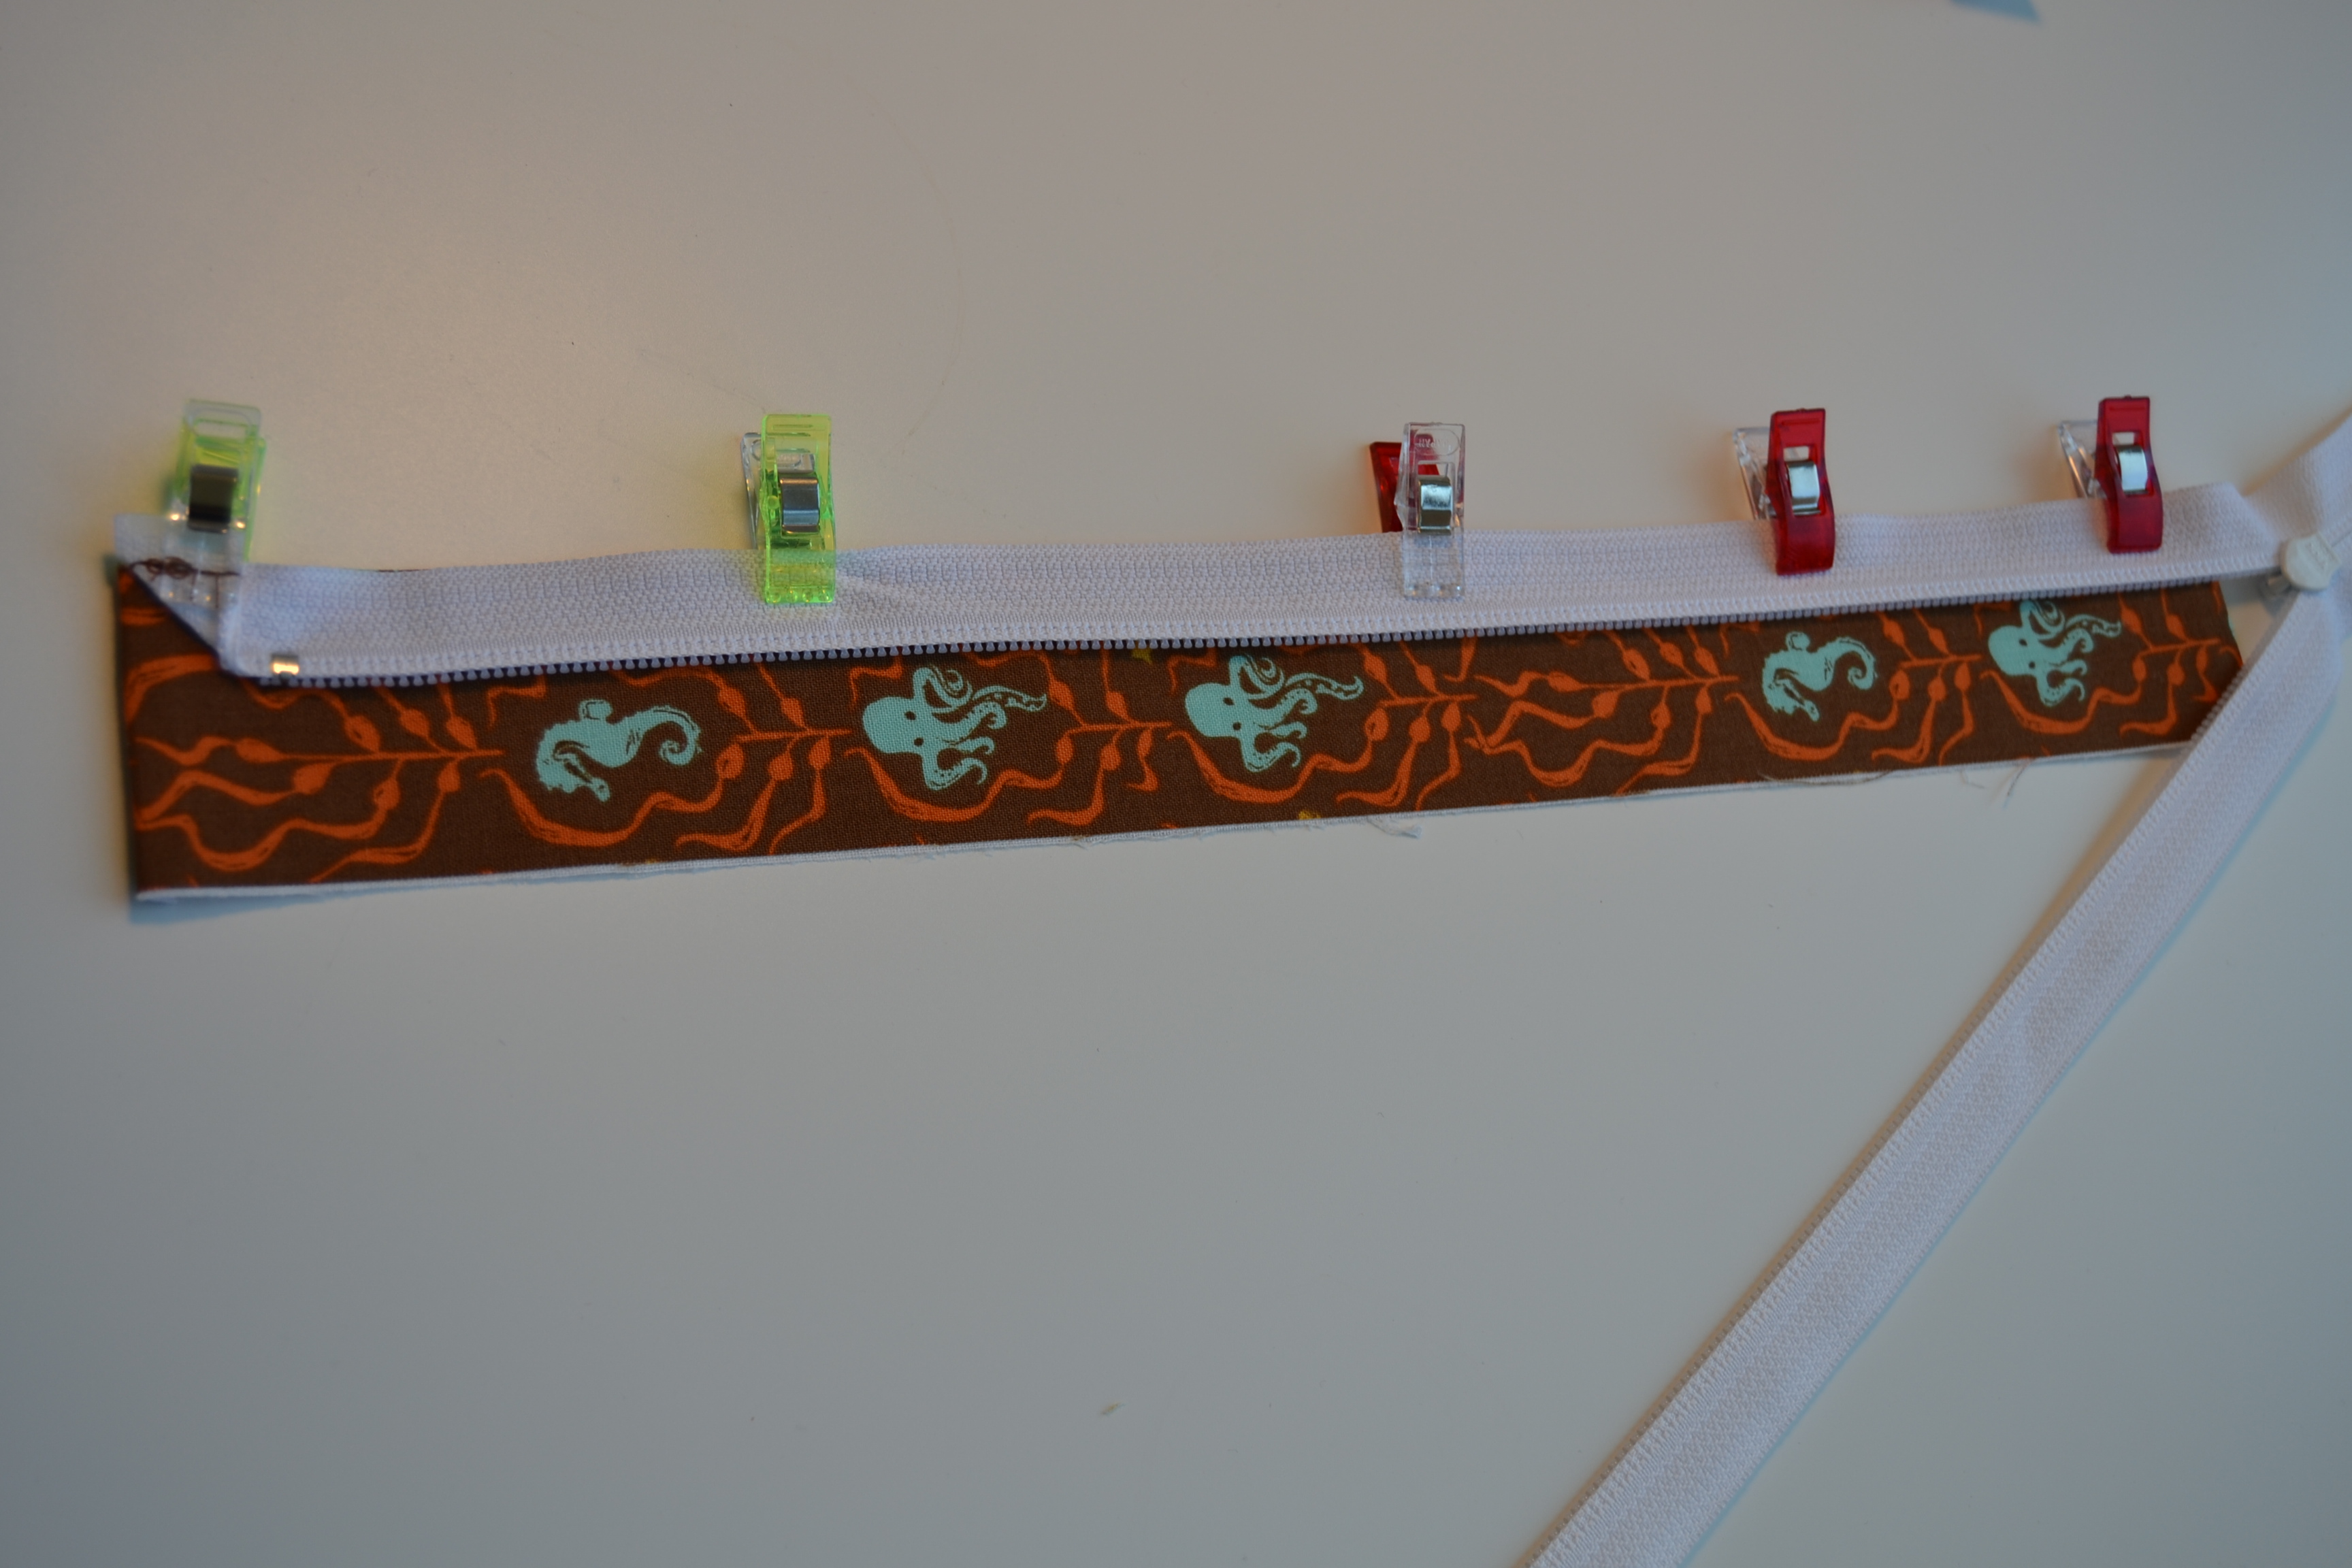
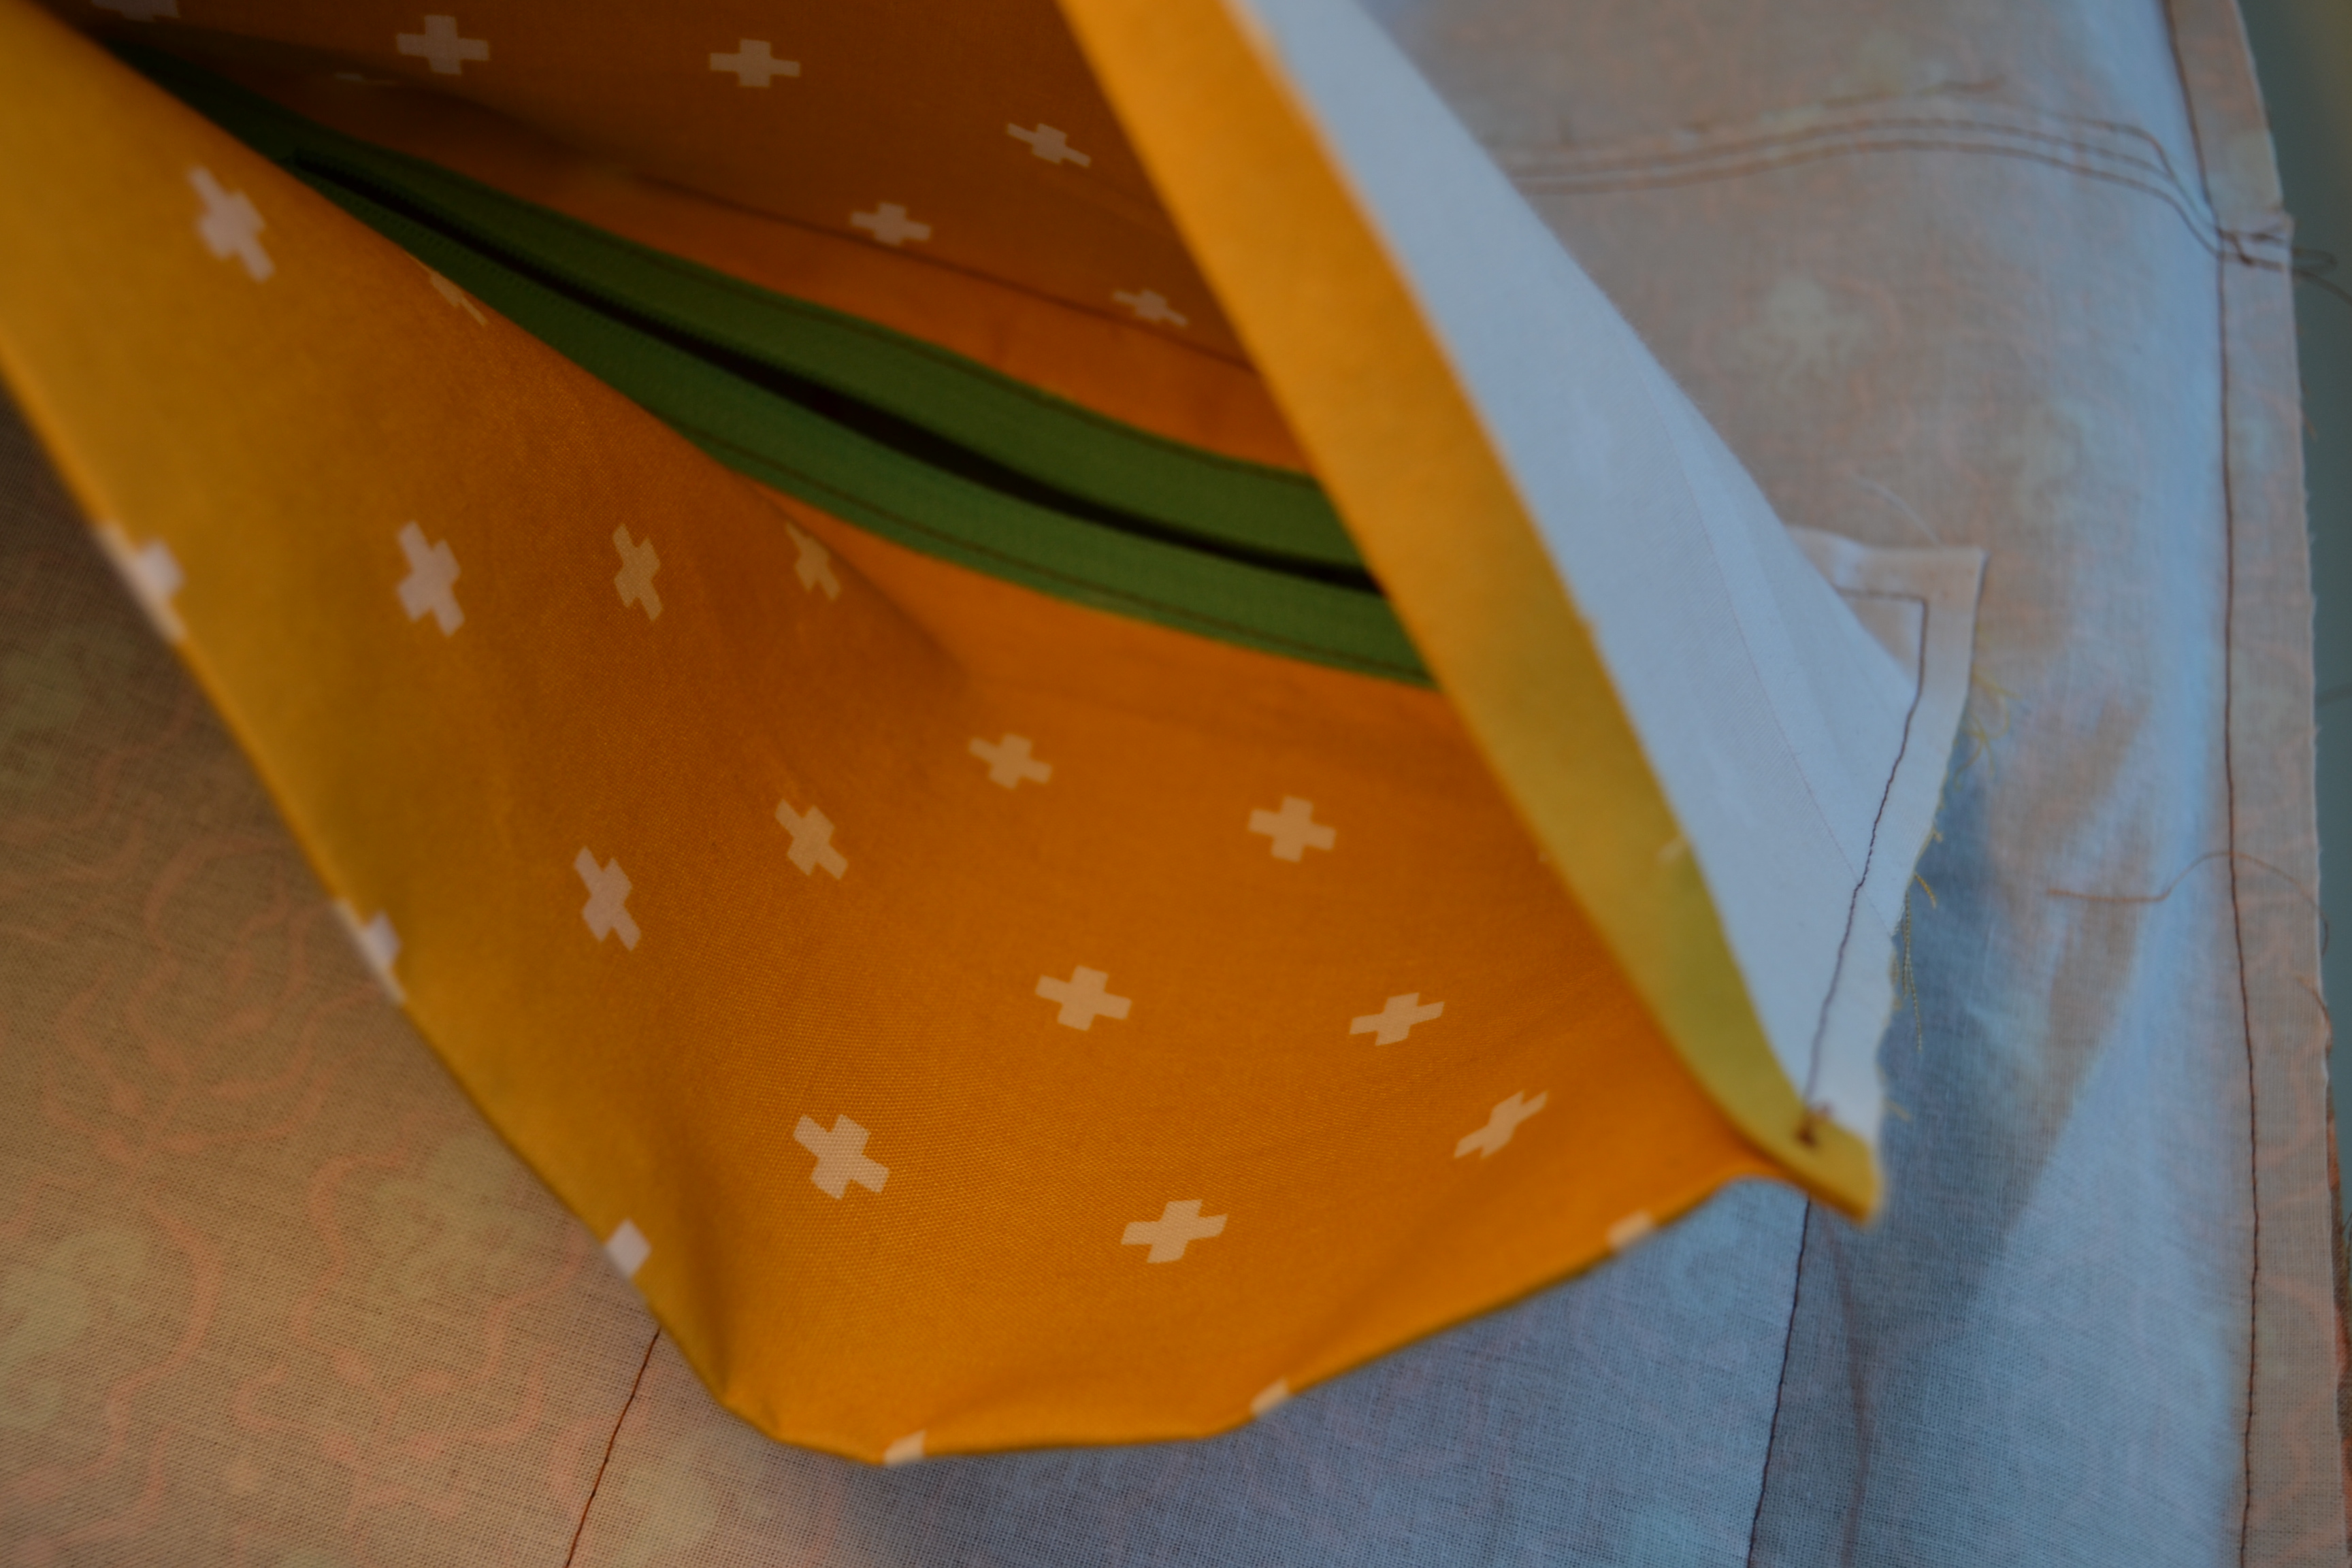
The first thing that I do to make my zipper bridge is turn the ends of my fabric under. I mark a 1/2″ line in from each of the short ends on the wrong side of all 4 fabric pieces and press to that line (the fabric will be turned under by 1/4″). When I turn my fabric under, I just do this step for all of the pieces in my bag that need finished ends. In this case, I did it for the: zippered pocket (only if you’re turning your bag through the pocket), the adjustable strap, the zipper bridge pieces, and the strap tabs.
After your zipper bridge ends are turned under, we’re going to prepare our zipper. Sew the zipper to itself at a 45º angle on both sides at the beginning of your zipper tape. This is so that the zipper has a clean line going into the fabric and isn’t just kind of plonked in.
The zipper will be sandwiched between both pieces of fabric on each side but we’ll baste one piece of fabric first instead of trying to sew through all 3 layers at once. This is so that the layers don’t shift and you get a nice, clean seam.The tip of the angle on your zipper should just touch the corner of the zipper bridge fabric (upper left in picture where the first neon clip is). Make sure you sew with your zipper on the top side. If you sew with the fabric side up, it’s not as thick as the zipper so it won’t feed evenly.
At an 1/8″ seam allowance (SA), baste the top piece of fabric right side together (RST) with the zipper. Start and stop your sewing 1/8″ in from the short ends. This will start the seam within the turned fabric and won’t take the stitching all the way to the end so that it gives a clean edge on your zipper bridge.
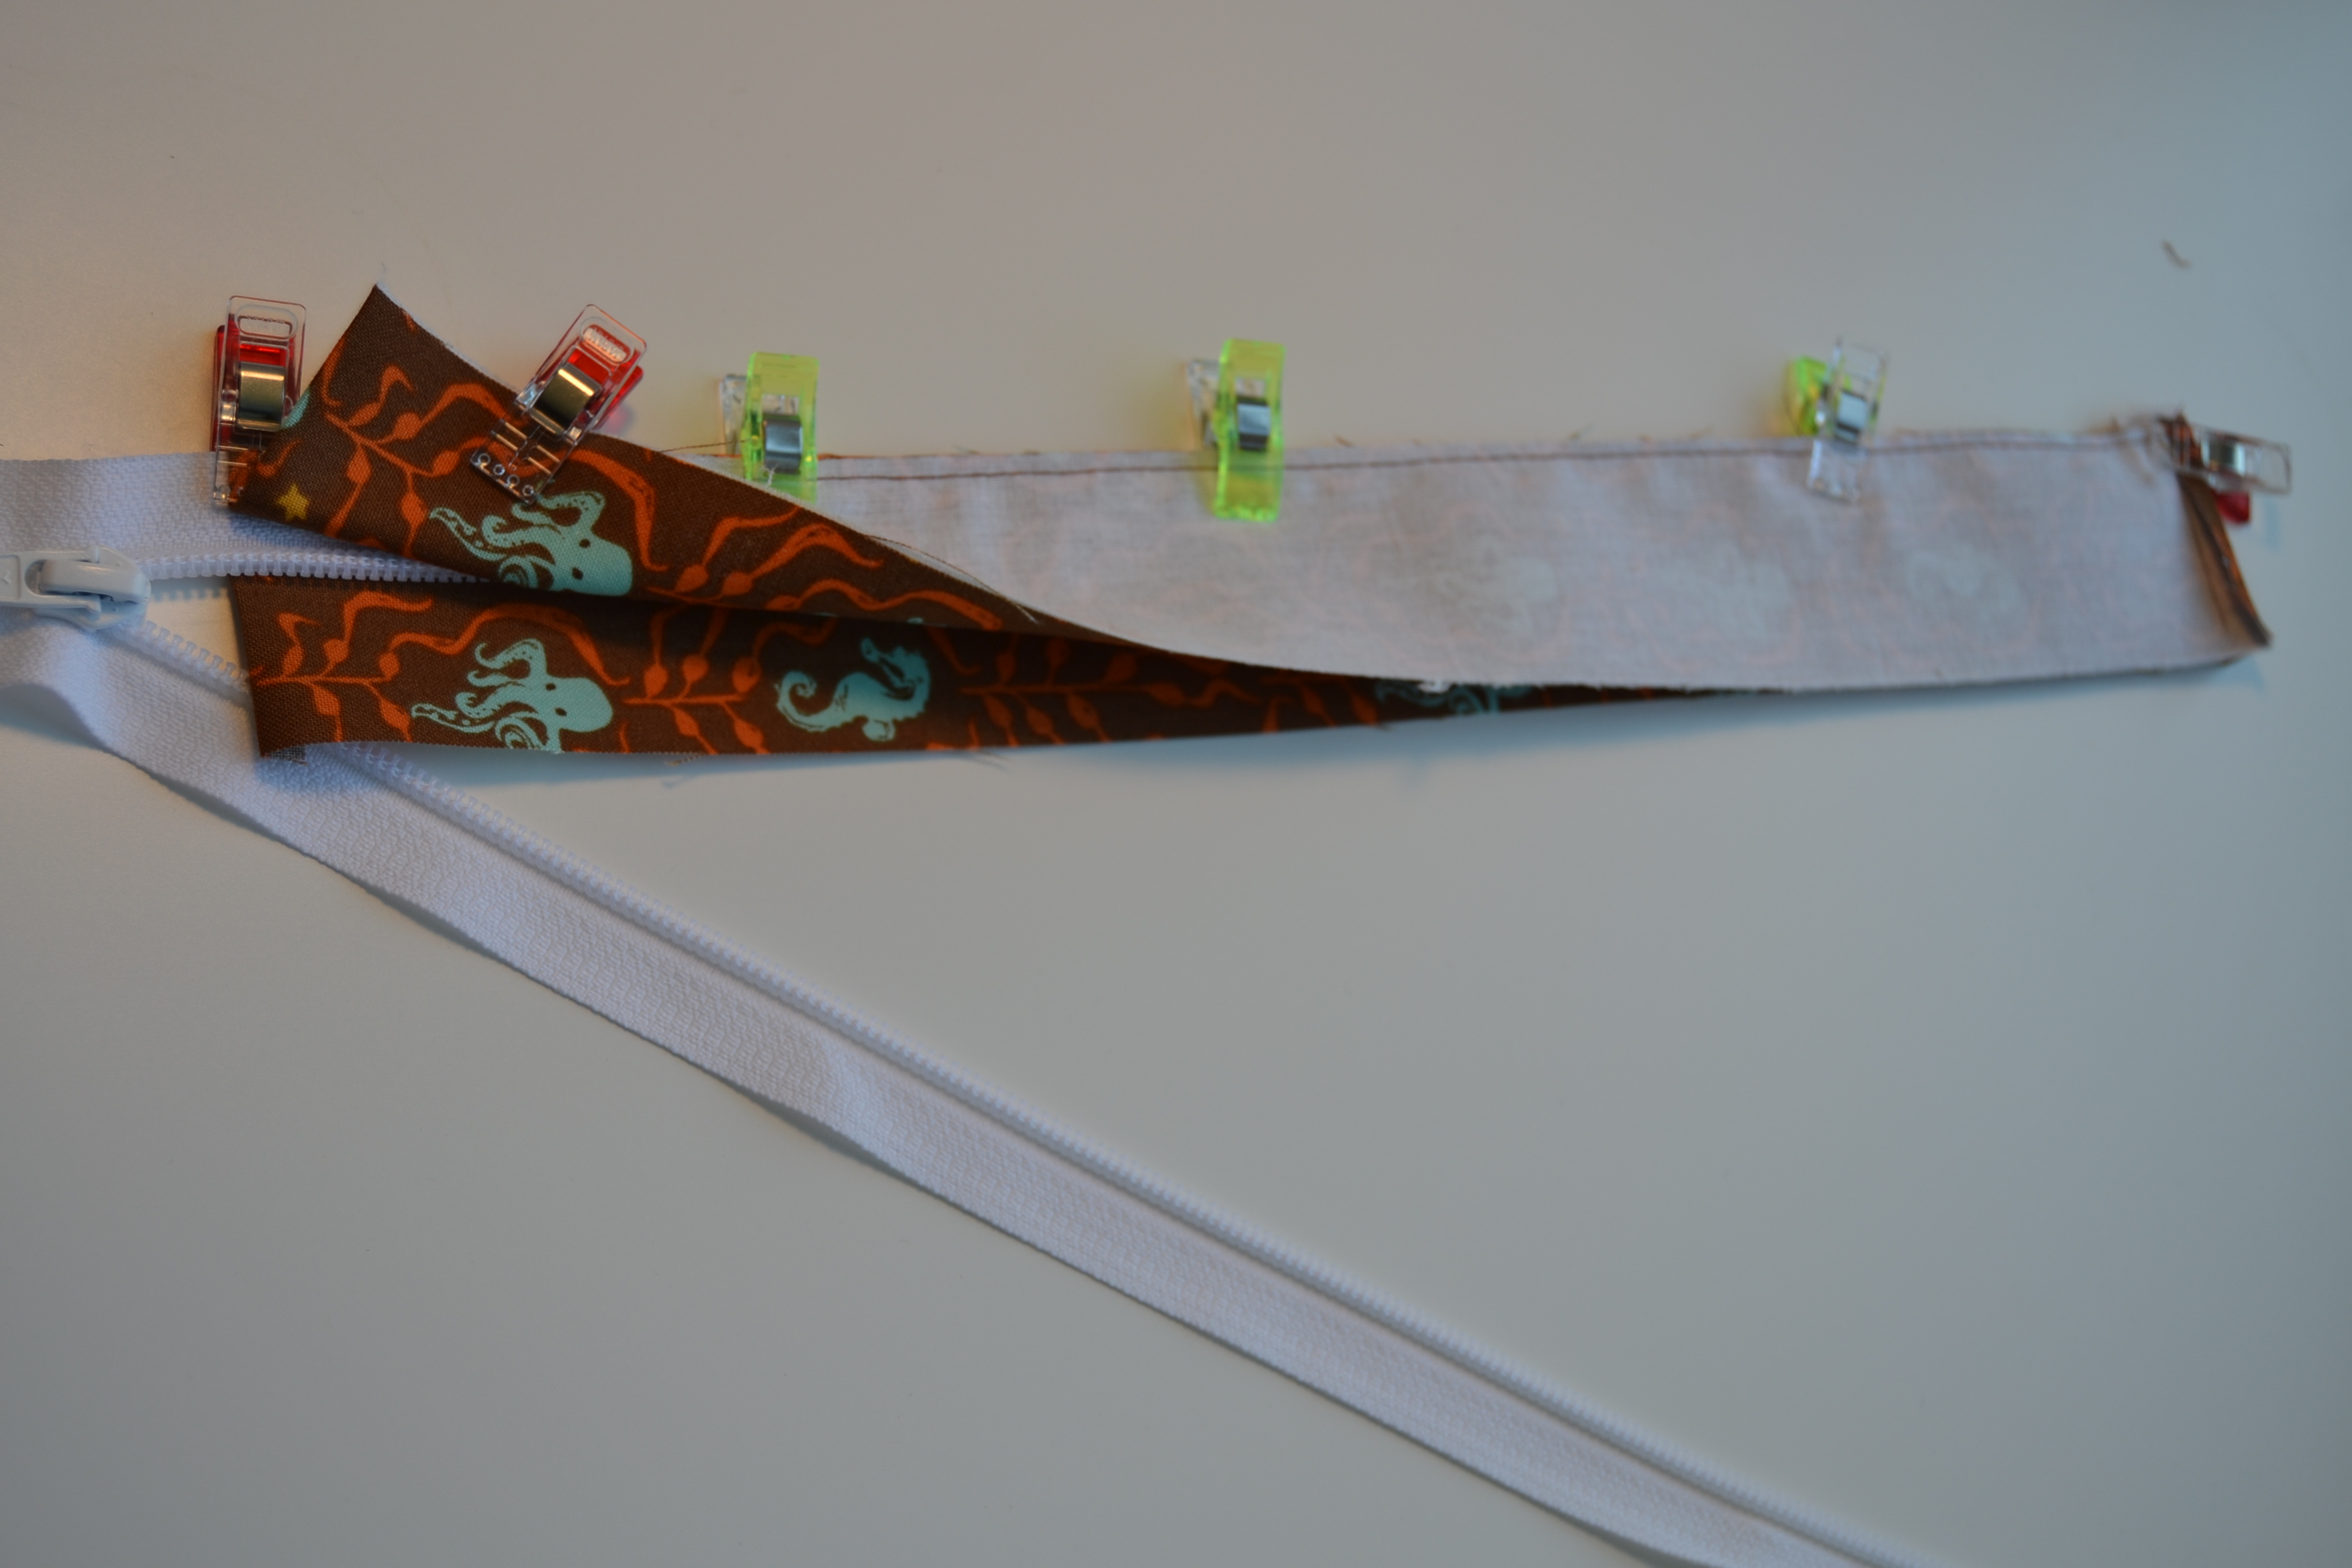
After you’ve basted the top layer of fabric to your zipper, we’re going to sew all 3 layers together at a 1/4″ SA. Align the bottom fabric RST with the bottom of the zipper tape. Make sure your top and bottom fabric layers are the same length. If they’re not, adjust the length of the bottom fabric by changing the width of the turned under fabric ends so that it’s the same length as the top fabric. Make sure you put on your zipper foot to sew the zipper at 1/4″ SA so that the zipper teeth don’t push on your presser foot and give you a wobbly seam.
After your 3 layers are sewn together, pull the fabric away from the zipper tape and pin the fabric layers wrong side together. You will have to get a little bossy with the fabric so that all of the edges are aligned properly. I clip the inner corners that meet the zipper because they’re a little thick and need to be just right so that no raw edges show.
After you’ve pinned your zipper panel, we’ll topstich the layers together. There will be one raw edge that will get sandwiched in between the top and bottom lining layers. Baste stitch the raw edge closed.
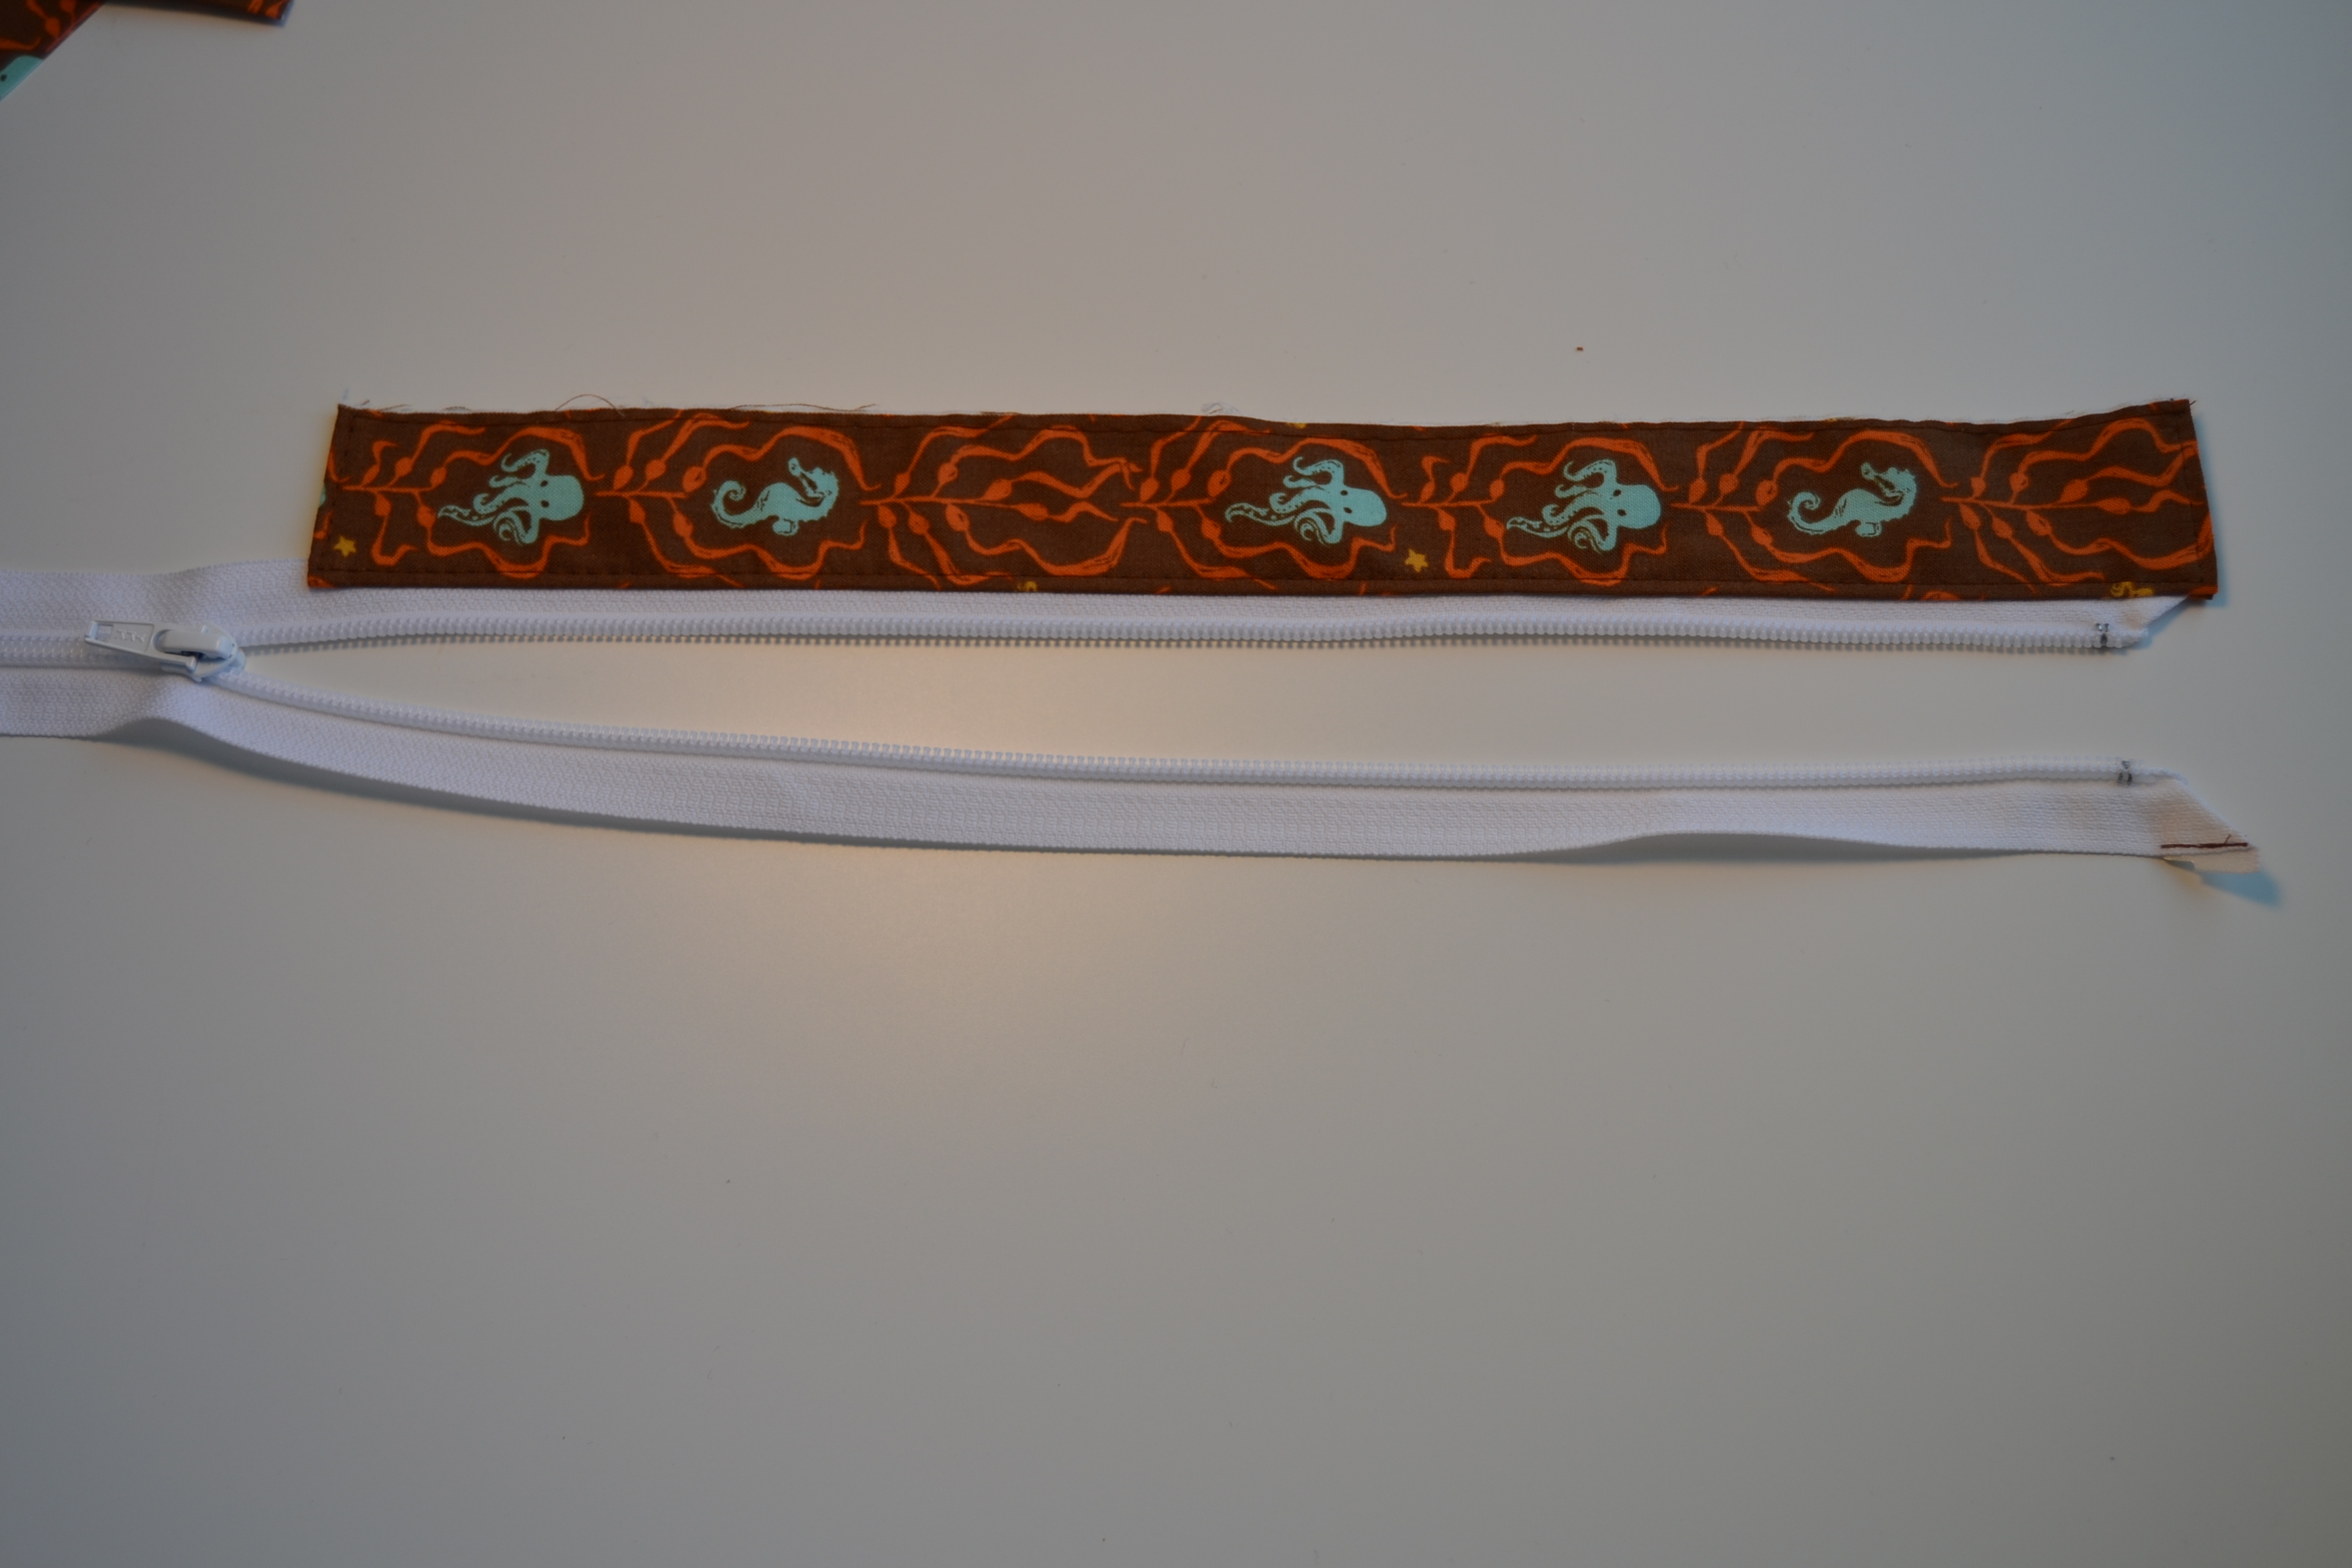
Repeat the above steps for the other side of your zipper bridge. You might find it easier to do the same steps for both sides at the same time. I just did one side at a time so that it would be less confusing in the pictures.
To finish your zipper bridge, we’ll need to finish the end of the zipper. If necessary, cut your zipper to the proper length. I cut mine with a pinking blade and treat it with seam sealant to prevent fraying.
Fold the edges of your zipper tape in towards the back of your zipper. I dab a bit of glue on the ends of mine and shove it into the metal zipper end. And then I dip my screw into the glue that splooged everywhere after I opened the tube and screw it into place.
Phew! The zipper bridge is finished!
I went ahead and basted mine at an 1/8″ SA to my lining tops so that I could just set it aside and deal with less pieces.
After you’ve finished your lining pockets, you can attach the lining top to the lining main.
Turning Through the Zippered Pocket
To prepare the zippered pocket to turn your bag through, we’ll need finished edges on the bottom of the pocket, so that we can have a clean seam. Make a mark 1″ in, on the wrong side, from the long bottom edge. Press your fabric to the mark. This will turn your fabric under by a 1/2″.
Tip: You’ll notice in my picture that my interfacing on my zippered pockets is pieced. I leave a basket of SF101 scraps on my cutting table and use them for lining pockets and straps so that I don’t waste interfacing.
For all of my zippered pockets, I like to have an inch on each side of the zipper. So I mark 1″ in from the sides and the top and make a 1/2″ zipper box.
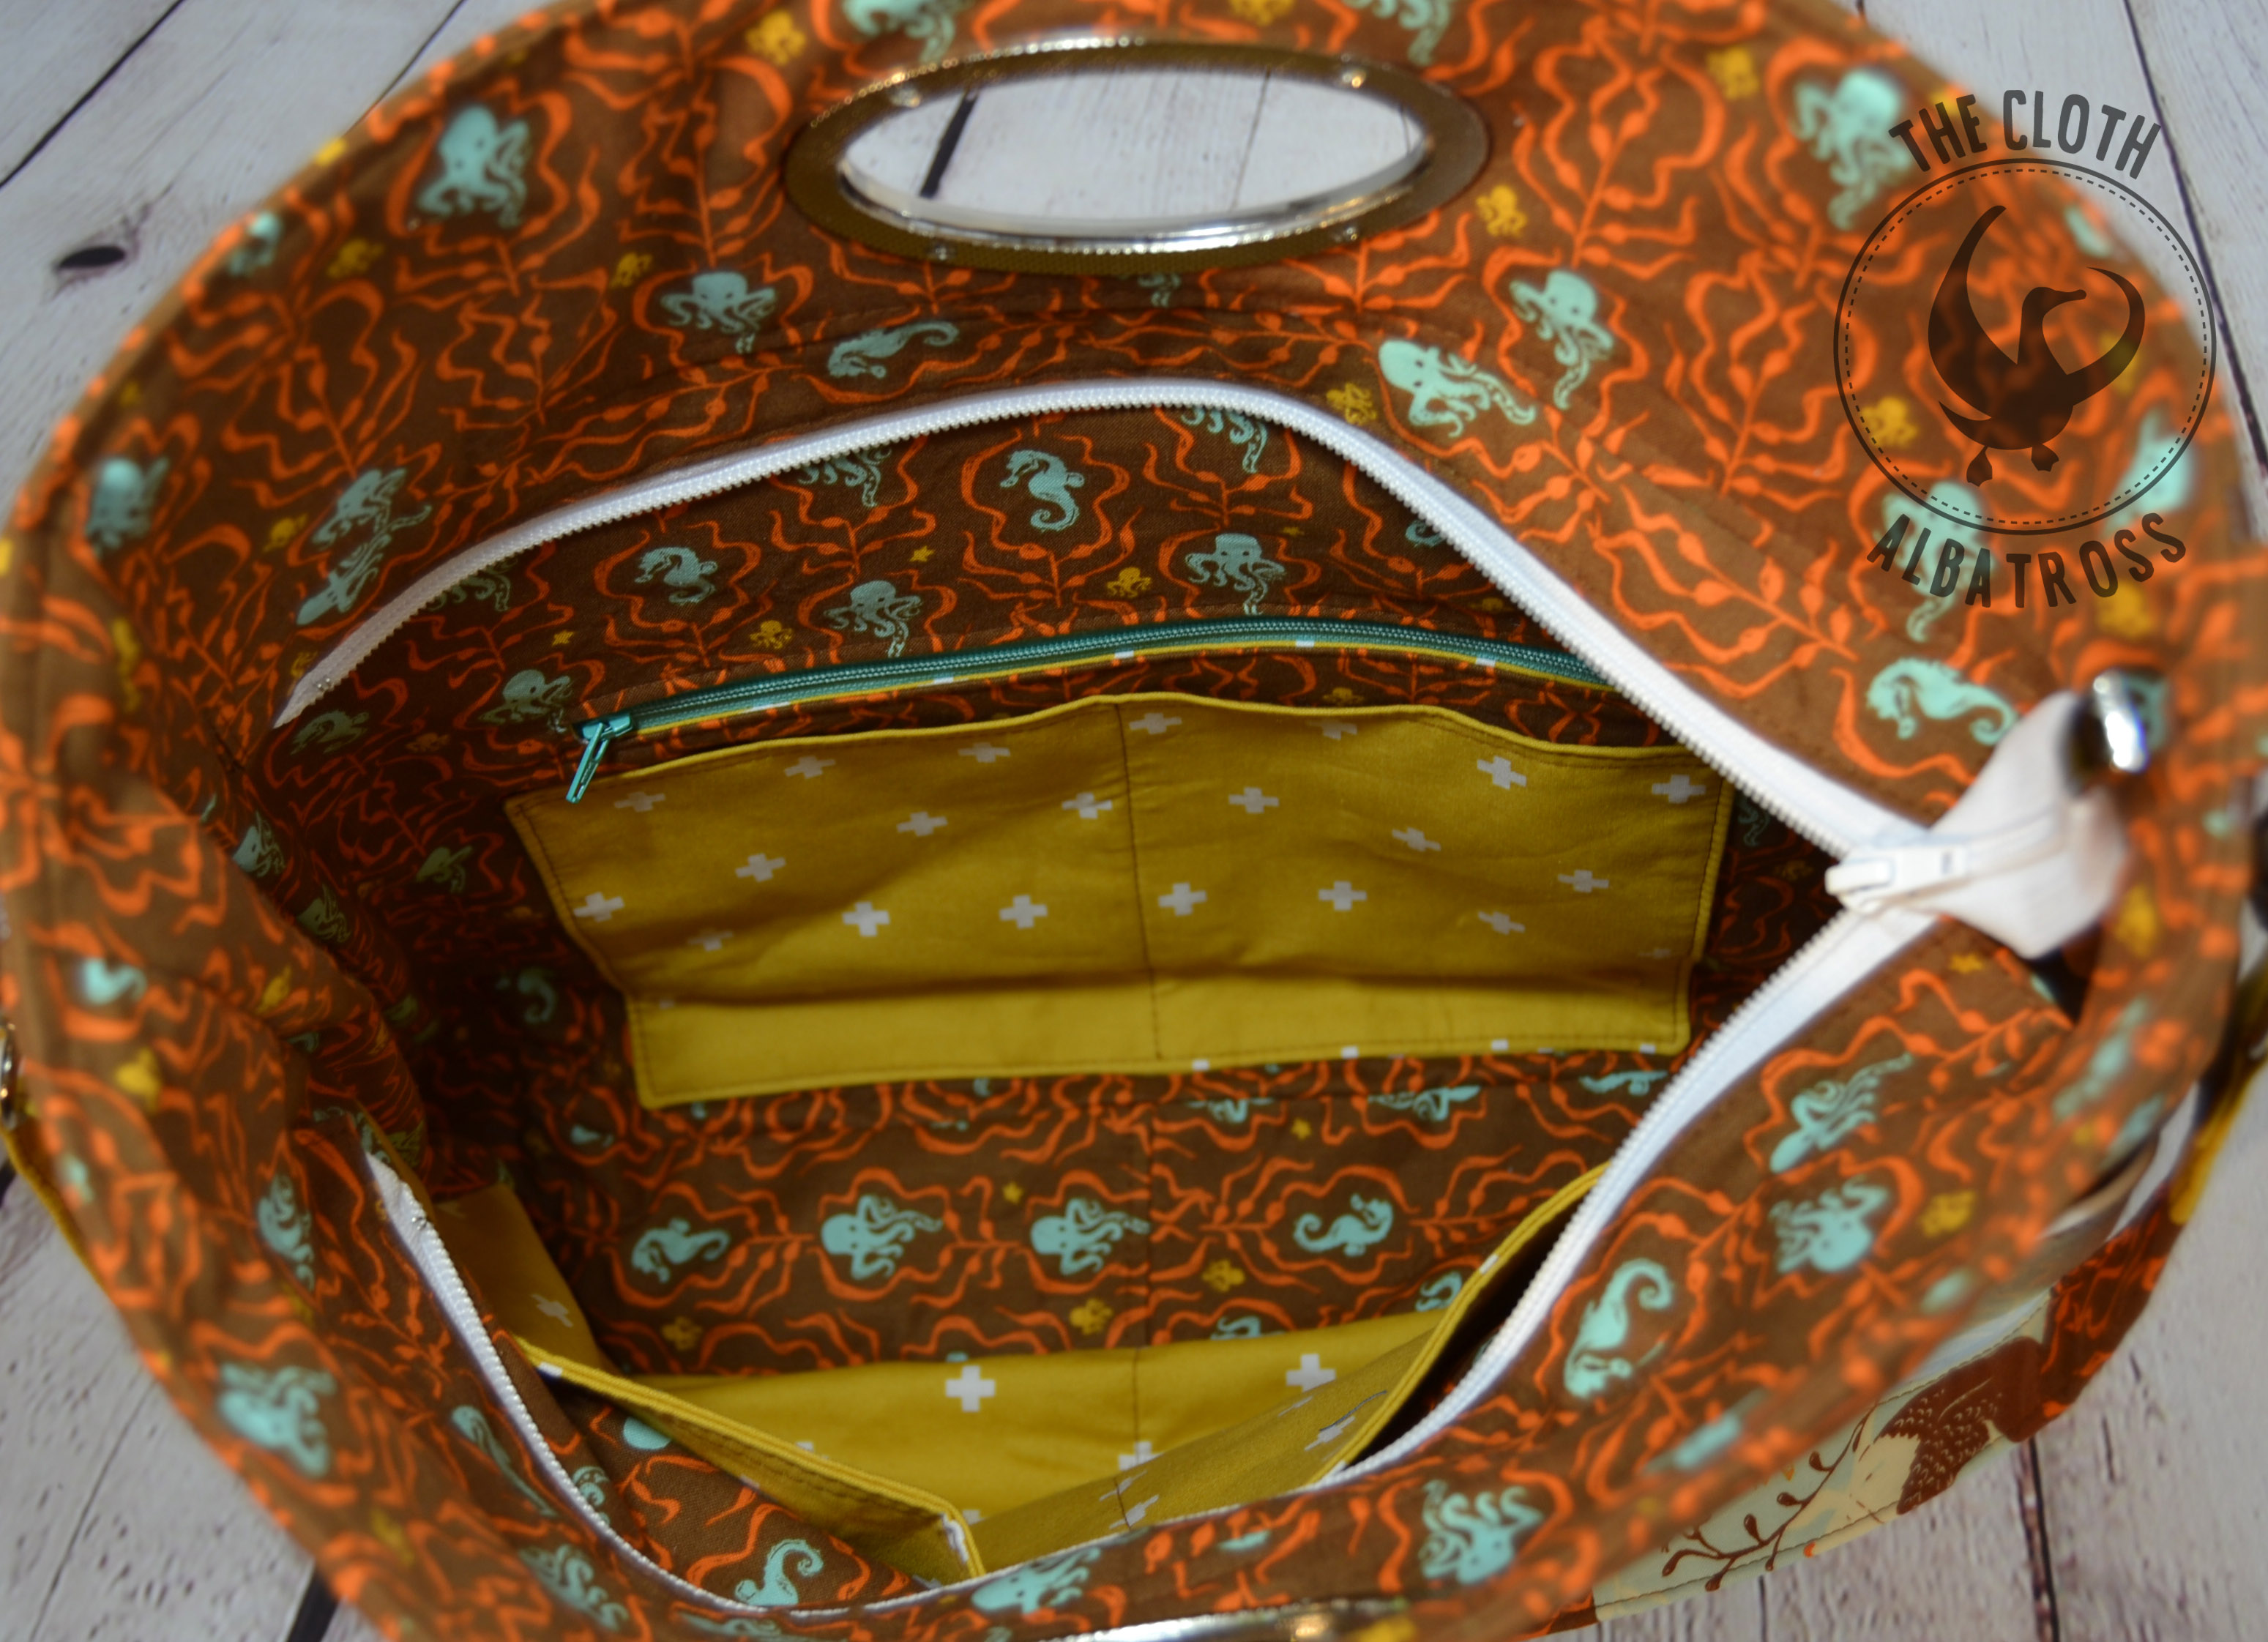
I placed my zippered pocket piece centered and 3.5″ down from the top of the main lining piece.
After I’ve sewn and slit open my zipper box, I press the seams open before turning. It’s easier to get a clean edge that way.
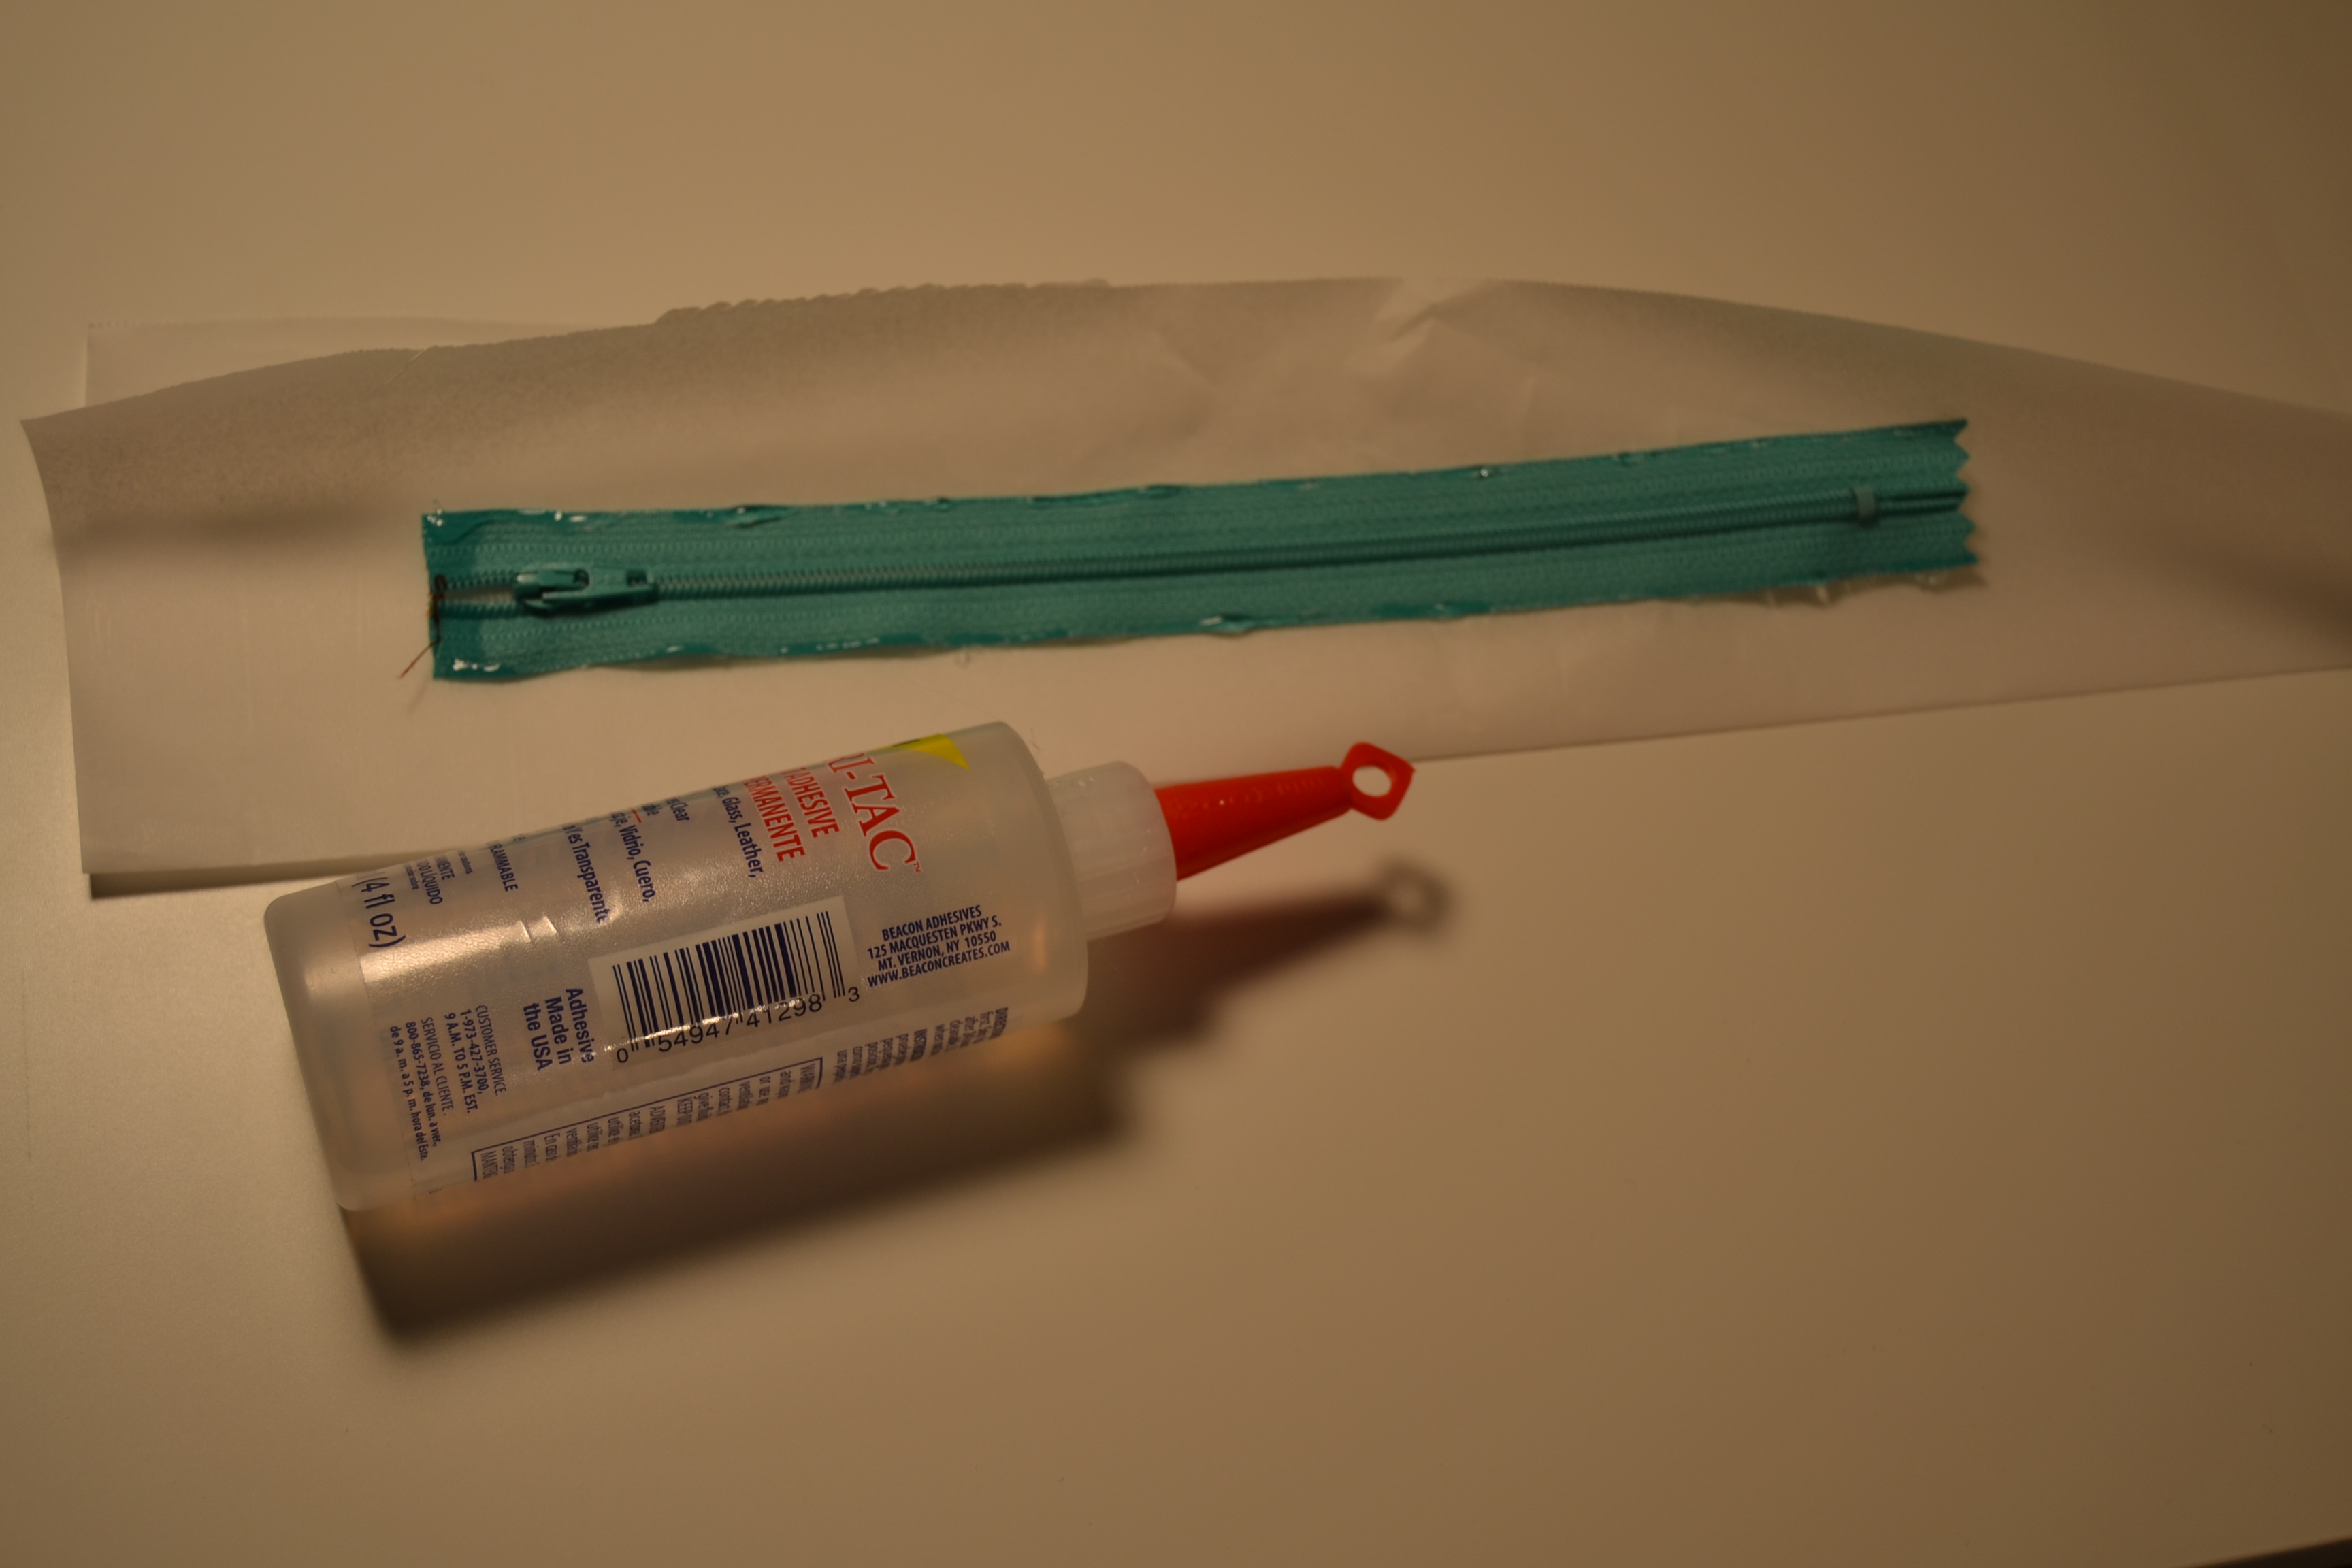
To position my zipper, I take a piece of parchment paper and put a bit of fabric glue along the very edges of the zipper tape.
Then I lay the lining panel right over top of it.
Then I press it with a hot, dry iron and make sure not to get the iron over the zipper teeth. I press from the back, over the parchment paper so that I don’t get any glue on my iron.
After you’ve sewn your zipper in, take your other zipper lining piece and pin it RST with the sewn in piece.
We’re only going to sew 3 edges of the zippered pocket pieces together. The bottom edge will be left open for turning the bag. I find it easier to sew from the side of the pocket that touches the bag panel. You just have to push the panel out of the way.
Begin sewing 1/8″ in from one bottom corner and stop sewing an 1/8″ in from the opposite bottom corner.
It’s very important to leave your zipper pocket OPEN. You will be turning the bag through this hole.
Once your bag is finished, you can turn it through the zipper pocket by reaching your hand up through the bottom and pulling the bag through the zippered opening all the way down through the pocket.
Once your bag is turned, clip the bottom edges of your zippered pocket together and sew right along the bottom edge to fully enclose the zippered pocket.
After the bottom edge is sewn, push it into the pocket and topstitch your bag. By turning your bag through the zippered pocket, you don’t have any exposed seams in the lining.
Grommet Connector Tabs
I like the idea of grommet connectors for this bag because I think that they go well with the grommet handles. They’re also cheaper than triangle rings (although, I do love triangle rings). To begin, I cut my tabs slightly shorter and a bit wider than the pattern calls for. I cut them at 4 1/2″ W x 3 1/4″ H. The extra width accounts for the diameter of the grommets that I used and the shorter height is because the tabs in the pattern get folded over the triangle rings, and we won’t be folding our tabs.
Finish your strap tabs according to the pattern. (They will just be a slightly different size but they are finished the same way.)
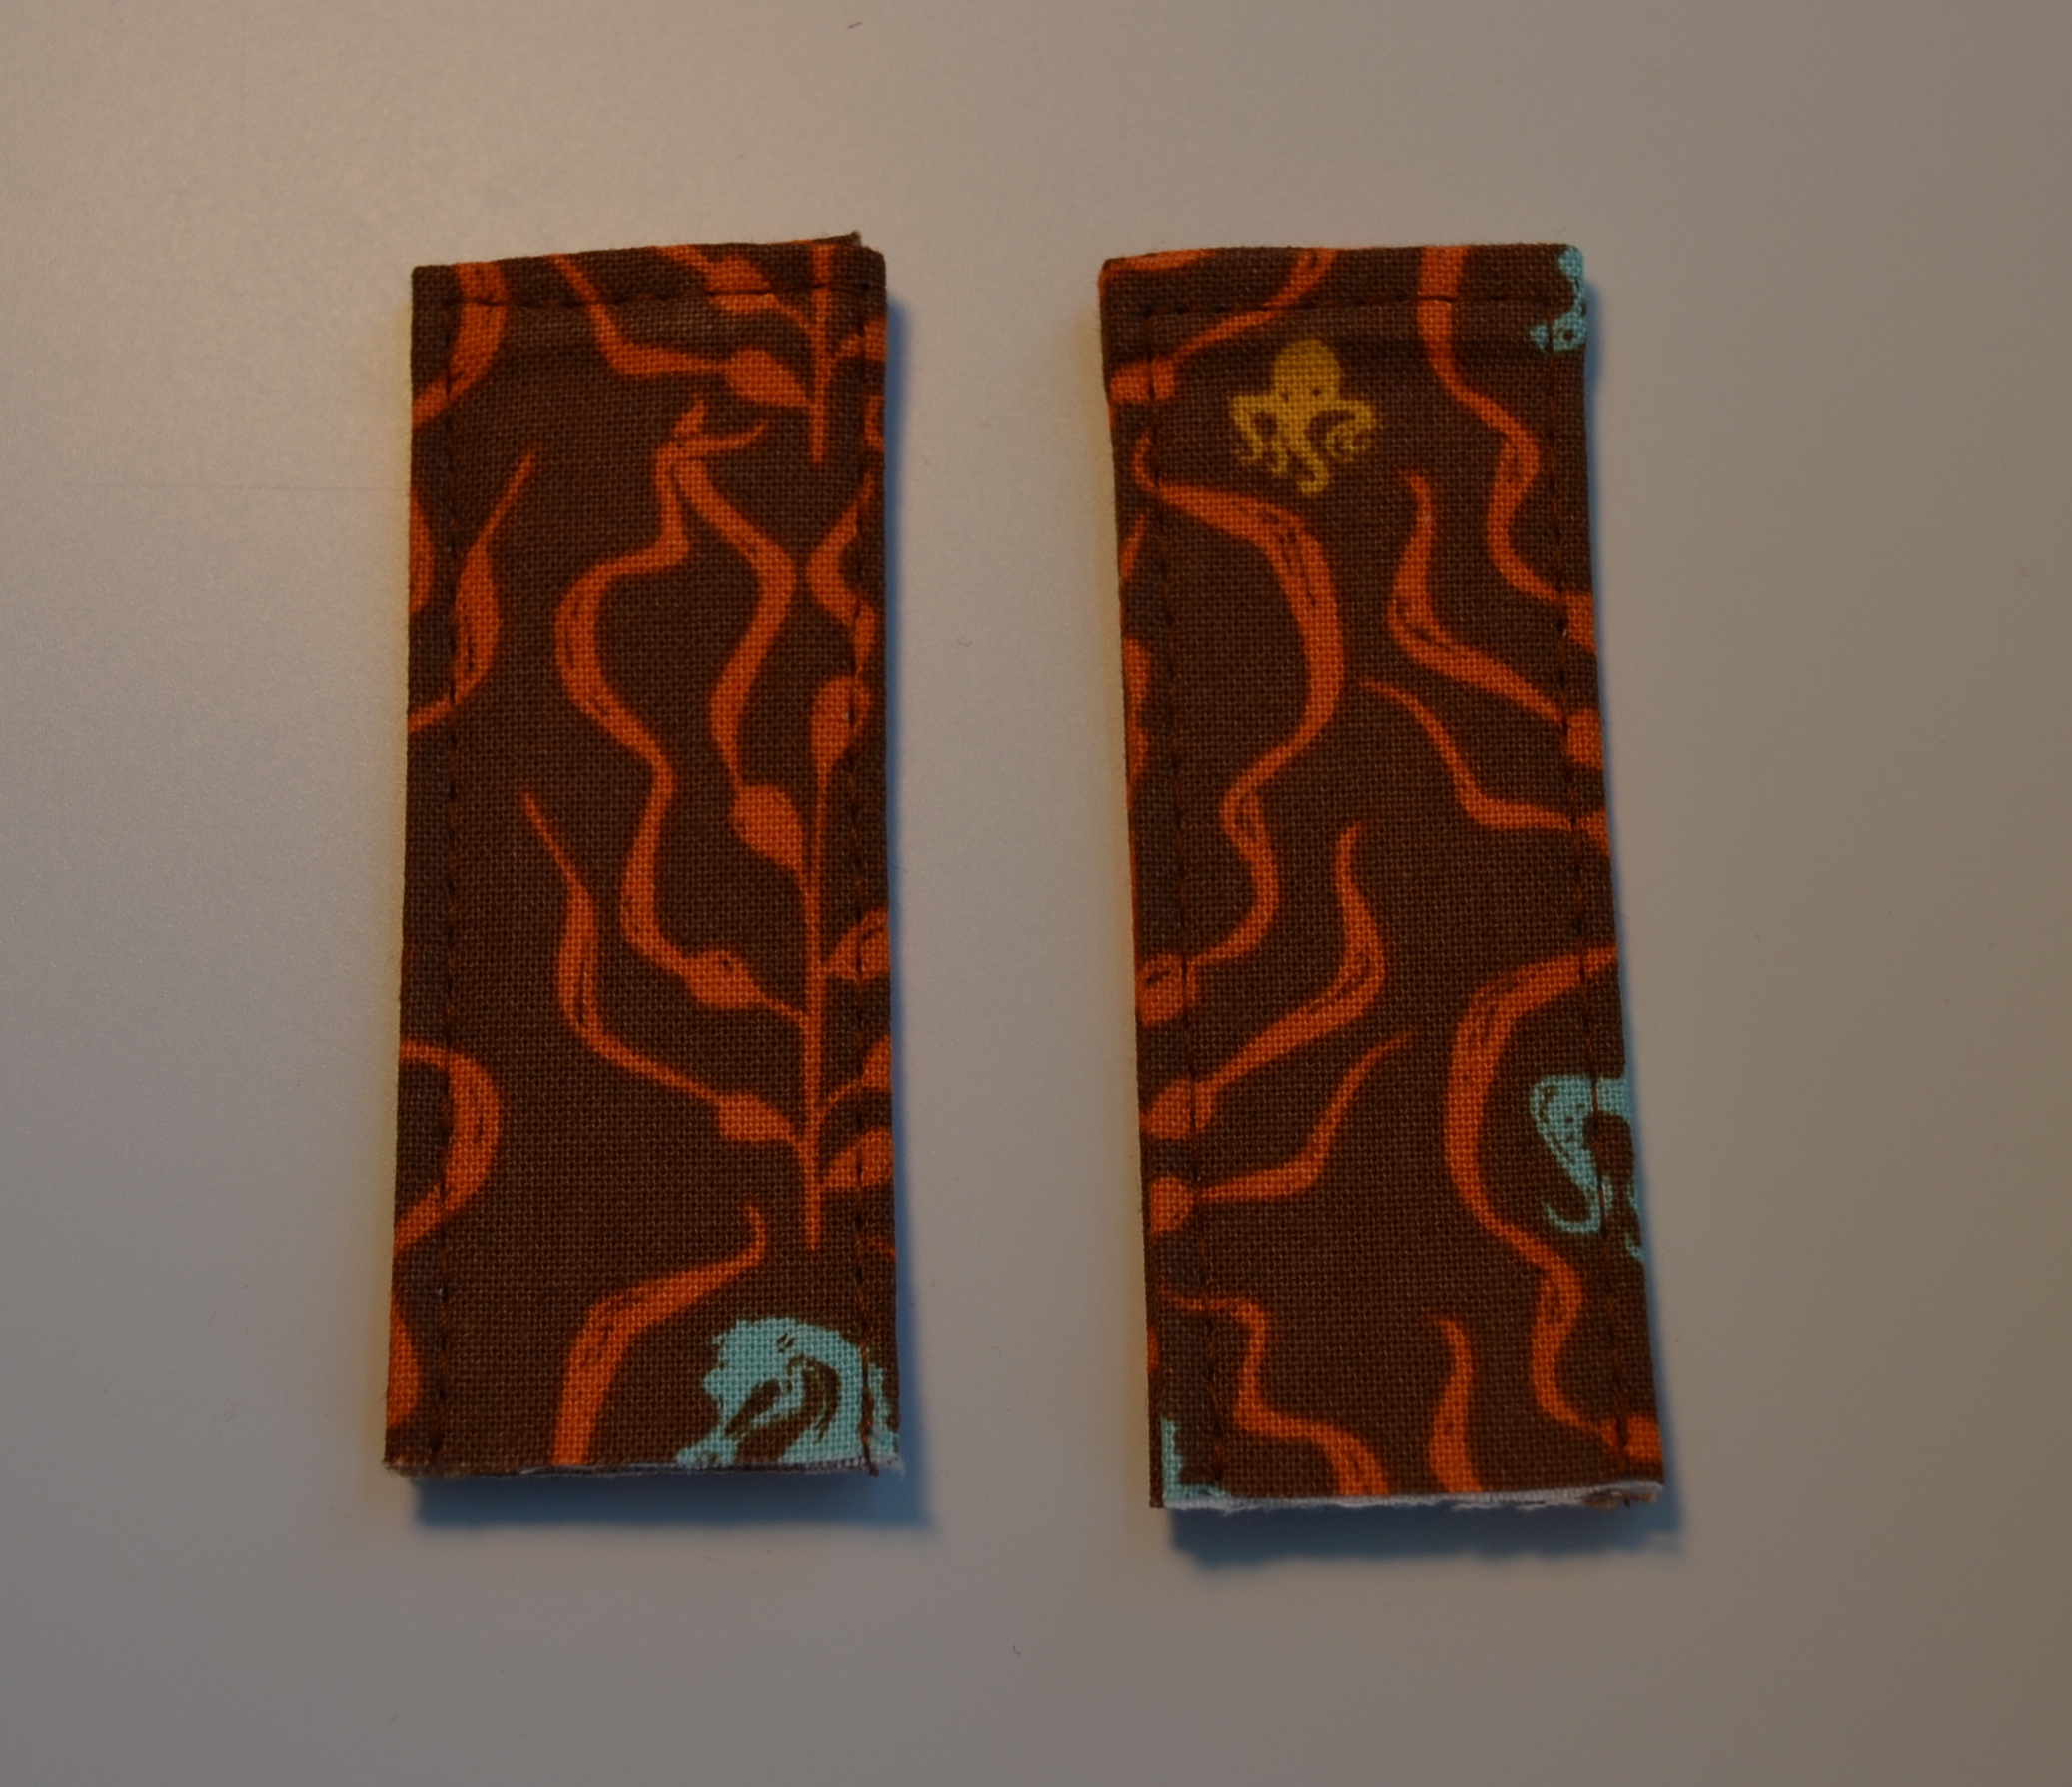
The first step in installing grommets is to make a hole the same size as the inner diameter of your grommet. Center a grommet on your strap tab 1/4″ down from the finished edge. Trace the inner circle.
Use scissors to cut the hole. Alternatively, you can use a punch to make the hole. I was lucky and had a proper sized punch that I got in a cheap punch set from China that I ordered for turn lock installation awhile back.
After you’ve made holes in both of your strap tabs, treat the raw fabric edges with seam sealant.
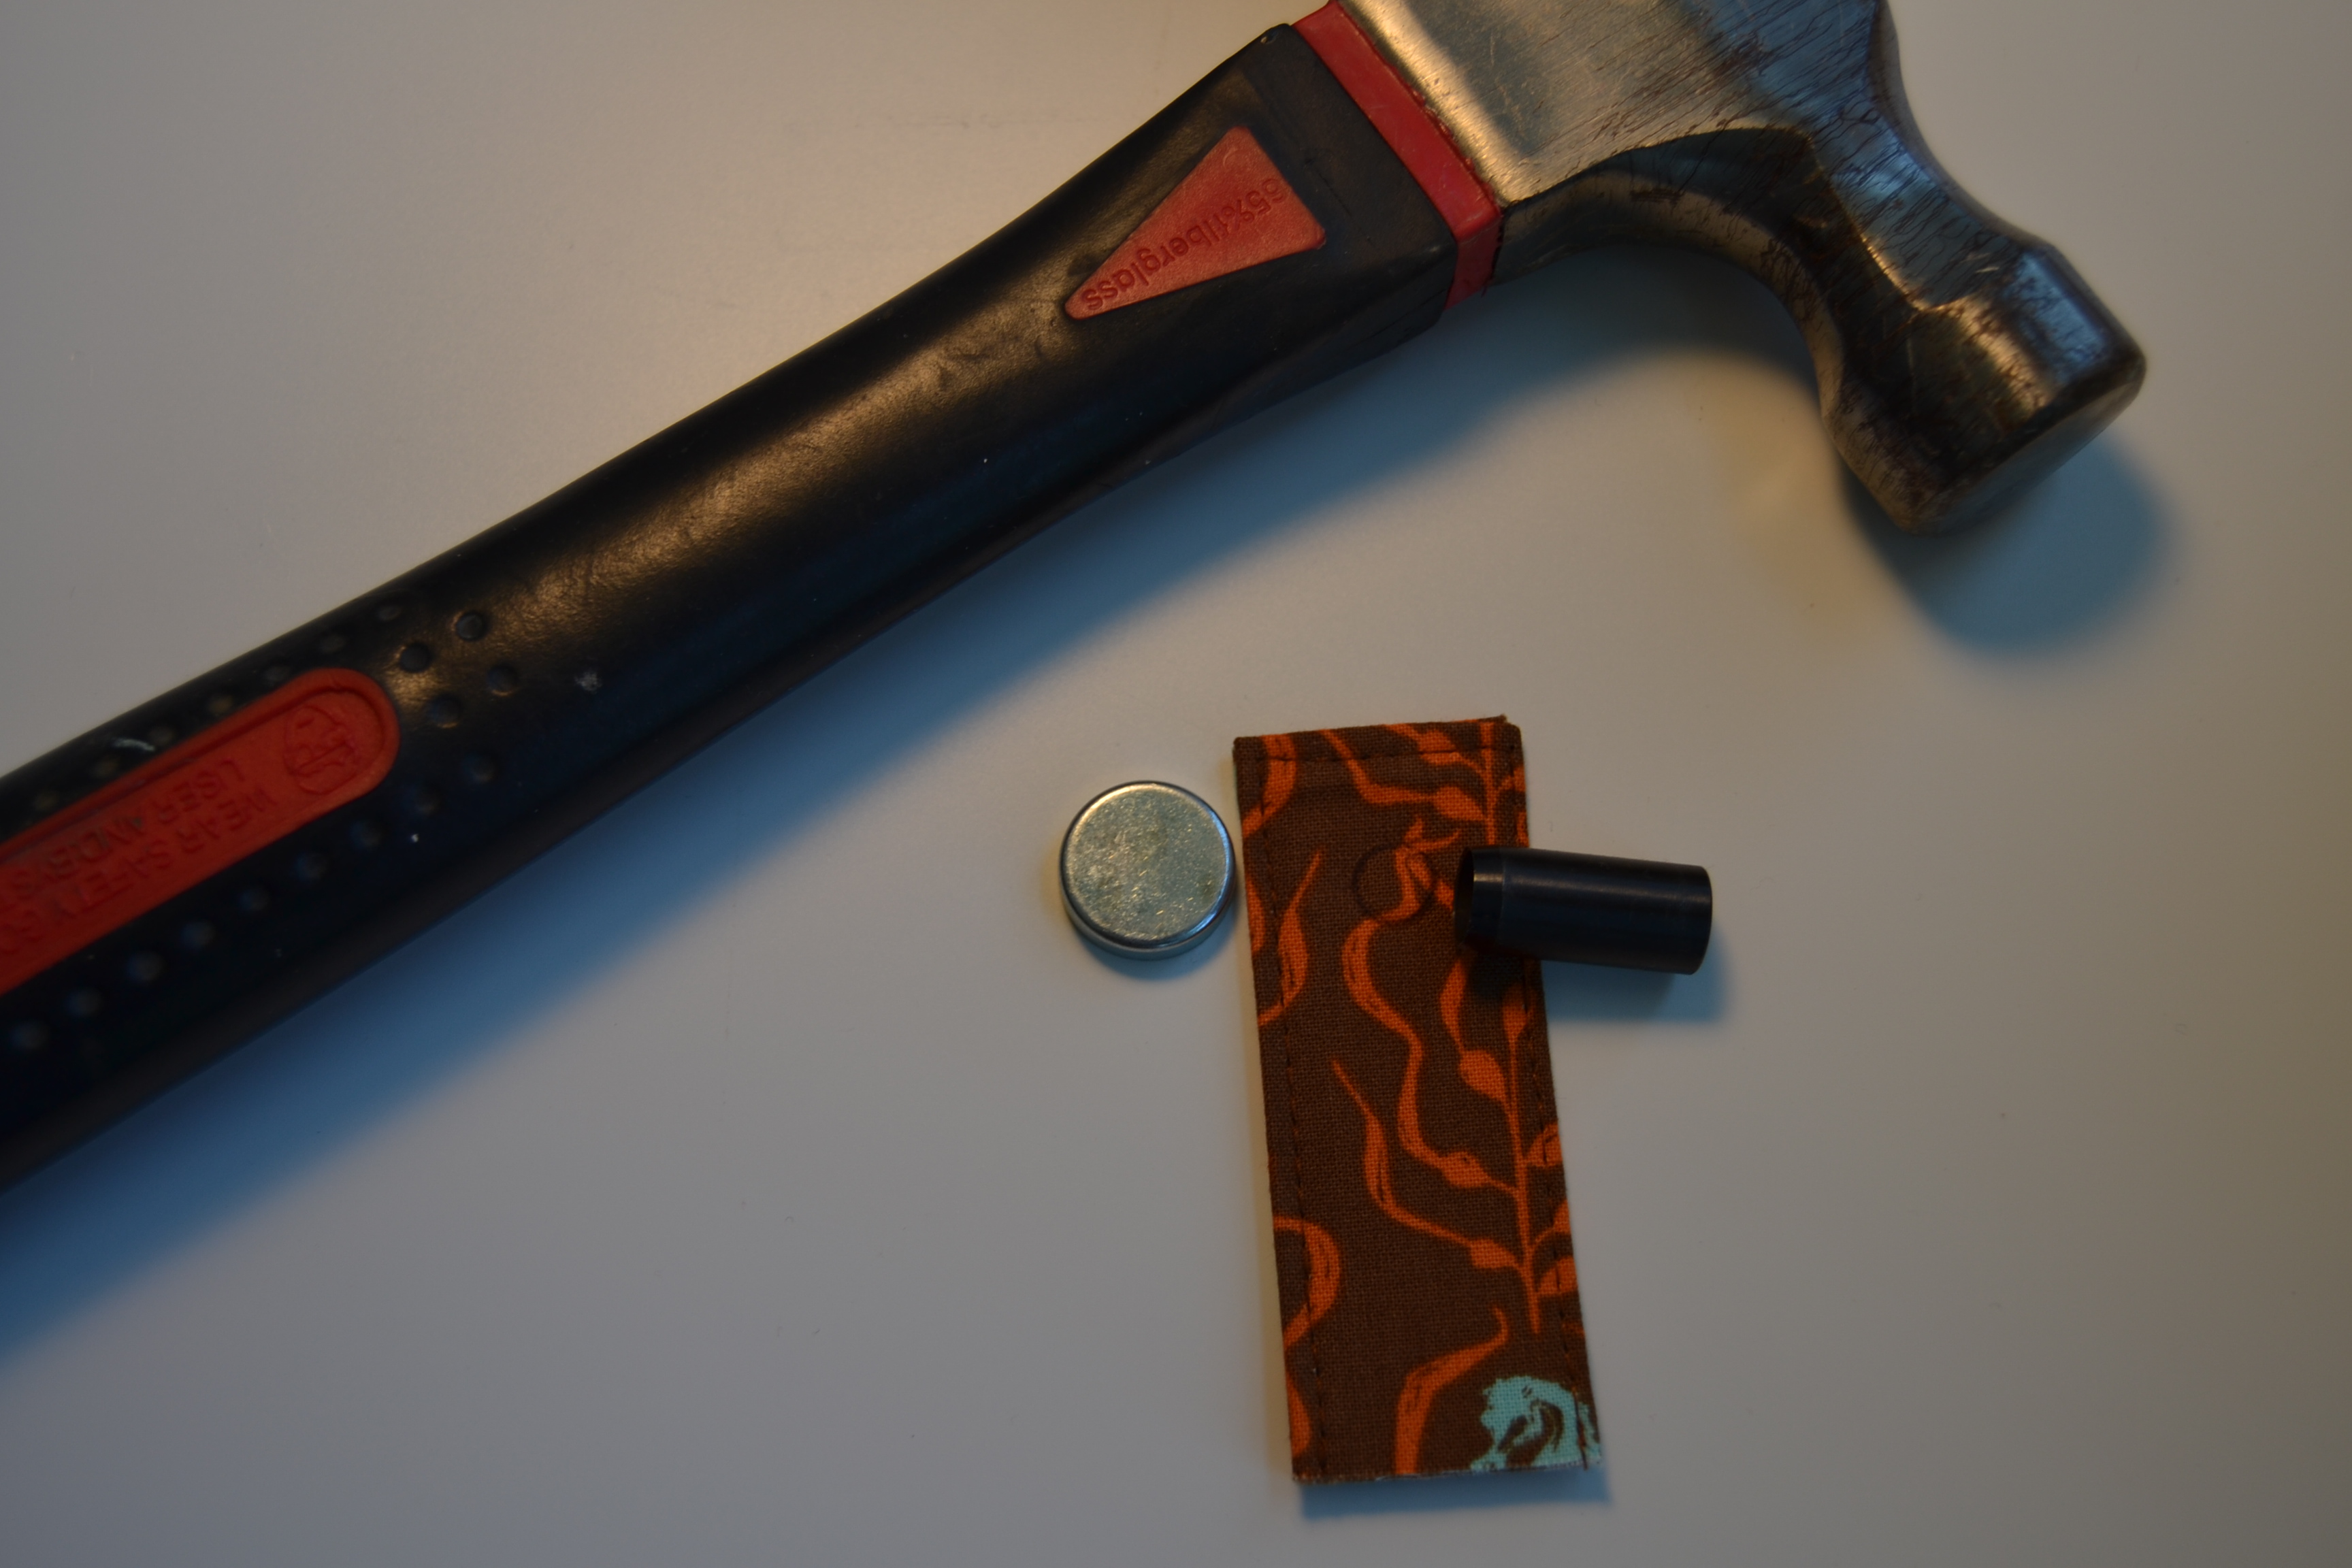
Now it’s time to install the grommets. You need a manual grommet setter or grommet press to install them. You can get a manual grommet setter in a kit from the craft store with extra grommets for >$10. With the manual grommet setter, I would definitely practice on scraps the same thickness as your strap tabs before you go to install them in your finished tab. You may find that there isn’t enough thickness for the grommets and they don’t close all of the way. In this case, you can add a layer of fusible fleece when you’re making your strap tabs.
This is what the manual setter looks like. There’s a bottom portion underneath the strap tab and then you hammer the end of the post to set the grommet.
If you think that you will be using grommets frequently, I would highly recommend getting a press. I got this press, 3 dies*, and 1,500 grommets shipped for $50. If you were to buy that many grommets at the craft store, it would cost you over $50. (Everything I got for that price pictured below. I don’t remember the exact seller but you can search amazon or ebay to compare pricing.)
*The dies are what go into the press and fit different sized grommets.
The tab on the left has the backside of the grommet facing up and the tab on the right is the front of the grommet.
After you have your grommets set in your tabs, attach them to your bag per the pattern.
Finished Window Shopper Tote
Sorry this post kind of jumped around a bit. I just wanted to share areas of the pattern that I tweaked or areas that I thought people might like to see more pictures of. I hope that you found this helpful!
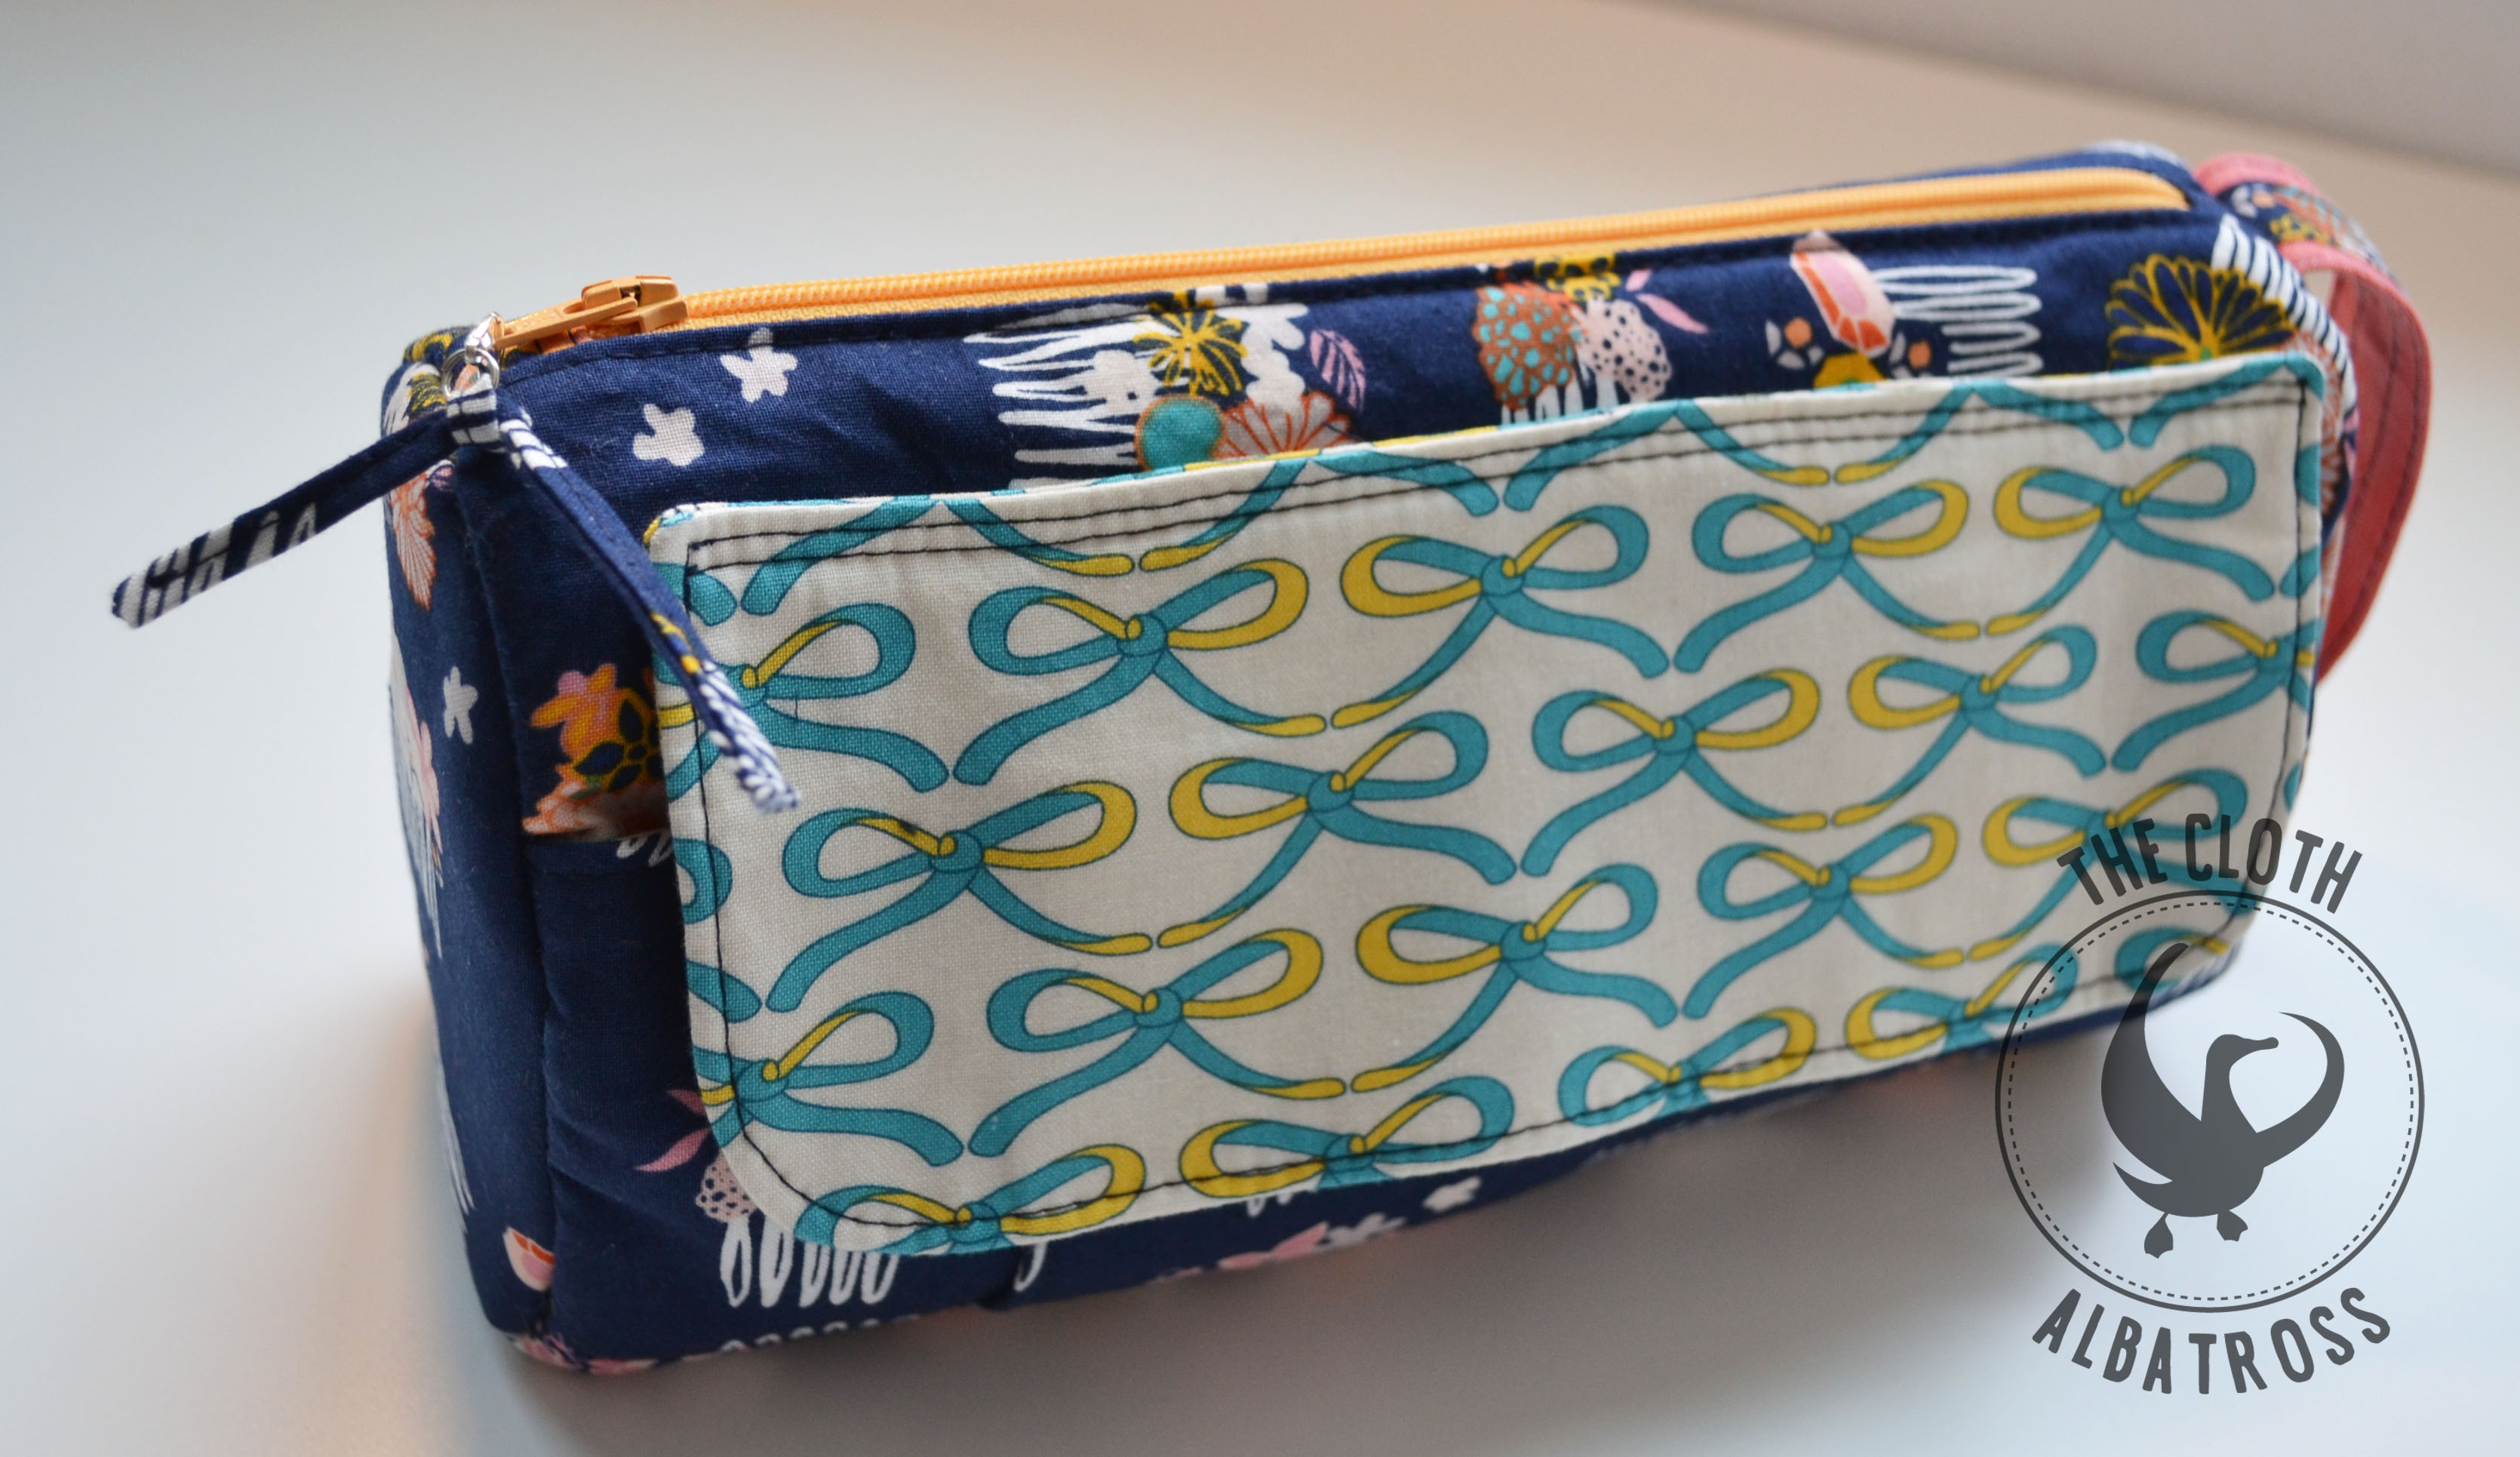
I knew that I had to make a toiletry pouch from Kim Andersson’s Good Hair Day collection fabric. I think I’ve been having a bad hair day for about 4 years now but at least I can have a cute toiletry pouch. The pattern I used is the Jade Pouch by Blue Calla. I love its flap and handle.
I made a couple of simple changes to it to personalize it – a fabric zipper pull and accented handle.
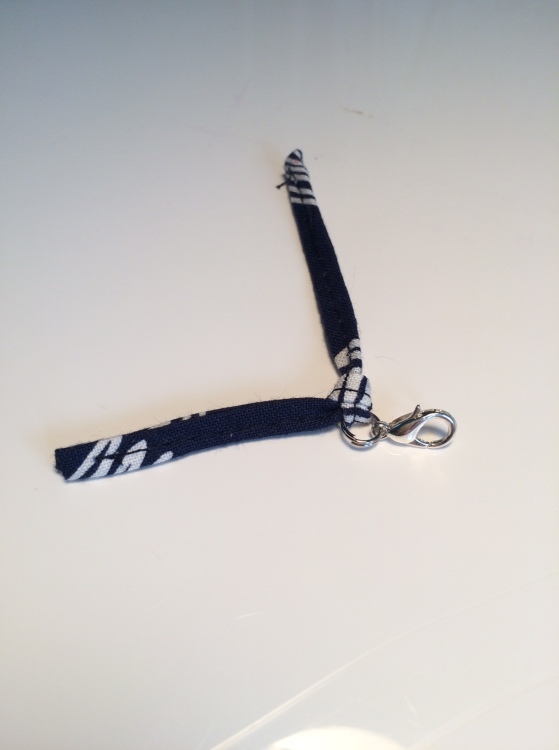
Fabric Zipper Pull
To make a fabric zipper pull, you’ll need: a lobster clasp, a split ring, and a scrap of fabric. I found the lobster clasp and split ring at the craft store in the jewelry-making section. They’re a bit hard to see in the picture below; the split ring is 1″ down from the top of the fabric. Cut your fabric scrap to 3/4″ x 5″. If your fabric scrap is a bit shorter than 5″, that’s fine. You’ll only lose 1/2″ in length when making it.
On the wrong side of your fabric, mark 1/2″ in from both short ends.
Press each end in toward the 1/2″ mark. Your fabric should be pressed in 1/4″ from each short end. You can always just press your fabric in a 1/4″ without marking a 1/2″ in but I like to have the line as a guide. I always find myself fumbling with the pressing ruler when I’m trying to iron something this tiny.
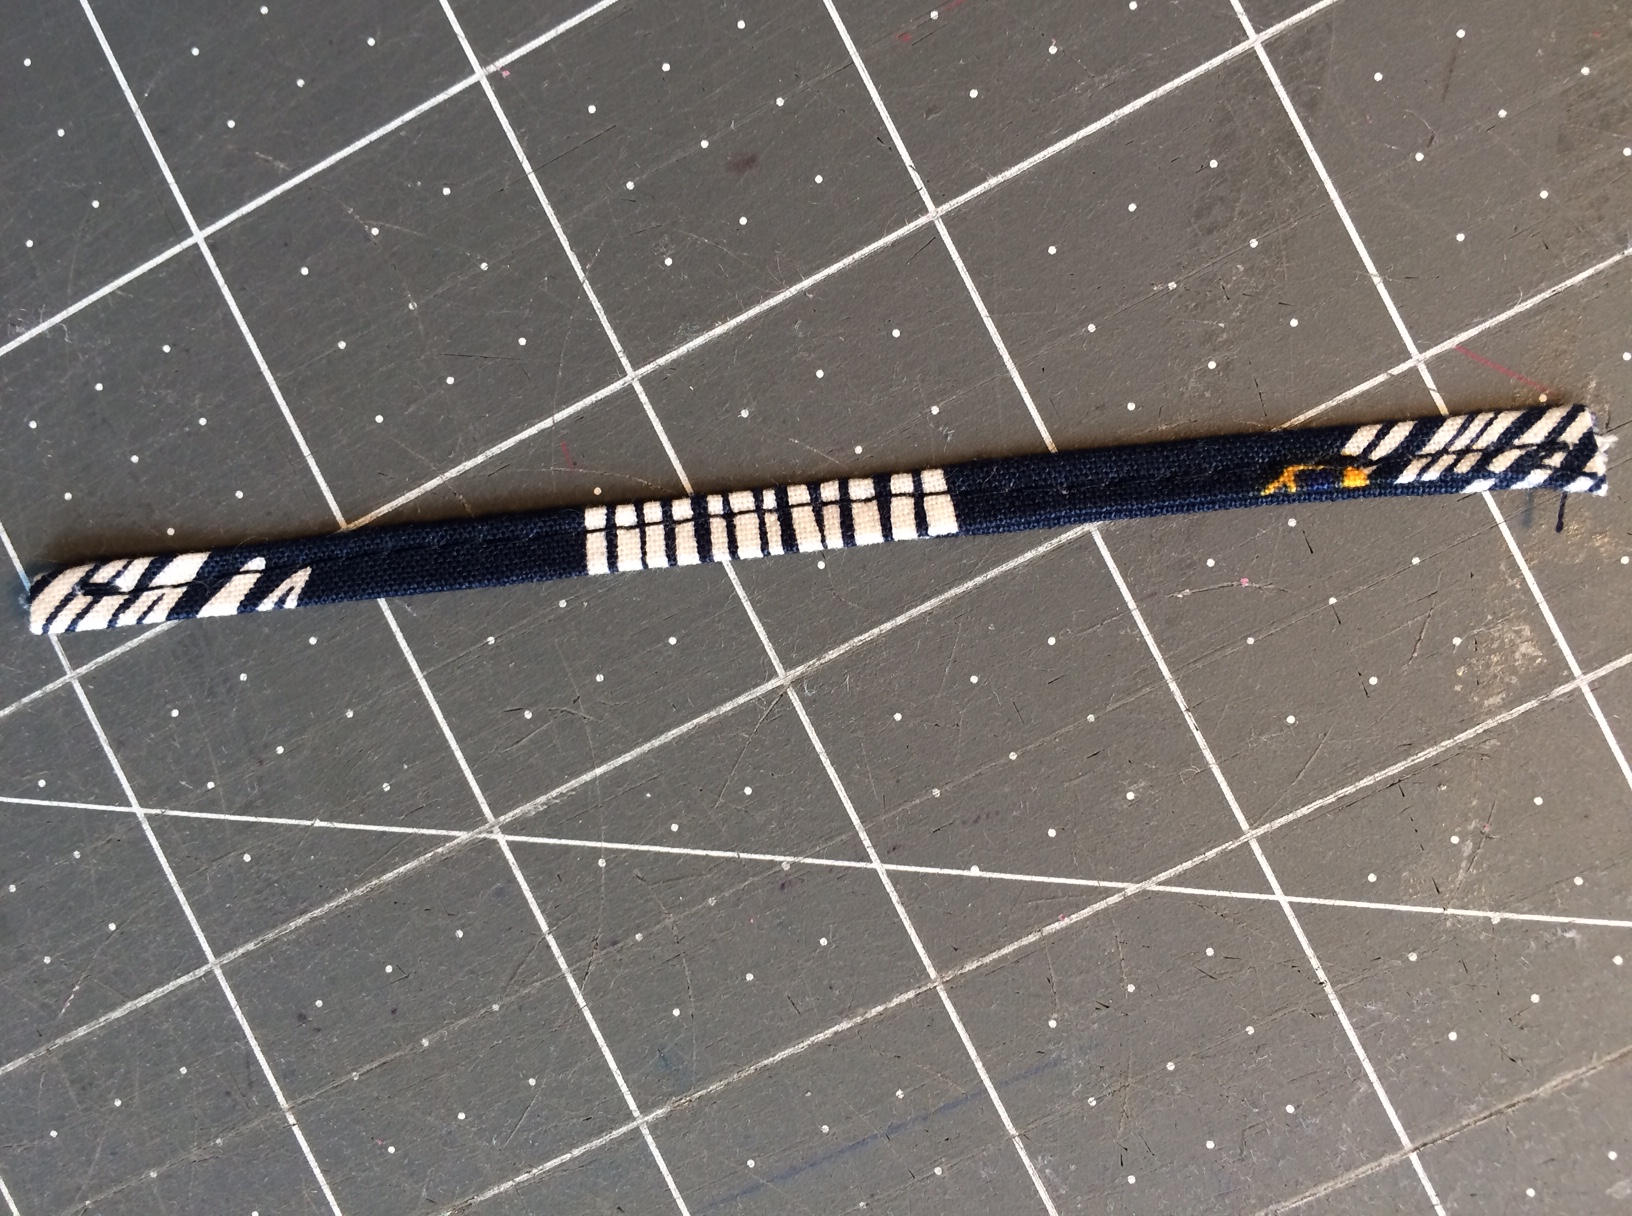
This part is tedious. If you have a bias tape maker, that would probably be easier, but I have never mastered those. Anyway, take your fabric and mark and center line from the long edge and press the raw edges in towards that line. Then press the folded edge toward the center again. You should have a piece that’s 4 1/2″ long x 1/4″ wide.
All raw edges should be enclosed. Topstitch down the length of the strip.
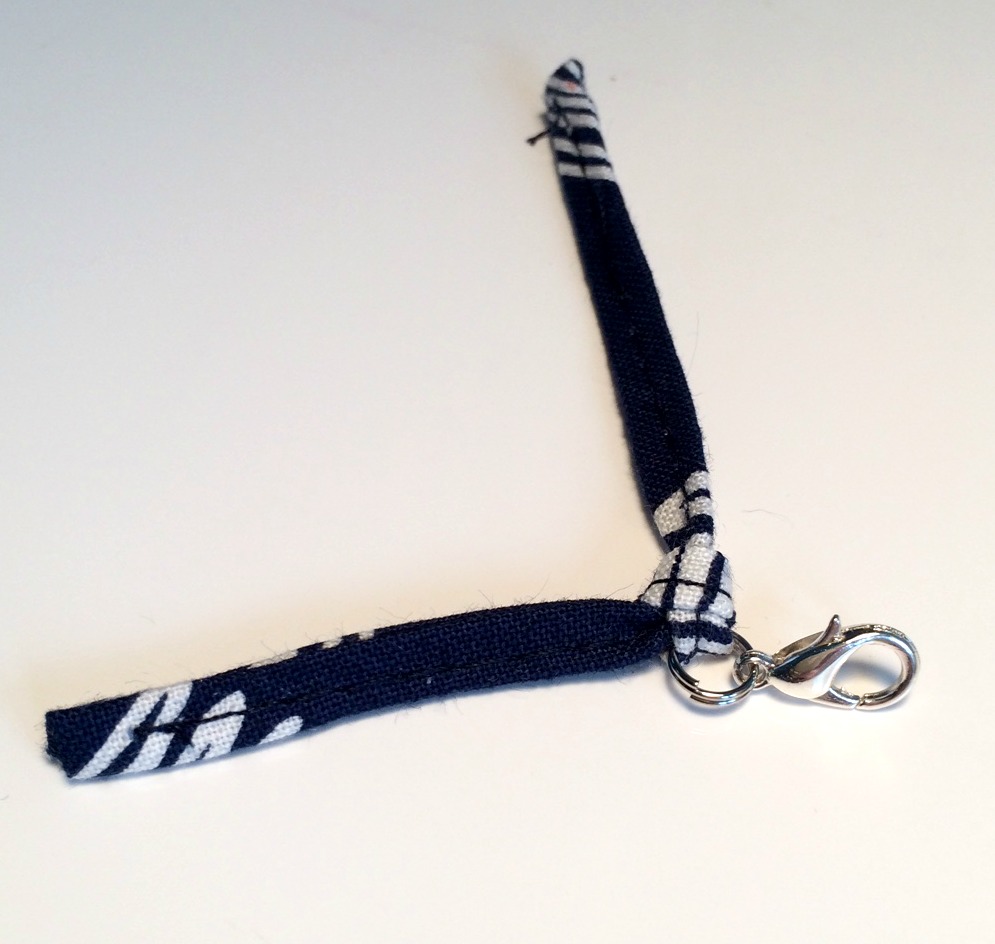
Take your split ring, and open one of the ends. I normally use the tip of my seam ripper to open it. There’s probably a safer way to do this, as I usually stab myself with this method. After your split ring is pried open, slide in the lobster clasp. Once your lobster clasp is attached to your split ring, push your topstitched zipper pull fabric through the center of the split ring and tie it in a tight knot.
Yay! Your zipper pull is done. I like fabric zipper pulls because they can be made to match any project. They’re a little bit fiddly but they add a nice touch to handmade projects.
Accented Handle
You will need a main fabric, accent fabric, woven interfacing (SF101), and fabric glue (or glue stick). Instead of following the Jade cutting instructions for the handle, cut:
2″ x 7″ piece of main fabric
2″ x 7″ piece of SF101
1″ x 7″ piece of accent fabric
Fuse the SF101 to the main fabric. Mark a line down the center of the interfaced side of the fabric and use your iron to press the sides in to the center line that you just marked. Mark a line down the wrong side of the accent fabric and press* the raw edges towards the center line, (same as you did with the interfaced fabric).
*Sometimes it can be difficult to get non-interfaced fabric to press. You can use a bit of spray starch to get a crisper press.
You should now have a 1″ x 7″ piece and a 1/2″ x 7″ piece.
Take your 1″ x 7″ piece and topstitch an 1/8″ in from the folded edge. The top of the handle will end up being the side with raw edges facing up.
I also topstitched my accent piece at this step to prevent shifting when I sewed it to the main fabric, but if you don’t like stitching over existing stitches, skip this step. The top of the accent piece will be the side with no raw edges. Topstitch as close to the edge as you can.
I like to glue the accent piece to the main fabric to prevent shifting. You can always use clips or pins, but I find they get in my way when I’m trying to topstich and I end up shifting my accent piece. Take your main fabric, with raw edges up and run a bit of glue right down the center where the raw edges meet. Center your accent fabric, raw edges down, on top of the main fabric. Press with a hot, dry iron.
After the handle strip has cooled, follow the existing stitches on the accent piece, and topstitch down to main fabric.
Follow the handle instructions in the Jade pattern for attaching.
Thanks for reading! If you add a fabric zipper pull to your project, I’d love to see it; tag me on Instagram
GIVEAWAY!!! To win a charm pack of Good Hair Day fabric, leave a blog post comment and let me know what you’re working on. I’ll notify the winner via email at the end of the blog hop.
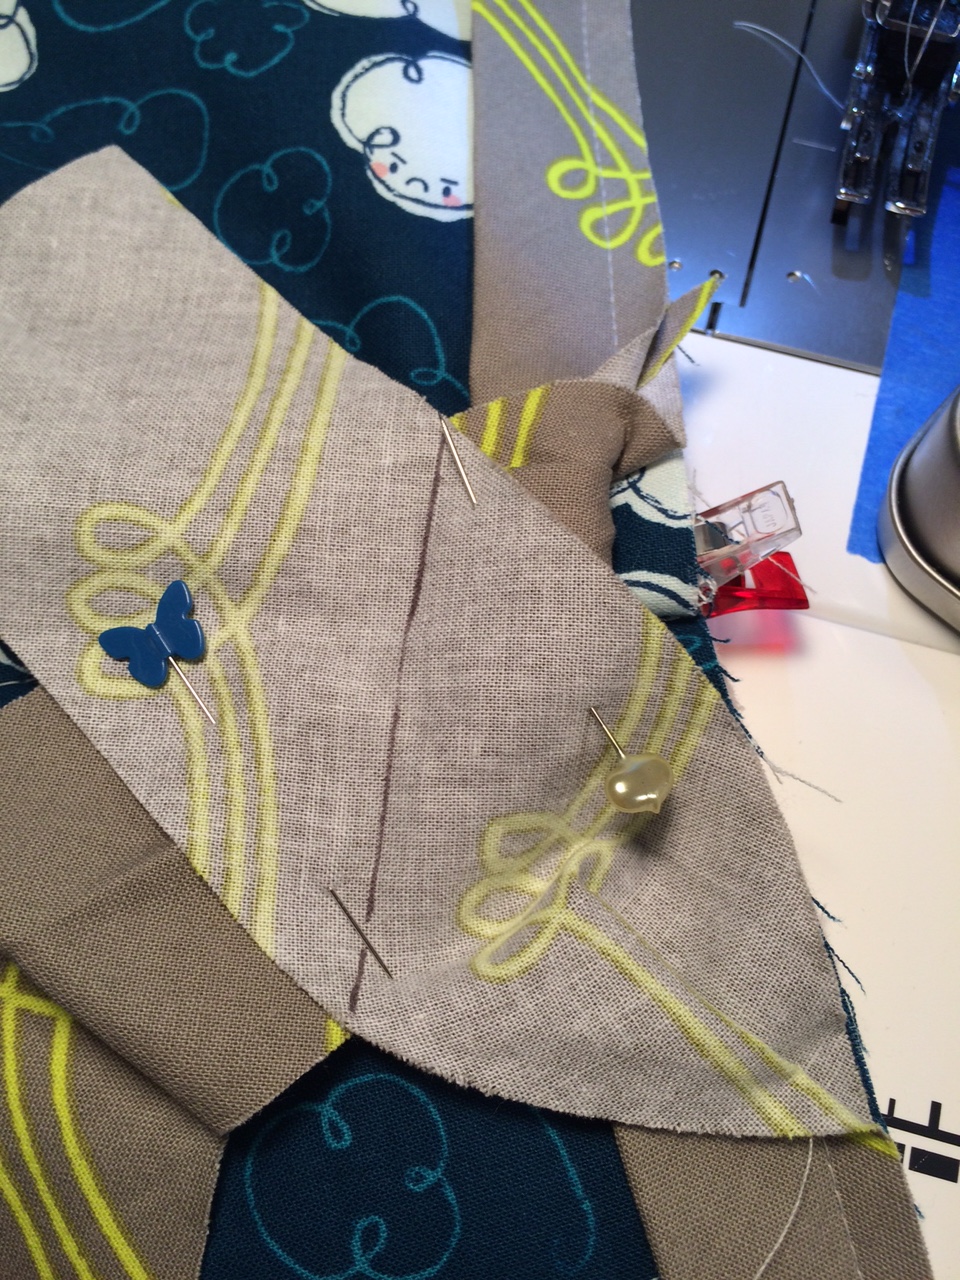
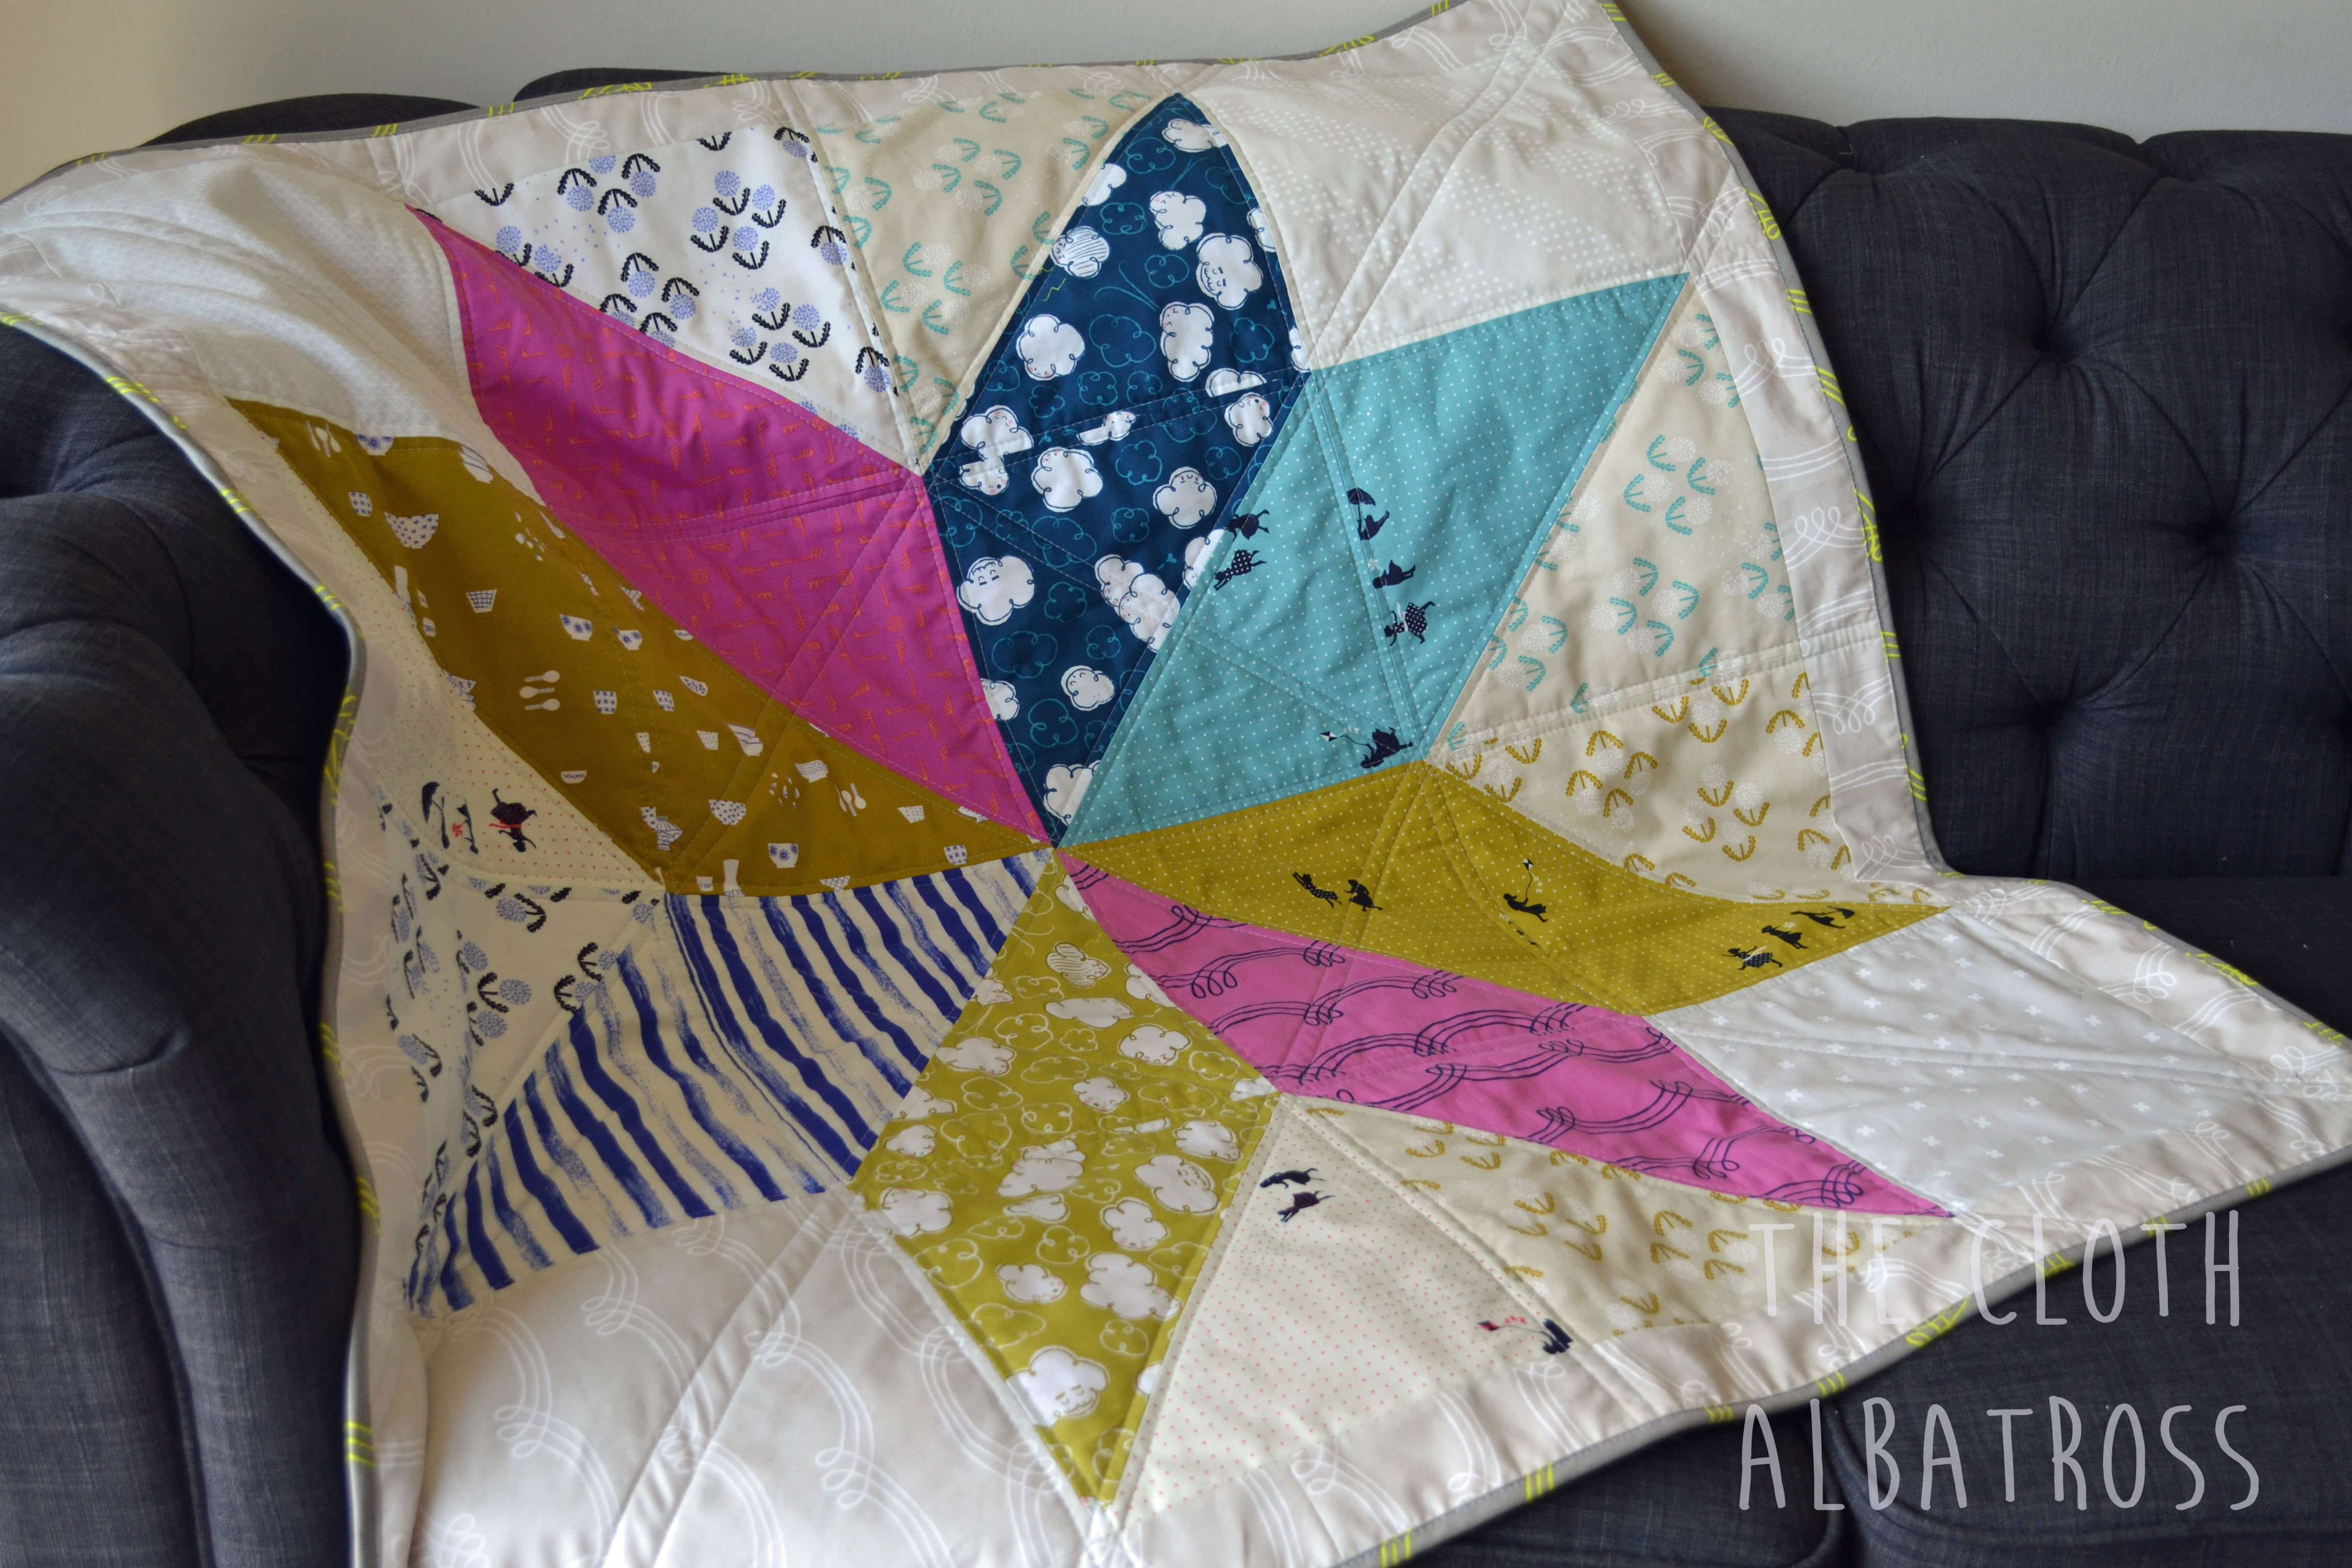
I had a request for a baby quilt for a baby girl but the quilt was to be more neutral. I love the Zephyr collection by Rashida Coleman-Hale of Cotton+Steel. It’s fresh and modern and has a great color scheme. I wasn’t sure what pattern to use, so I looked at my Pinterest board at all of the quilts that I pinned that would probably never make. I saw the Lone Star quilt and knew it would work perfectly, as it’s a great size (~40″ x 40″) for a baby quilt and is a modern twist on a traditional pattern, which I tend to be drawn to. I followed the tutorial on Diary of a Quilter and used a Zephyr fabric layer cake to make the quilt top. Her tutorial is free and easy-to-follow.
I decided to take several photos while I was binding the quilt because I know it’s most people’s most dreaded part of making a quilt. (Disclaimer: I have an aversion to hand sewing, so the method I use is completely on the machine. Also, there are a ton of combinations and techniques for quilt binding. This is just the method that I’ve found works best for me.)
After you have your bias tape cut and sewn in a long strip, (I cut mine at 2.25″ wide.) fold it in half wrong sides together. So you should have 1 long strip of single-fold bias tape that is 1 1/8″ wide. Lay your quilt sandwich face down, so that the backing is facing you and place the raw edges of your bias tape against the raw edges of your quilt sandwich.
When attaching my binding, I start at the bottom center of my quilt so that the binding seam ends up there.
When I get to the corners, I pull the binding up and fold it back on itself and leave that extra there so that I can easily make mitered corners.
Before I begin sewing the binding, I clip* it all the way around the quilt, doing each of the 4 corners as pictured above. I leave tails on both sides so that I have extra to work with when I’m finishing the binding at the end seam.
*Wonder Clips aren’t necessary but they’re definitely the handiest way to attach binding. I’ve found they’re cheapest on Amazon; you can also use binder clips.
Start sewing your binding a few inches in from the bottom center with a 1/4″ seam allowance (SA). I use blue painter’s tape to mark it on my machine, since I switch SAs a lot and I think it’s easier to sew a straight line with a bold marking to pay attention to.
A couple inches before you get to your first corner, stop with your needle down. You’re going to pull back the excess fabric in your corner and mark or eyeball a 45º angle to the corner from your 1/4″ SA. You’re going to sew straight down that mark, making sure to backstitch.
After sewing your angle and backstitching, pull the bit of excess fabric back against the angled stitch line and begin sewing a 1/4″ in from both edges on the other side.
When both sides of the corner have been stitched, it should look like this:
When the fabric is folded to the front of the quilt, you will automatically have a perfectly mitered corner from the tricky stitching that you did.
For some reason, that grumpy cloud is judging my mitered corner. Whatever, cloud.
You’ll continue around the back of your quilt, stopping at the corner to make your mitered corner stitching. Once you’re almost back to your starting point (bottom center), stop leaving ~6″ between the edges. You should have binding tails on each side. In the next step, we’ll get them to be the perfect length with no bulking seams.
Getting the binding to be the exact length that you need can be a bit tricky. I tried to take several pictures to show how I do it. You can also fold one end in and tuck the other end inside of the folded edge but that leaves a noticeable seam and a bit of bulk. The first thing I do is to finger press each side of the bias tape at opposite 90º angles from each other. You can see that I left a bit of room between each piece and they’re not exactly touching. That’s because bias is a bit stretchy, so to avoid puckering, I make it slightly shorter than the actual length.
The arrows are showing the 2 points that you’re going to want to mark with a Frixion pen (or other temporary mark).
Once you’ve marked the 2 dots, you’re going to bring the 2 bias ends together at those points and make an X. So your bias strips will be right sides together, meeting at the mark that you just made.
Pin the bias tape together so that the pins are parallel with the bias strip that is wrong side facing you. You’ll want them positioned this way so that you can draw a line in the next step. In the second image above, you can see that I’ve clipped the quilt behind the binding, that way it’s not pulling on the bias and it’s out of the way.
Draw a line connecting the 2 intersecting points of the bias. This line will be parallel to the quilt edge.
Sew directly over the line that you just drew. If you’re not sewing parallel with the edge of the quilt, you may have drawn your line connecting the wrong points. This is the easiest part to get turned around on.
Before pressing and trimming your seam that you have just sewn, turn the bias strip over to make sure you have the proper length. If your length looks good, press your seam and trim off your excess bias. Then sew the remaining length of the bias to the back of the quilt.
Once the binding is sewn to the backing, flip your quilt over. Pull the bias to the front of the quilt and sew closely to the edge of the binding. Take it slowly, you’re almost done and these are the stitches that will show the most.
I should have taken more photos to show the front of the binding, but I think getting everything right when attaching the binding to the back is the most difficult part, so hopefully that made sense.
The only thing left to do on my quilt is to handstitch on the custom label that I ordered from Spoonflower. You can order a sample swatch from Spoonflower for $6 shipped, so you can get (4) 4″ x 4″ labels for $1.50/each.
I love the book Handmade Style by Anna Graham of Noodlehead Patterns. There are so many projects in it, all of which I would like to eventually make. The Carry-All Pincushion is the second pattern that I’ve made from the book.
This pattern was super easy to follow. One thing that is interesting about Anna’s patterns is that most of the pieces initially cut are rectangles, even if the final shape has some curved edges. She gives you stitch guides on the pieces. At first, I was a bit thrown off by this, as it’s different from other patterns, but I’ve grown to really like that style. It’s easier to fussy cut your piece and be more accurate, since you’re not distracted by the curve while you’re cutting. I traced my stitch guide onto a piece of waxed paper, iron it to the rectangular piece and then use a Frixion* pen to mark the stitch line and sew directly over the line that I have drawn.
*Frixion pens can be found in the office supply aisle at Target or similar retailer. They’re heat erasable, so they’re perfect for sewing projects as you can iron away your lines when you’re done. I usually only use them on light colored fabrics because they can leave behind a whitish line on darker fabrics.
I didn’t have any crushed walnut shells like the pattern calls for, so I used Poly-Pellets to weigh my pincushion down. I’m definitely going to be making more of these, so I’ll probably try to find crushed walnut shells for my next one. (Make sure if you’re giving a pincushion as a gift and you use crushed walnut shell to tell the recipient in case they have any allergies.)
I’m currently working on a custom baby quilt and I’m really excited about how it’s turning out so far. I’ll write my next post when I’m finished quilting and binding. Happy Hump Day!
This past week I tested the Lantana Shoulder Bag for Blue Calla Creations. The Lantana pattern calls for a method of attaching the straps in a way I have never seen before, so I knew that I wanted to spend a little extra time making the straps looking sexy. (Straps can totally be sexy.) I had a charm pack (5″ x 5″ squares) that I decided would work perfectly.
Since the squares were 5″ wide, the straps ended up a 1/4″ wider than the pattern calls for. With this bag, since there’s no hardware needed, I didn’t need to make any alterations. If you were to use a charm pack for making straps on a bag that required hardware, you would need to take that into consideration. For instance, if you were making a bag that called for 1″ straps, you could either cut the width of the squares down to 4″ or purchase hardware that was 1.25″ wide. In the case of needing 1″ straps, it may be easier to cut the squares down to 4″, since 1.25″ hardware can be a bit difficult to find.
The Lantana has an inner slip pocket and I had some charm squares leftover from making the straps, I decided to feature one on the pocket.
My next project is a pincushion from Anna Graham’s book Handmade Style. I’m still trying to decide on fabrics for that one.