
I wanted to share some of the PPE patterns that I have found, since they don’t always come up in a quick Google search. If you’re interested in the Charmed Liebling mask hack for adding strap holders, skip to the section titled “Ninja Mask Hack.”
If you want a pretty blog with professional videos, Natalie of Sew Hungry Hippie did a blog roundup with several PPE patterns. For my thrown together blog, please keep reading.
Scrub Cap Patterns

The first scrub cap I sewed is a paid pattern I found on Etsy by adesignbyangie. A big perk to this pattern is that you don’t need as long of a strip of fabric as some of the other patterns because of the way the pattern pieces are broken up. It calls for elastic, so if you do not have this on hand, I would choose a different pattern. She also has several other styles in her Etsy shop, which I have not tried.

Rad Patterns Surgical Cap
Rad Patterns offers a free, downloadable pattern with 2 styles. I only sewed the bouffant style, which would be good if you have a lot of hair. My hair is long and up in a high bun in this picture.

The bouffant style in the pattern tells you to make gathering stitches, but I just made pleats in mine. I did not try the other style included in the pattern but you can see pictures of it on their site. Another nice thing about this pattern company is they have a Facebook Group so that you can share your makes and ask questions. If you do join this Facebook group, please read through their posts before posting. They’re a very inclusive group that usually ends their posts with pronoun preference, so be mindful and respectful of this.
Sweet Red Poppy Scrub Cap

The Sweet Red Poppy Cap is a free pattern with a video. This is my favorite scrub cap I’ve made so far. In the picture, I’m wearing my hair up in a high bun and it gives a nice fit. The pattern comes together easily and is reversible.
Masks with a Pocket
If you’re wanting a mask with a pocket, see my previous blog post where I used the Craft Passion mask pattern. Before you use filtration material that is off-label, please make sure you’re using products that are safe to breathe in. 3M has issued a statement that they do not recommend their home filters cut up to breathe in against the face, and many vacuum bags contain fiberglass. Using a non-woven material as a pocket insert such as a paper towel, or a coffee filter may be a better option.

I used the Craft Passion pattern to make my 8 year old a mask. One thing about elastic is that it does not stay well behind little ears. There are hacks for pulling the elastic behind the head*, pulling it onto buttons on headbands*, or you can use ties.
*I have not used these 2 patterns. I found them on a quick Google search.

The Olson Mask is also a good mask pattern with a pocket, and comes in children’s sizes**. I have made a few of these masks and liked that there’s a pocket without having to use multiple fabric layers. This pattern can be confusing if you use a solid fabric, as the pieces can be easily turned around when you’re hemming the mirrored images. If you use this pattern, I would recommend using printed fabric.
**Please do not put masks on children under 2, or anyone that would have difficulty removing their own mask. Just because you see someone selling a product does not mean that it is safe or recommended.

Ninja Mask Hack

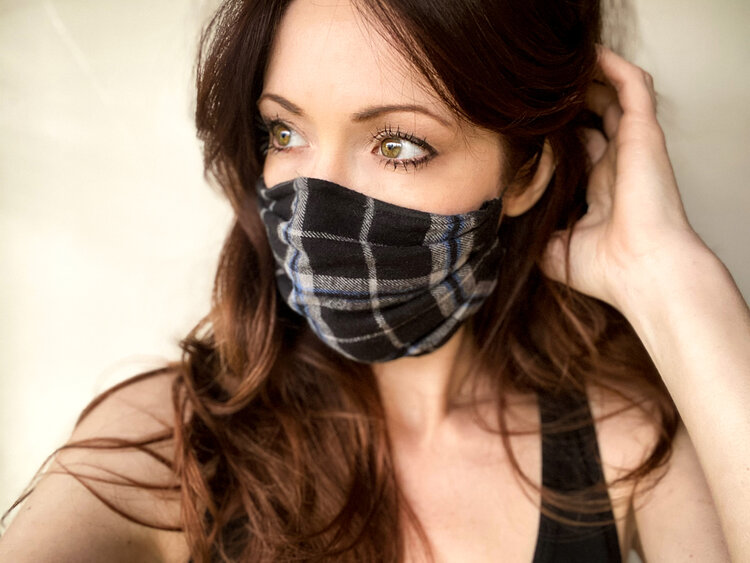
I really like this pattern from Charmed Liebling. This mask has no pocket, is a simple sew, and is reversible. It’s a ninja style mask that is more angled towards the ears than some of the other patterns. This is the mask that I use for myself.
When you are on Anna’s page, the pattern piece is linked when you scroll all the way down and see the purple link, “hier das Mundschutz…”
When you print the pattern piece, there are 2 pattern pieces on the page. The bottom pattern piece prints off the page. This is fine. You do not need that pattern piece as it’s exactly the same as the top pattern piece. Make sure you’re printing “actual size” and that your scale matches after printing.
In addition to the Charmed Liebling pattern piece, you will need a strip of fabric that is at least 4″ x 3.5″ (3.5″ because you will need twice the width of 1.75″ since you’re making 2 strap holders per mask). However, I like to cut my fabric 4″ high by however long of a piece of fabric that I have so I can make several strap holders at once. For instance, if you’re making 3 masks, you will need 6 strap holders (6 x 1.75″ = 10.5″). You would need a piece of canvas (or interfaced woven cotton) that is 4″ x 10.5″. I recommend just cutting 4″ by a long length and figuring it out later.
The mask pattern is simplistic, as you only need one pattern piece to cut 2 sets of mirrored images in 2 different fabrics. After you’ve sewn along the curved edge of both sets of fabric, be sure to notch your curves with a pinking blade, or scissors.

The one thing that I did not like about construction was sewing the elastic, or ties into the seams. This can be easily changed by adding strap holders to the sides. I used canvas for mine so that I did not have to interface quilting cotton. I only wanted to use a double layer rather than the 4 layers that many straps have so that the side seam of the mask did not get too bulky. If you do not have canvas, you can interface quilting cotton/woven fabric with Pellon SF 101 (fusible woven interfacing).
When making strap holders, it would be timely to make them all separately, so I like to cut one long strip of fabric at 4″ tall. (The finished height of your strap holders will be 2″ because we’re folding the width of the fabric in towards the center to hide the raw edges, so we end up with half the height we cut our fabric.)

After you cut your canvas, you will need to mark the center of the strip lengthwise, so that you can iron the raw edges in to meet the center on the wrong side of the fabric. You will need to do 4 rows of topstitching. 2 rows on each finished edge 1/8″ in, and the additional rows will each be 1/8″ from the center seam (or 2 rows 1/4″ apart). The stitches on either side of the center seam keep the raw edges from pulling up when you’re threading in your ties, or elastic through the strap holders.
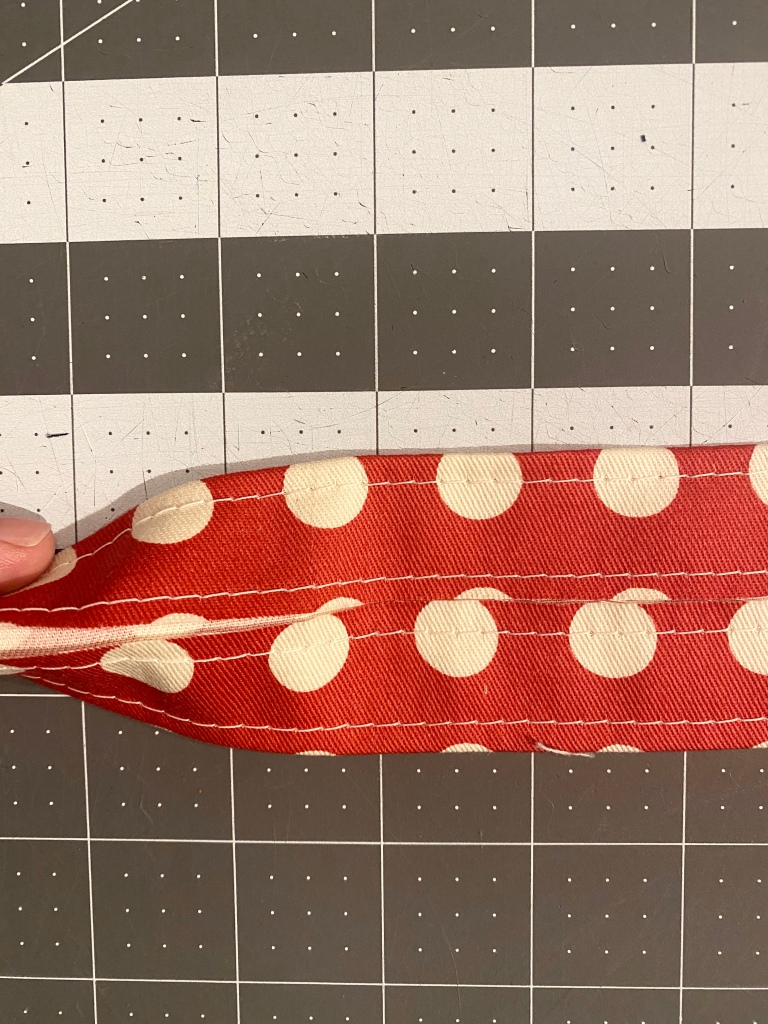
After you have topstitched your strapholder, you’re going to hack it up into 1.75″ wide pieces.

Bring the raw edges of the strap holders together and baste. I bring these all to the sewing machine at once and chainstitch (stitching without stopping between each one) them together. I don’t usually bother clipping the raw edges together but wanted to show the raw edges brought together in the picture.

Once your channels are basted, we’re going to baste them to the edge of one of our mask pieces. You will baste to the edge with a scant 1/4″ (little bit) hanging over the edge. The reason we’re leaving a bit hanging over the edge is that it will keep the edge from fraying or pulling through. Since the channel will have pressure on it from the elastic, or straps pulling, we want this seam to be secure.

After both strap holders are basted to one of your mask pieces, sandwich the other mask piece on top with right sides together with other mask piece. Make sure your center seams are aligned. I clip these together with Wonder Clips, as I find them much easier to deal with than pins at thicker seams.

When I am sewing something that I need to leave a turning hole in, I place a pin on each side of where I want the opening to be so that I do not forget where to start and stop. Make your turning hole about 1.5″ wide on the bottom of your mask, about an inch in from the edge so that it doesn’t interfere with your corner.

When you begin sewing your mask pieces together. Begin at the left pin, so that you can sew one continuous length of stitching to the other pin. Make sure to pivot at your corners and maintain a 1/4″ seam allowance on the mask fabric even where your strap holders overhang (your stitching will be ~1/2″ in from the edge of the strap holder).
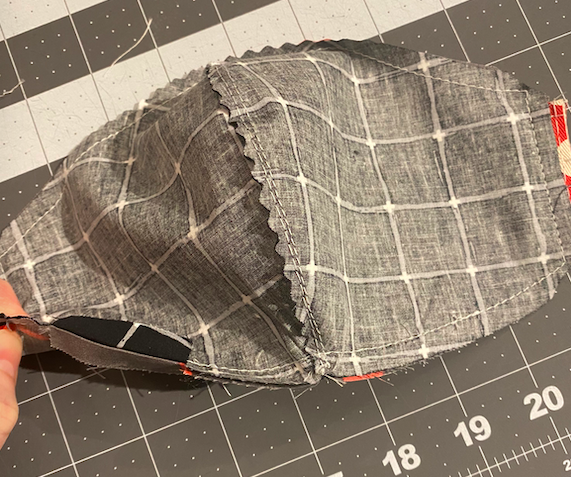
After you sew your mask pieces together, leaving your turning hole open, notch your curve, clip your corners and press your seams open. In the image below, I have not finished pressing my seams open but wanted to highlight the turning hole. When I have a turning hole, I like to make small snips on each side of the opening within the seam allowance so that it easier to press the opening in, which gives a clean press when you’re topstitching from the right side of the mask.
After you have notched, clipped, and pressed. Turn your mask right side out through the turning hole. Once it has been turned out, use a chopstick or other dull pointed object to push the seams outward, especially at the corners.

Once the mask has been turned, make sure to press your seams well before topstitching, taking care that none of the fabric is bunched at the seams. Pressing well before topstitching makes a huge difference in how clean your topstitching looks on your finished product.
Topstitch ~1/8″ in all around the edge of your mask. When you’re topstitching over your turning hole, make sure your edges are evenly pushed in and ensure that you’re catching them in your topstitching. This way your mask doesn’t look wavy in that spot and there’s no rogue opening.
Once you have topstitched your mask, it’s finished! You’re ready to thread your elastic, or straps through with a safety pin. For my masks, I use (2) 8.5″ long pieces of 1/4″ elastic, or (2) 36″ pieces of twill tape. If using twill tape, or bias tape straps, make sure to secure your straps in your strap holders with a stay stitch in the center.

For my masks, I prefer elastic because they’re easier to slip on and I’m not wearing them for a long period of time. If you have trouble wearing elastic, need an adjustable length, or wear masks for long periods, straps are the better option.
After your mask is threaded, it’s finished! I made this mask in Katarina Rocella fabric. She designs for Art Gallery Fabric, which is some of the highest thread count fabric in the industry, so it’s ideal for making woven cotton masks. Her daughter also did an adorable mask making tutorial on her Instagram.

Buying Masks
If you don’t sew, or do not have the time to sew. There are many talented sellers making masks to sell. Some of them are donating masks for each mask sold.
Keyana of Clutch Lota has been making masks for the homeless for donations received through her site’s mask order form. I know that she has been inundated with orders, so she may be too overwhelmed to take additional mask orders. However, she does have some clutches in her shop if you would like to show her support.
My long-time friend has been making masks for essential workers in the Sacramento area, and has begun to sell her masks. You can also purchase a mask for an essential worker through her website madebybetsy.

My friend Irena had to put her career on hold during the stay-at-home order, and I’m so impressed at how quickly she has built her mask-making business. She went to design school so she is skilled in tailoring, making her masks fit well, while also looking stylish. She restocks her website stitchbitchmasks regularly.
Ashley Star has a fabulous style and fun video to go along with her masks.
If you’re looking for children’s masks, there are many sellers on Etsy. (If you sell children’s masks, and would like me to link your shop, let me know!)
Please stay safe, and remember that everyone is processing a lot of emotions right now in different ways – a little bit of kindness goes a long way.

